The Dremel 3D40 Idea Builder, a great 3D printer for the classroom

Introduction
As a company, they have been around since 1932 and their products are available in many retail stores, from tool and hardware stores to superstores like Walmart. Indeed, few companies have achieved the level of ubiquity that Dremel has with their rotary tools.
Many people use Dremel’s products to make amazing things and they have established a respectable brand that hasn’t deviated too much in decades. Thus their first big innovation is the introduction of a line of 3D printers, including the Idea Builder 3D40 which we are looking at today.
The Dremel Idea Builder 3D40 is the newest model, but the original Idea Builder (labeled 3D20) came out in 2014 to some surprise and mixed response (mostly due to the decision to use proprietary 3D filament and sticking to PLA material exclusively), but ultimately a generally positive reception.
As Dremel’s second version of their flagship desktop 3D printer, the Idea Builder 3D40 is a largely iterative update, refining the original Idea Builder in some significant ways, despite a few continued omissions.

Some of the key features of the Dremel 3D40 Idea Builder are:
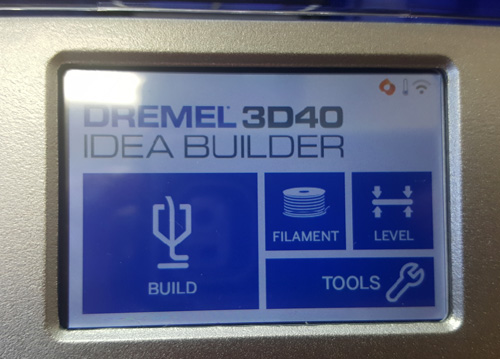
- A Color LCD Touchscreen: A color touch screen is certainly not unheard of in this market. However, we feel it was well implemented in the Idea Builder 3D40. You are never provided with too many options or required to press tiny buttons with illegibly small text. It just works and makes interacting with the machine more comfortable.
- A Removable Build Plate: This feature is especially nice if you purchase a second build plate (or if you get the Education model), but even if you don’t it is quite nice to be able to remove it and work with it outside of the machine; especially since the machine is so well enclosed.
- An Updated Extruder: The extruder has a sensor to detect when the filament runs out and pauses the build; which we found out when we left the machine running overnight and came back and found it paused rather than ruined! Some additional technology makes the extruder virtually clog-proof, as long as you follow their procedure for loading filament.
- Simple and Assisted Bed Leveling: Bed leveling is selected from the LCD menu and a few adjustments to a pair of knobs later you’re leveled and ready to print. The leveling probe works great and the bed stays level.
The Dremel 3D40 Idea Builder is available in two versions, the “Standard” version priced at $1,299 and the Dremel 3D40 Idea Builder for Education ($1,599) we are testing today.
They are the same 3D printer but different products in the sense that the Education model includes everything a teacher needs to get going such as 3 more spools of PLA, an additional build plate, and curriculum (including another flash drive with 3D models for each lesson). Our review really is pertinent to both.
- Tested objects: We always carefully select a few items to print that will help evaluate and illustrate the real-world quality of the prints. This time we printed a 3DBenchy, the Make: 2015 3D Printer Shoot-Out Test Models, the 3D Printer Test Kit by 3DKitbash, and a Ford Engine Block by Ford.
- The 3D filament used for the test: The Idea Builder 3D40 uses proprietary 3D filament so we printed exclusively with the PLA they provided; which happens to be excellent material.
- Total 3D printing test time: We tested the 3D40 for a total of 74 hours and 26 minutes over the course of the review.
 Pros
Pros
- Well-designed extruder
- Great user experience with the touch screen software that makes all operations clear
- Good quality prints and no leveling issues
- Overall design: the Dremel 3D40 looks nice, isn’t too noisy and prints at reasonable speeds
 Cons
Cons
- Small build volume given its quite big footprint
- Proprietary 3D filaments
- PLA only
Packaging
Unboxing: very compact packaging comes from decades of experience
The 3D40 came in a nice big brown box and arrived in fantastic condition. For this review, we were sent the Education model fully labeled the Dremel Idea Builder 3D40 for Education, which is the same printer as the regular 3D40 but includes a few things that made the review easier.
This includes 4 spools of PLA (white, black, blue, and orange), a second build plate, a preloaded flash drive as well as additional print surfaces, and a tool for applying them to the glass.
We were very excited for the 3D printer to arrive and it was delivered in perfect shape. The box was undamaged and we had no trouble opening it to find all the awesome things inside!
The box we received had many smaller boxes inside, including the lovely orange, white and blue Dremel box which houses the printer itself and is protected with a pair of molded pulp spacers that seem to have done a fine job of protecting the machine.
We might have preferred to see styrofoam but, again, it seems to have worked fine. What comes with the 3D40 is all inside that main box, achieved by putting the spool of white PLA and the build surfaces inside the machine.
Instructions manual: a great quick start guide
Dremel has been around the block a few times and is no stranger to documentation. This is an area that many newcomers struggle with or sadly overlook. Dremel, however, included a great Quick Start Guide (in English, Spanish and French) that takes you through the following: Unboxing, Kit Contents, Getting to Know Your Dremel 3D40, Getting Ready to Build (including leveling), Building (Printing), Best Practices and Resources, and Getting Connected.
The beauty of it is that although they have a more detailed operating manual that covers any other detail you might need, the Quick Start Guide lets you get printing right away because there are files stored on the machine and the flash drive.
The more detailed Operating/Safety Instructions manual goes into every necessary detail from each option on the color touch screen to things like loading filament into the cavity or removal and placement of the print bed and print surfaces.
Accessories: the Dremel 3D40 for Education offers a lot
This particular package, as we mentioned before, included some additional items that are part of the education model, but it’s mostly just more of what is in the regular package. That is more 3D printing materials, more 3D print surfaces, another flash drive, etc. It does also include a USB cable.
The build surfaces provided are great. The blue painter’s tape squares work fine on top of the removable glass bed and we 3D printed with them without any trouble. The custom, more premium build tape though is especially good as it is similar to print surfaces like BuildTak. It has a textured surface and does quite a bit to make up for the lack of a heated bed on big PLA prints.
We didn’t find the included scraper tool to be useful for removing prints, but it was great for applying the build tape.
Overview and setup
Software
The web-based software required no installation. The simple creation of an online account is enough to properly get started on the software side. The browser-based Print Studio software is based on the Autodesk Spark platform.
Even if you take it a step further and download the Print Studio software, it is preconfigured for the machine and requires no additional setup. You simply download the software and go through the installation. Then you launch Print Studio and let it know what machine you are using.
Hardware
There really isn’t much to do as far as setup once you’ve unboxed the printer. There are some more molded pulp inserts inside that protect the machine in shipping that need to be removed and then you can simply level the bed and start 3D printing.
It was one of the fastest box-to-print times we’ve seen with a desktop 3D printer so far.
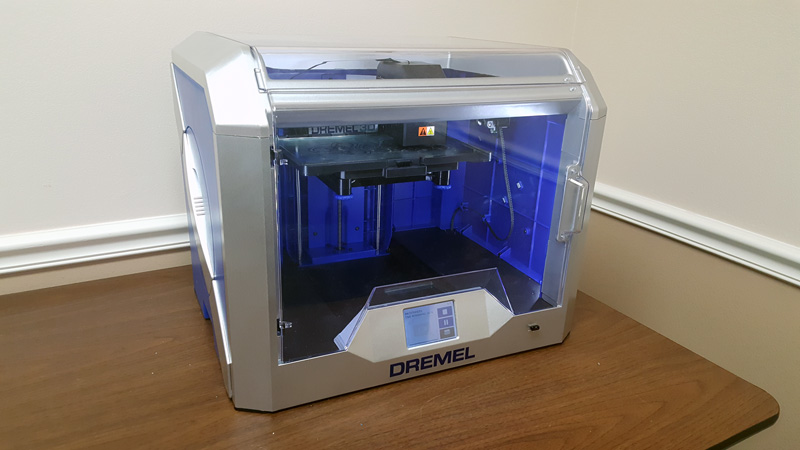
The Dremel 3D40 Idea Builder is mostly made of plastic but seems to have a sturdy frame inside. Aesthetically we’d say this strikes a nice balance between industrial and modern attractiveness, quite on par with what you’d expect based on their rotary tools.
The LCD lights up when you turn the 3D printer on and it greets you with a delightful little chime with the boot screen. Then you are ready to print something, level the bed, etc… One quite convenient thing: updates for the machine’s firmware can be done over the air once you connect to the Wifi.

Print surfaces are important as they make a big difference in print adhesion. The Dremel Idea Builder 3D40 has a removable glass bed with a plastic frame and it is possible to 3D print directly on the glass. But Dremel wisely includes some premium options for print surfaces that you can apply over the glass.
Dremel offers branded blue painters tape squares that work great and some even more premium black surfaces with some texture that are really impressive, very similar to the famous BuildTak. Since the Education model comes with 2 different types of surfaces we tried both.
They both work great but the black surface had better adhesion and we never had to replace it even after daily printing for almost the 2 months that review lasted.
Getting started
Following the included Quick Start Guide will easily get you up and printing in no time. There are only a few steps and you can start printing models that are pre-loaded without any trouble. We started our first print literally less than 10 minutes after turning the printer on.
Following the steps in the guide, we removed the cover for the filament compartment and slid some filament up through the guide tube. Then we followed the prompts on the screen for loading filament and the Idea Builder preheated and started extruding. Simple!
The extruder design makes many stressful aspects of 3D printing much easier.
You will certainly level the bed the first time here as well. This is an assisted process as it probes 3 positions and tells you which way to rotate the 2 blue knobs under the build plate. It works very well and we were happy with this very important feature.
Every 3D printer needs a good solution for bed leveling or it can make everything else look bad. It isn’t overly tedious and you won’t need to conduct this autocalibration process often. And most importantly, it is accurate, from our experience.
After that, you can simply select a 3D model from the LCD interface to start a 3D print. The Dremel 3D40 will do the rest!
Experience
Software
Dremel’s web-based interface, powered by Autodesk’s Spark platform, was frustrating at first. Ultimately we were very happy to find that their work with Autodesk provided them with excellent compatibility with their Print Studio software.
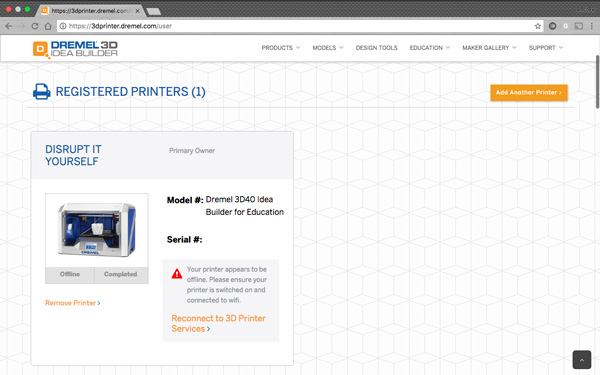
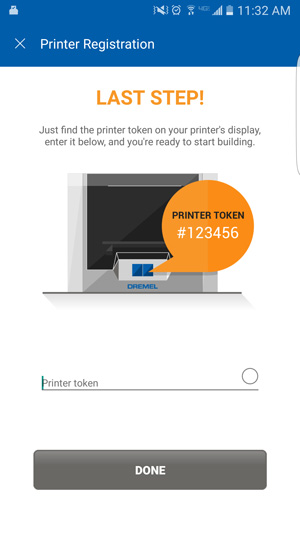
To use the simplified web-based software, you need to create an account online at Dremel3D.com and then connect your machine via Wifi or an ethernet connection. Then the Idea Builder 3D40 provides a token to identify your machine so you can add it to your account and send files to print à la 21st century.
The truth is that we don’t find those features to be critical and tend to use the included flash drive which is a fine option as well, but this depends on the environment and workflow. It may be that in a classroom setting this feature is more beneficial or when printing with several machines.
Everything feels very modern and navigable in the software interface. You aren’t presented with too many options and you can even simply print files that they provide from a curated catalog on the site. There is also a companion app for both iOS and Android that operates almost identically to the web-based platform.
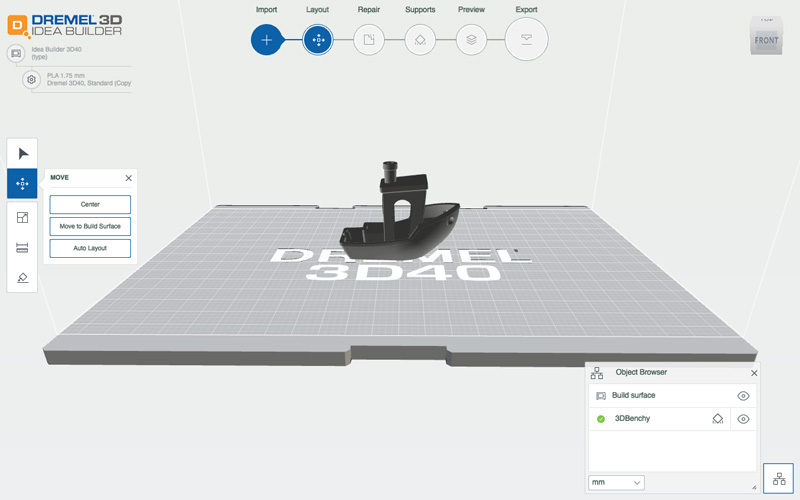
We were very happy to see that Print Studio offered the things that we needed. In the settings, we were able to adjust layer height, infills, speeds, extrusion, and even manual supports.
This combined offering of a full-featured slicer and a simplified web offering make the Dremel 3D40 work well for different potential customers and we think that is a smart move on their part.
3D printing
Keeping in mind that you can only print in PLA (and exclusively Dremel’s proprietary brand of PLA) the 3D prints turned out excellent. One of the first things we printed was the famous 3DBenchy and it turned out better than we ever expected. And with almost no exceptions we found that it cranked out print after glorious print for us even at respectable speeds.
By default, the recommended layer height setting is 200 microns. We found that this machine prints very well at 100 microns and using this software was the key to making it a worthy tool for professionals who are ok with a PLA-only machine.
One small drawback is that the only available supports are the spire-like Meshmixer supports. They often work very well but occasionally you may wish you could employ something more traditional, as there are times where a grid or zig-zag are necessary to properly support certain features.
The build volume is larger than on the original Idea Builder. This 3D printer sports a 255 mm x 155 mm x 170 mm build volume. That isn’t bad at all, especially with the added height. But with the overall dimensions of 514 mm x 406 mm x 403 mm it does feel like there should be more.
Noise
The Dremel 3D40 Idea Builder is a bit noisy. We tested it with Sound Meter for Android at a one-meter distance. While printing with the door and lid open, we got 66db. The good news is that this number drops down to 60 dB when the machine is closed.
Dremel’s Idea Builder 3D40 is not too noisy, but if you have a few 3D prints together it may start to be a bit noisy for environments where silence is needed.
3D printing results
1. Benchy

This was the first benchy we printed and it turned out perfect. Every element including overhangs printed flawlessly.
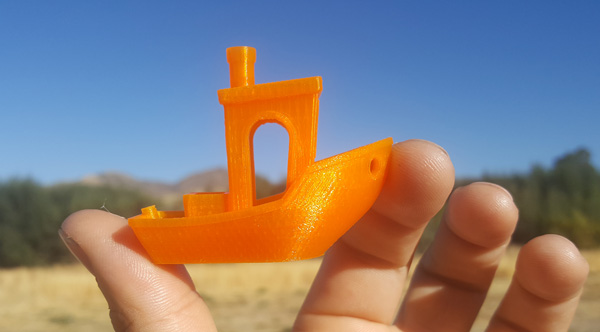
We even printed it at 100 microns and were very pleased by the result. We printed it with Dremel Orange PLA and the result was almost perfect, hence the rating.
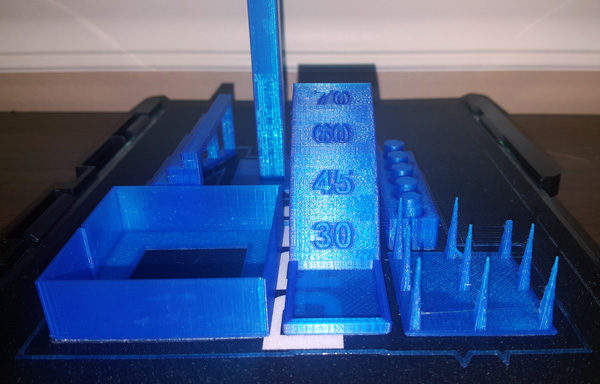
2. Make torture test
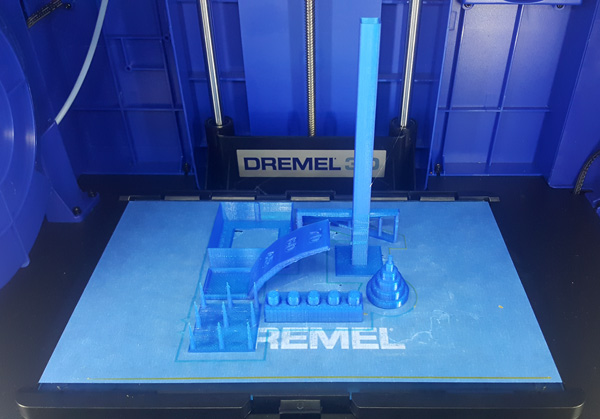
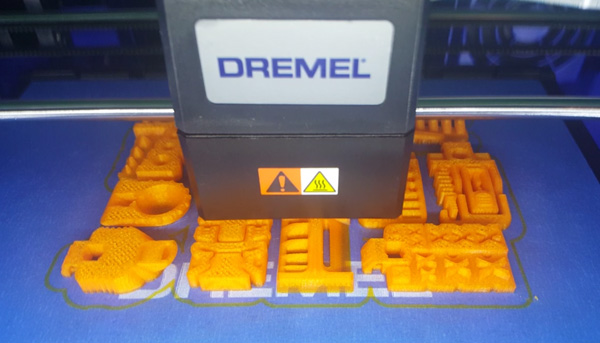
Make Magazine’s 3D Printer Torture Test offers a rigorous approach for testing the limits of a 3D printer. We use it as a benchmark test. All the 3D prints were done in 150 microns layer thickness.
- Dimensional accuracy
- Bridging performance
- Overhang performance
- Negative Spaces Tolerances
- Fine Positive Space Features Performance
- Mechanical Resonance in XY
- Mechanical Resonance in Z
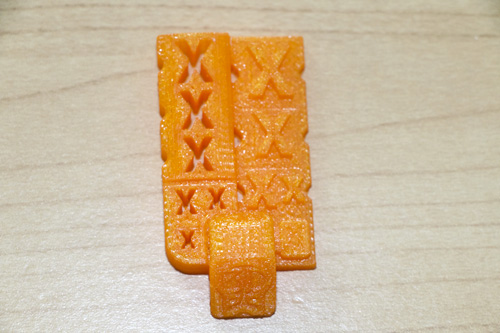
3. 3DKitBash v2
3DKitBash have released their own set of 10 chips designed to test all the above-mentioned aspects of 3D printing (including voids, spikes, edges, text, bridges, flex, and articulations). The articulations offer the ability to test the ability of the 3D printer to produce functional assemblies in one print.
The ten-piece set of Test Chips from 3DK was 3D printed beautifully. Most of the chips have detail and although we really should have used the White PLA (to make the details come out more in photos) they printed very accurately albeit a bit rough.
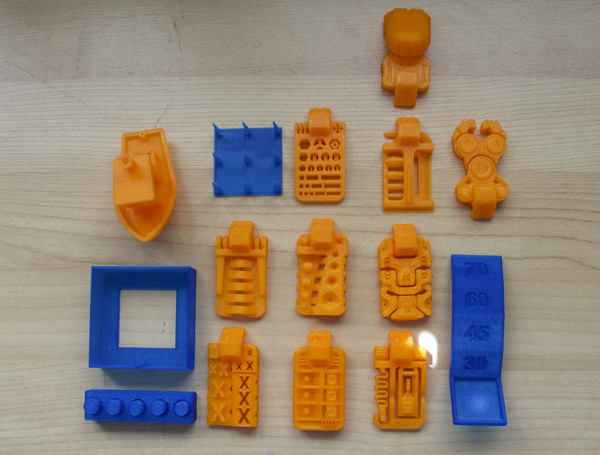
Every part was 3D printed at 200 microns and almost all of the “Print-In-Place” elements were produced accurately other than the chip with the claw/pincer element which unfortunately broke.
4. Ford Engine Block by Ford
As always in Aniwaa’s 3D printer reviews, we chose this model simply to mix things up a bit and include something a bit more practical that might not be designed perfectly for 3D printing.
This piece of an engine block has a lot of overhangs that require excessive support. We printed it at 200 microns and have to give the Idea Builder 3D40 some credit; it turned out fairly well considering how tough it is. And if the software allowed for “accordion” support it may have turned out even better.

Value
At $1,299.00 USD for the basic bundle or $1,599.00 for the Education option, this desktop 3D printer may seem a bit overpriced. But considering the polish and user experience of this product and the details we pointed out, it becomes a bit more justified.
Compared to other PLA-only, non-heated bed machines it definitely seems to produce better prints than its classmates and is a delight to use.
For an individual, the Dremel 3D40 Idea Builder is the right version and the Education version should only be considered by schools or companies (makes sense!). The Education bundle is definitively pricey but the extra investment is justified by the smooth user experience and simplified maintenance offered by Dremel.
Conclusion
If you are looking for a classroom or office-ready printer and you only need to 3D print small and medium-sized parts in PLA, you will be absolutely pleased with this 3D printer. When the lid and door are closed the Dremel 3D40 is a very good 3D printer that produces great 3D prints.
Finally, we think the Dremel 3D40 Idea Builder for Education is a great 3D printer for teachers. It is very classroom-friendly as teachers aren’t likely to ever have to take anything apart with this machine. The extruder also does a great job of cooling the print and we saw very impressive results on overhangs and bridging.
Really anyone who wants a simple and reliable PLA-only 3D printer will be happy with what they get for their money. But truth be told… we’d like a way to use a broader pallet of available materials without breaking Dremel’s rules.
Another 3D printer with similar qualities (good user experience and PLA 3D printing) is the European bq Witbox 2 ($1,900), a solid option, but more expensive and without a touchscreen.
For more material capabilities, but with proprietary 3D filaments, the Zortrax M200 ($1,990) might also be interesting. For users looking for a reliable workhorse capable to handle any type of 3D filaments and equipped with a dual extruder, the FlashForge Creator Pro at only $999 is definitively a good option.
