 English
  Français
SHINING 3D FreeScan Combo review: small, but mighty?


Introduction
It is safe to say that 3D capture is no longer a niche technology. Tech giants like Nvidia and Apple are incorporating this technology into an increasing array of consumer products.
And professional 3D capture landscape isn’t resting either with manufacturers such as SHINING 3D driving the innovation and cost-efficiency of this market.
We were asked to put their compact metrology-grade handheld scanner, the FreeScan Combo, to the test. Aimed at professionals in demanding industries that require precise measurements, this device promises to be compact, accurate, and versatile.
Our 3D scanning specialist, Pierre-Antoine, received a FreeScan Combo and a laptop at his Bordeaux office to conduct his eighth SHINING 3D scanner review assisted by two Aniwaa team members.
Let’s find out if the Combo, the latest iteration in the famous FreeScan line, lives up to its promise.
Technical Specifications
Before we dive into the testing, let’s take a moment to go over the Combo’s technical specifications.
Design
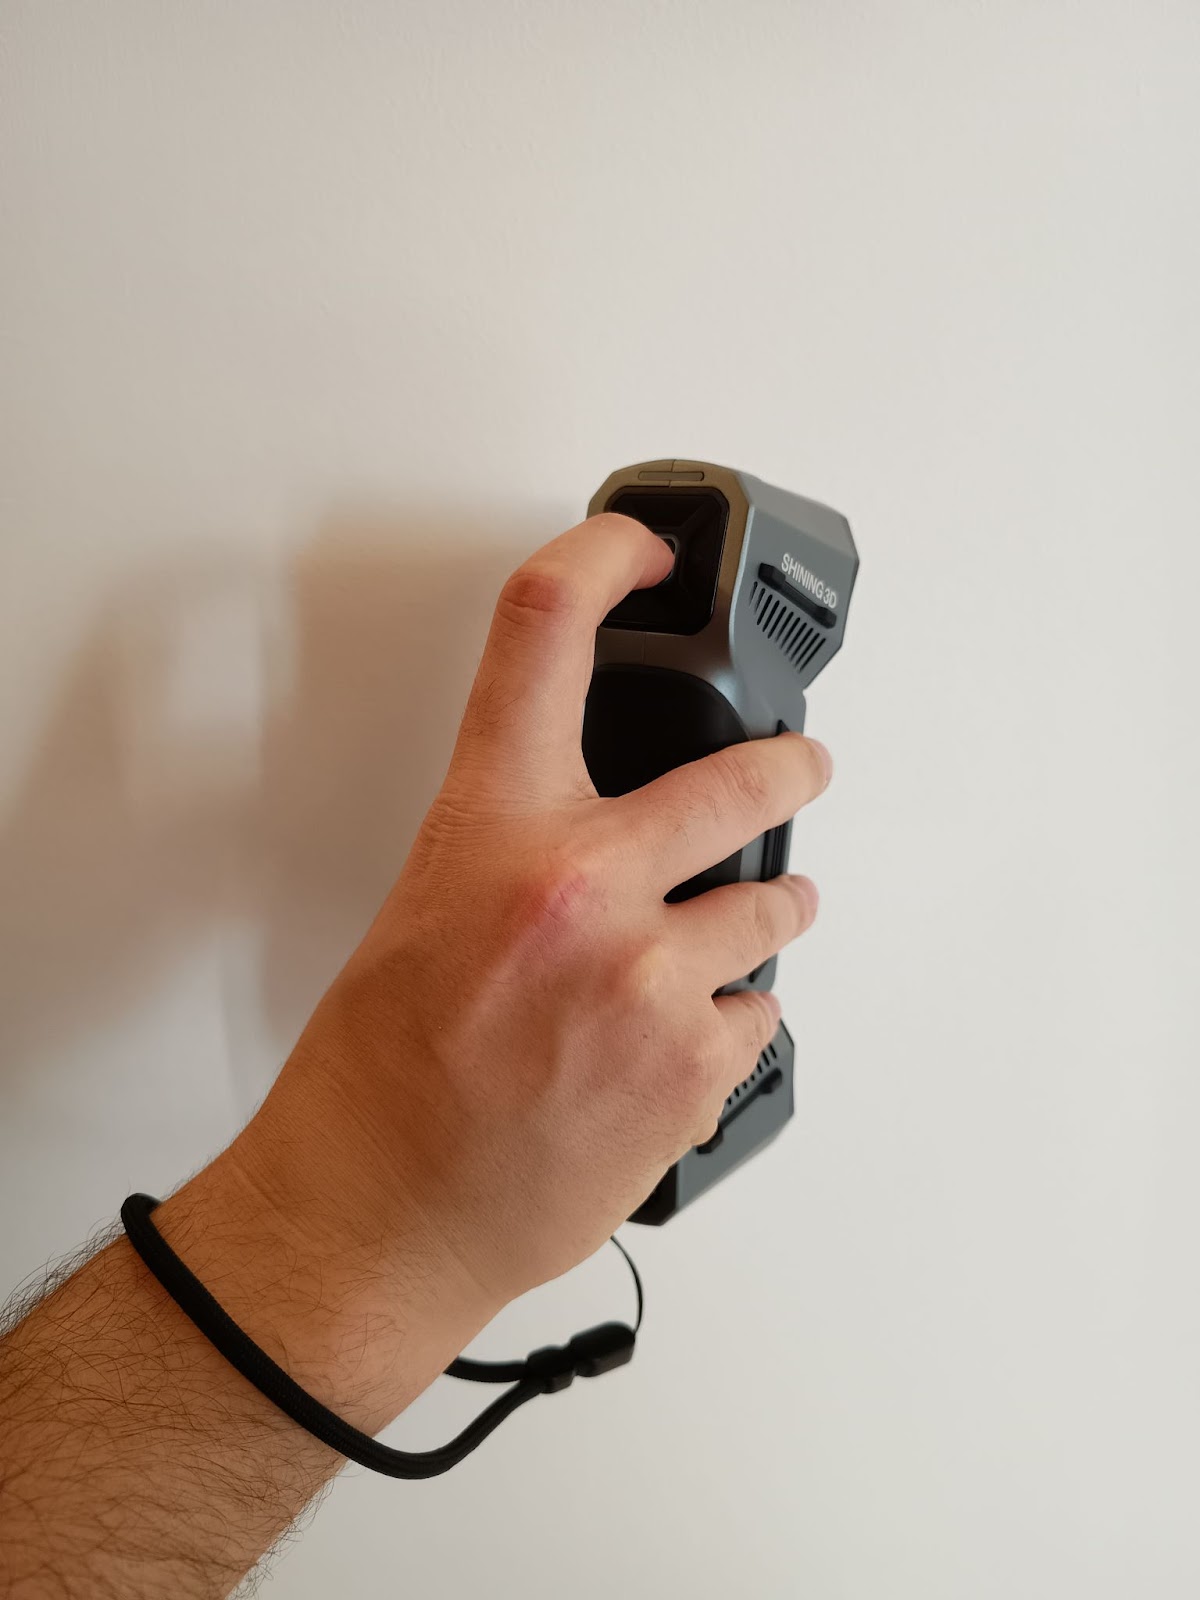
Weighing in at just 620g and standing at a height of 193 mm, the Combo is remarkably compact. This compact form factor offers three key benefits: easy transport, less fatigue during extended scanning sessions, and better access to hard-to-reach areas on complex parts.
Once connected, the cable (approx. 300g) does add a noticeable amount of weight relative to the scanner itself.
The scanner features conveniently placed control buttons that enable easy switching between capture modes and zoom control, all without the need to return to the computer.
Safety has also been a focus, with rubber pads on all sides to prevent slippage and a non-flat base that subtly discourages risky placement.
On aesthetics, the scanner scores high; it has a truly elegant design that we found quite appealing.
The one design drawback we noted was the absence of a comfortable hand grip. The scanner requires a clamped hold, which can lead to hand fatigue during extended scanning sessions.
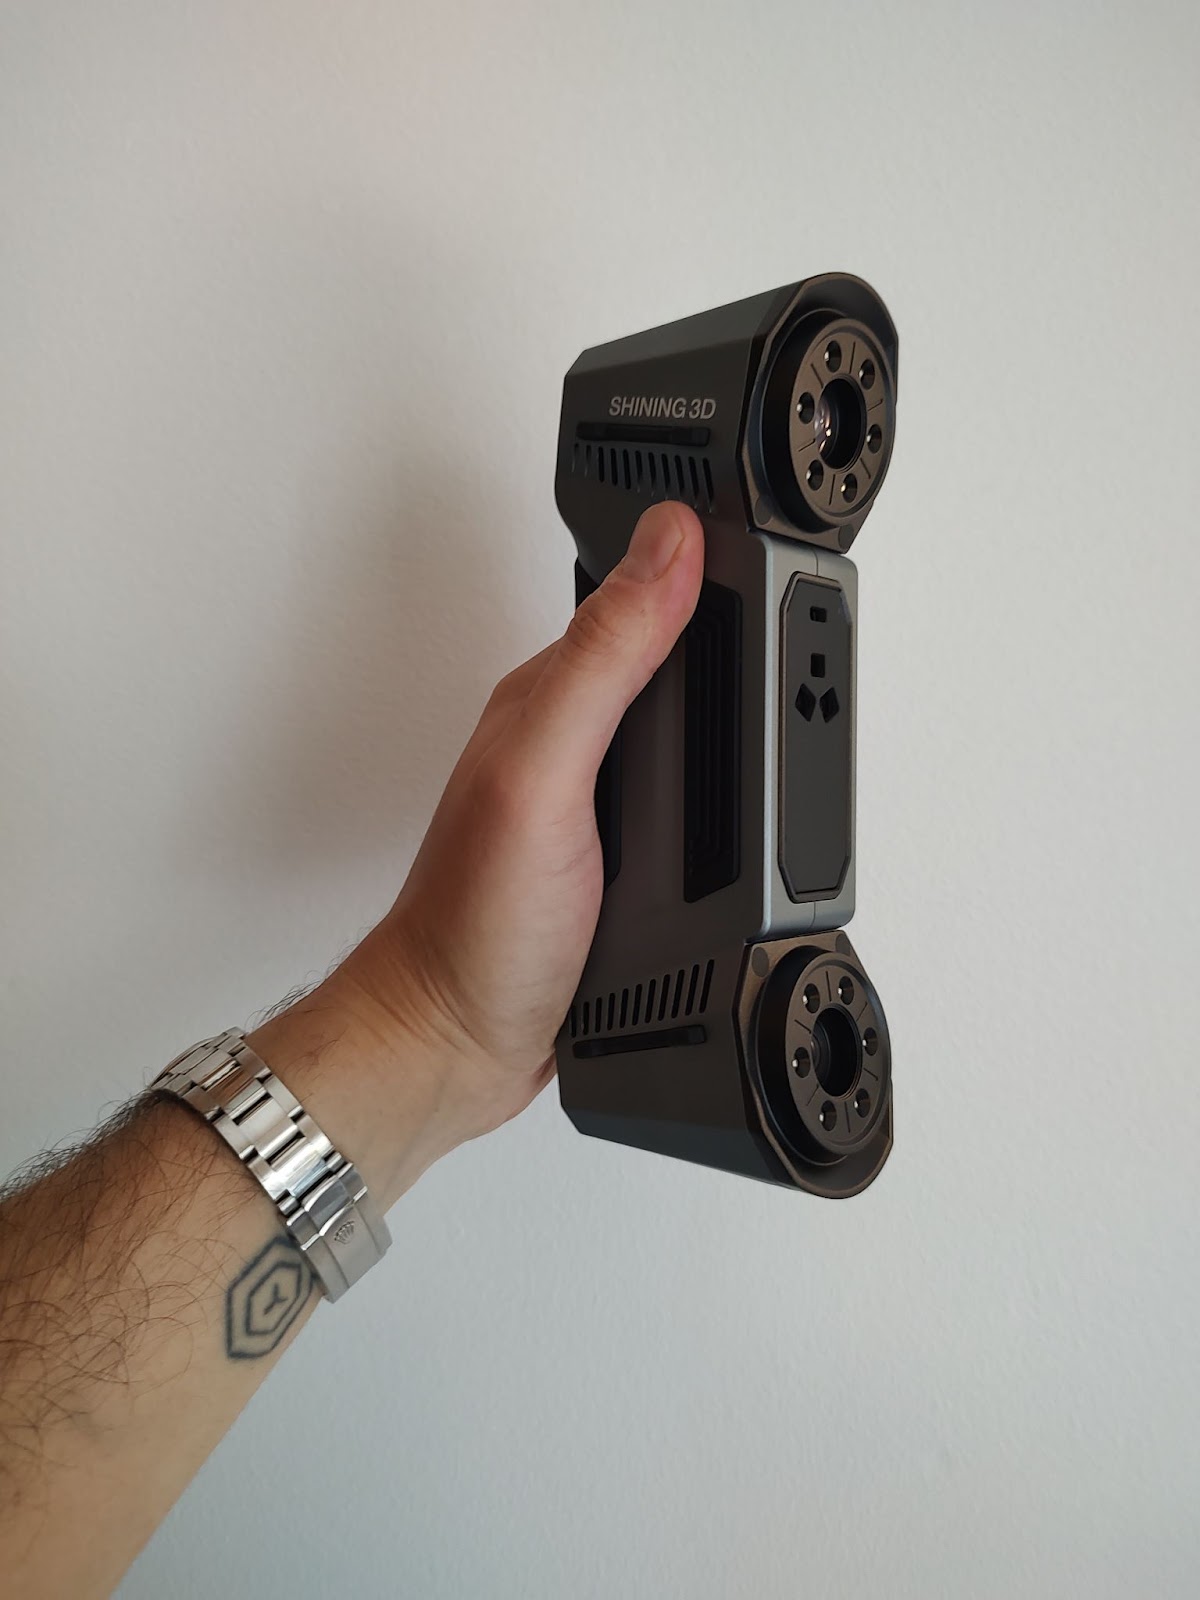
Technology
The FreeScan Combo comes with two different 3D capture technologies: Laser and Invisible light.
For complex scanning tasks, laser technology is your best bet with the Combo. It projects blue laser lines and gives you three specific capture modes:
- 26 blue laser lines mode (13 crosses) for fast 3D scanning and efficient capture of large objects.
- 7 parallel lines mode for capturing more details.
- A single blue laser line for extremely fine detail, such as deep grooves, pockets, or holes.
For scans that don’t need high detail or need to be done quickly, invisible light is the more suitable option. This mode uses VCSEL Infrared light.
Resolution and Accuracy
The Combo delivers impressive metrology-grade volumetric accuracy and resolution in both of its modes. In laser mode, it reaches a maximum volumetric accuracy of 0.02 + 0.033 mm/m and a peak resolution of 0.05 mm. When using Invisible light mode, the scanner offers a max volumetric accuracy of 0.05 + 0.1 mm/m and a max resolution of 0.1 mm.
Connectivity
Like most handheld 3D scanners, the Combo needs to be tethered during operation, requiring a connection to both a computer and an electrical outlet. A thoughtful touch from SHINING 3D is the merging of the USB-3 and power cables into a single cable, simplifying the setup.
As for computing requirements, the Combo software demands a robust system for smooth performance. SHINING 3D recommends:
OS: Win10/11 64 bit
Graphics card: NVIDIA GTX/RTX series, at least GeForce RTX 3060
Video memory: ≥6 GB
Processor: I7-10700
Memory: ≥32 GB
We were provided with an even more potent PC, featuring:
OS: Windows 11 64 bit
Graphics card: NVIDIA RTX 4070
Video memory: 8 GB
Processor: I9-13900H 2.60 GHz
Memory: 64 GB
With SHINING 3D’s minimum recommended setup, you should have ample power for both capturing and post-processing scans in any 3D design or inspection software.
Pricing
The Combo’s starting package is priced at $16,499 and includes a Pelican-style travel case, Solid Edge SHINING 3D Edition software, and the FreeScan Scanning Software. A FreeScan Combo RED BUNDLE is available at $19,499 and comes equipped with Geomagic Essentials, a powerful scan-to-CAD solution.
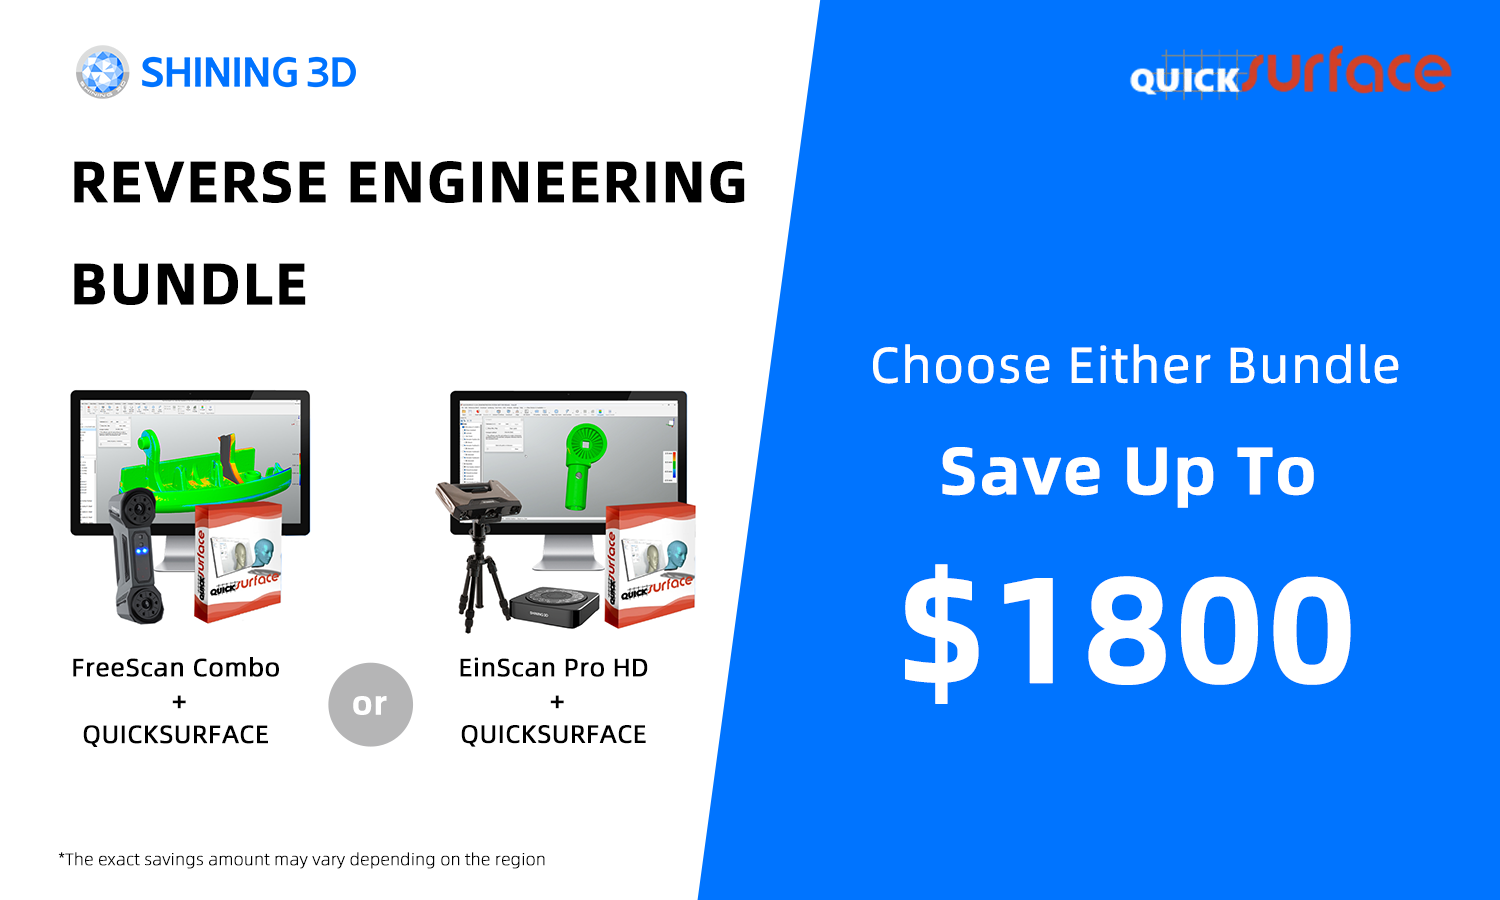
SHINING 3D has also recently released a Reverse Engineering bundle promotion that combines FreeScan Combo with QUICKSURFACE at a competitive price. More information here.
Unboxing and First Impressions
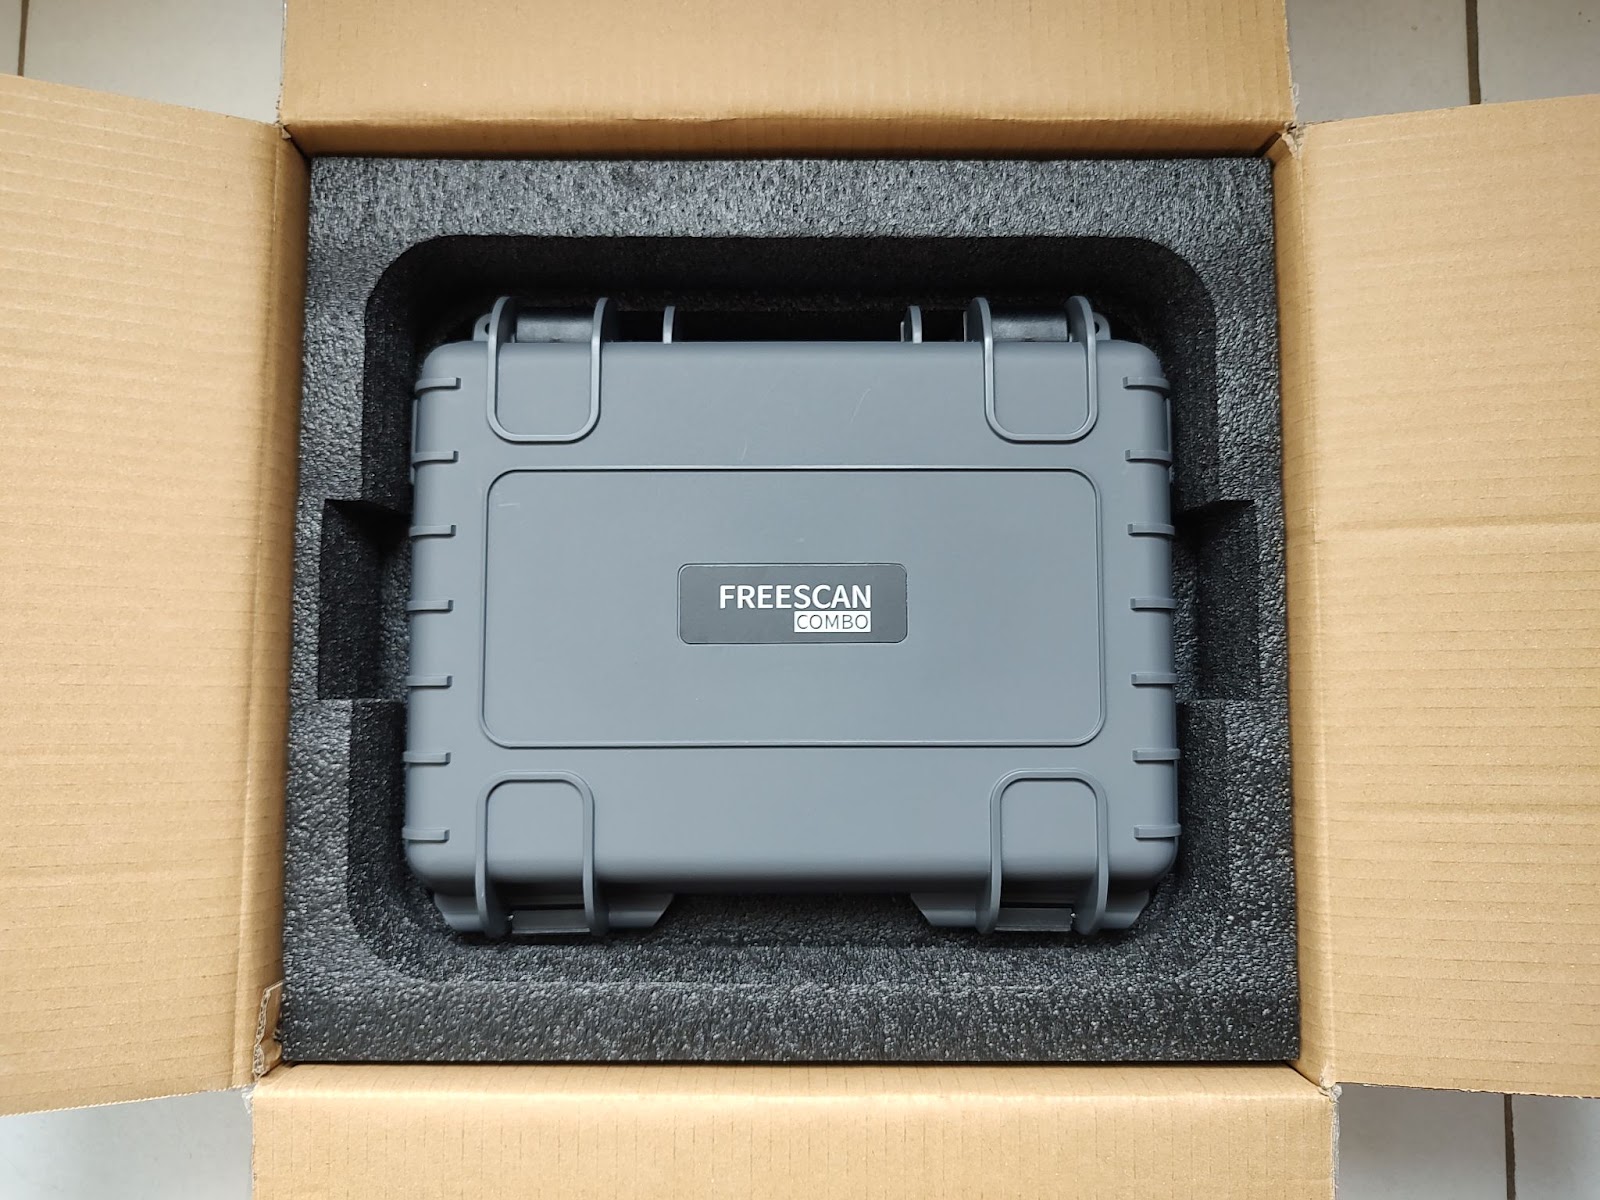
The Combo arrived packed in a durable Pelican-style case, which impressed us with its quality. Despite its ruggedness, the case is relatively compact, fitting into a large backpack—perfect for on-site scanning tasks. Everything from the overall design to the locking mechanisms exudes a high-end, sturdy feel.
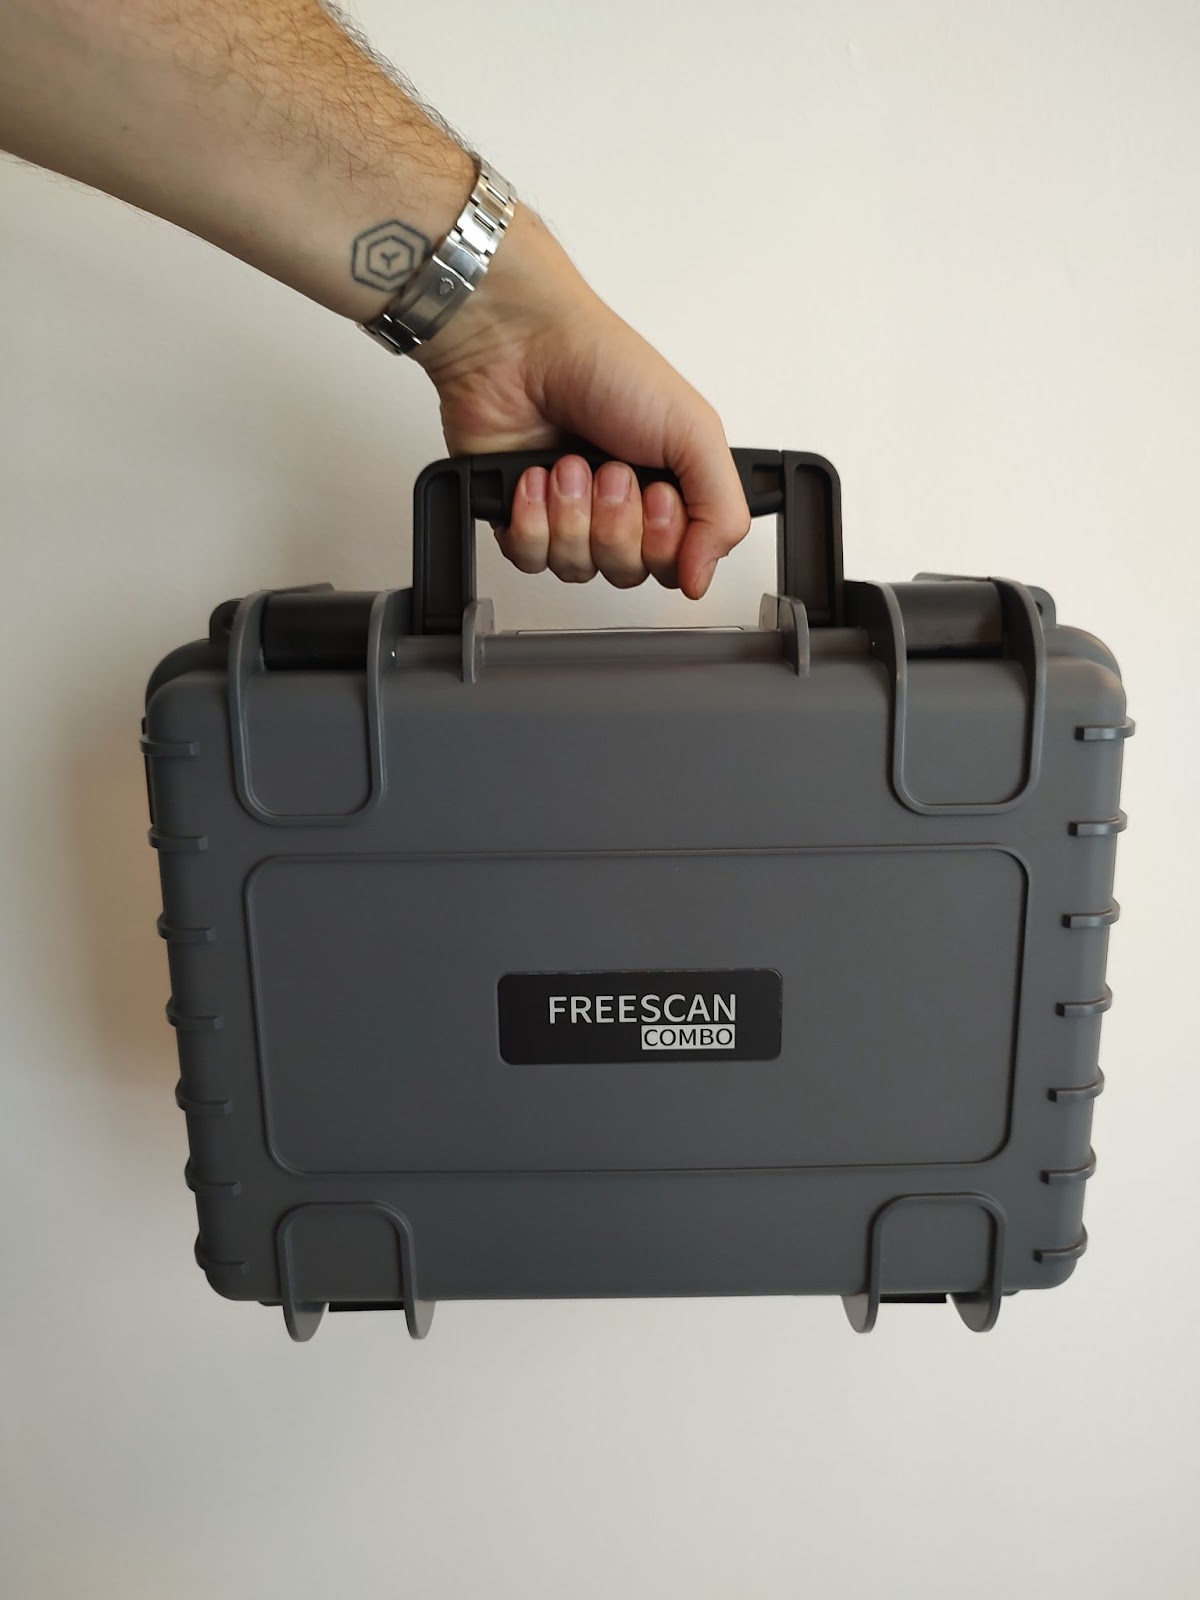
And it’s not just about looks; the case boasts an IP67 rating, ensuring full dust resistance and temporary water immersion protection.
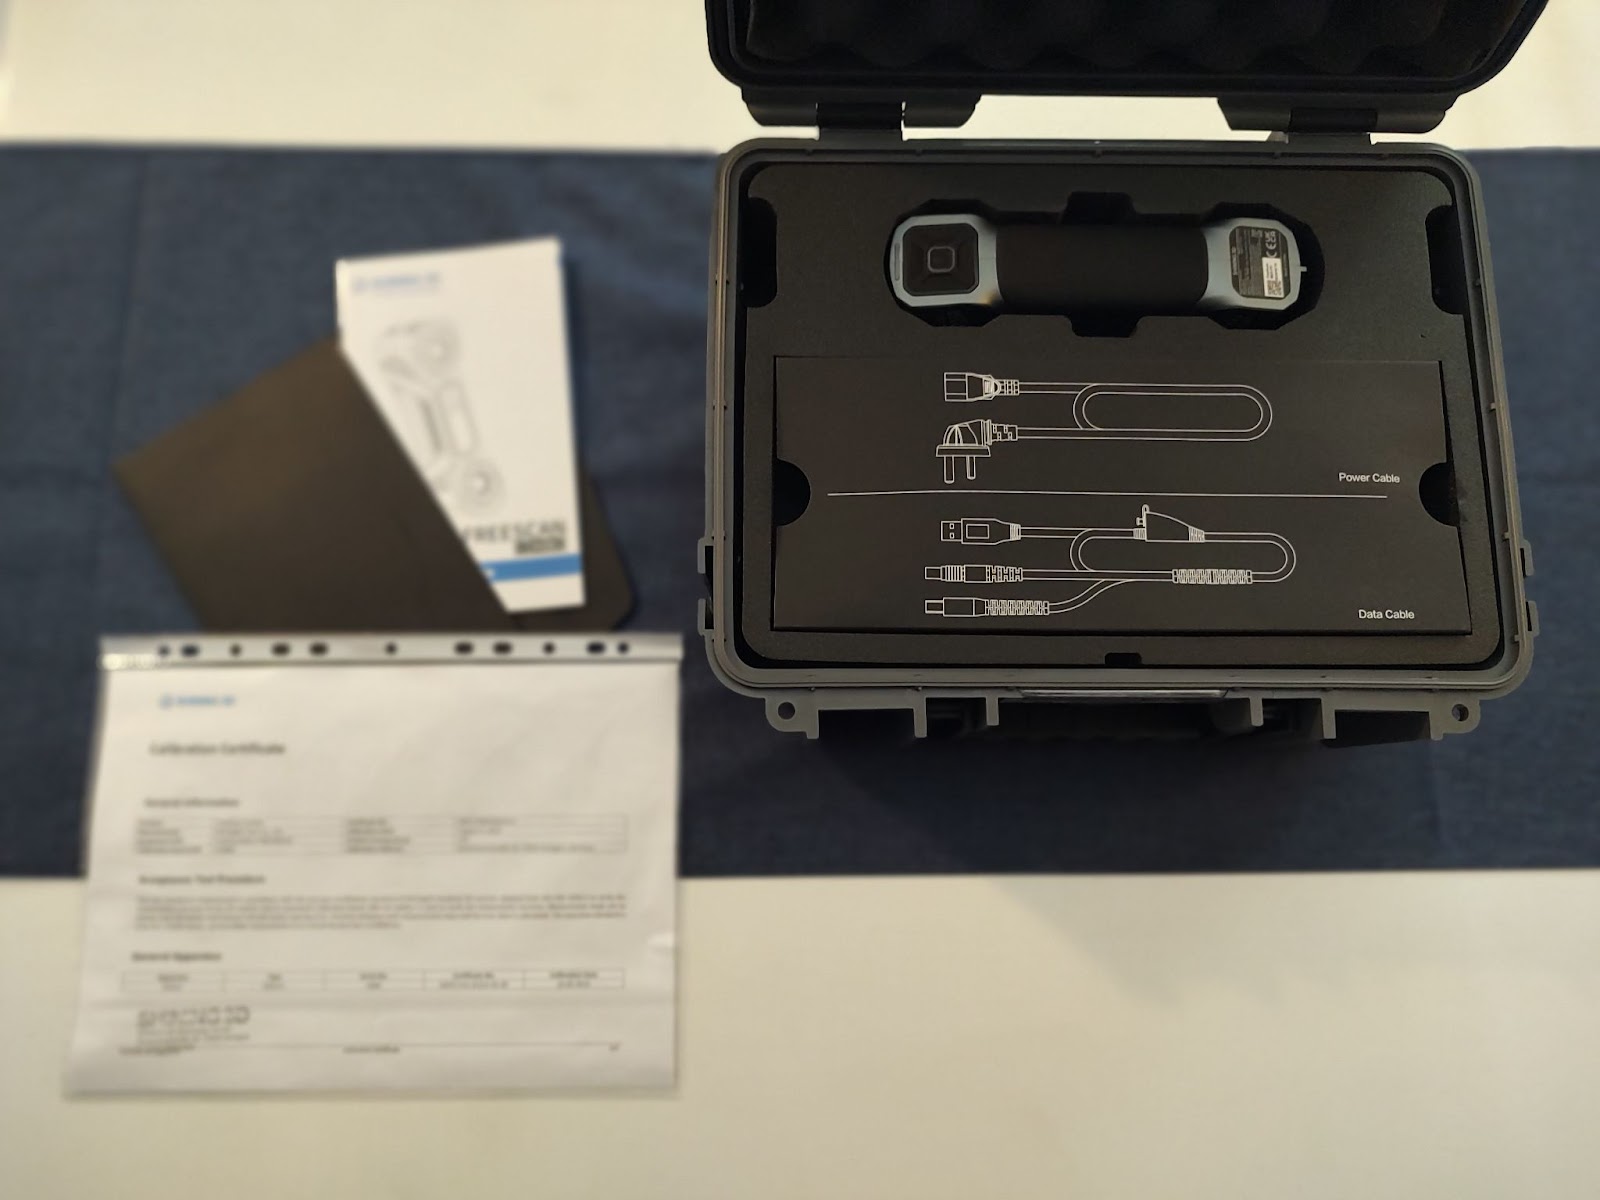
Inside the case, all the storage spaces are well-thought-out.
The scanner and accessories are easy (and satisfying!) to take out and store back in.
Setup Process
Getting started with the FreeScan Combo software is straightforward—just plug the license USB key into the computer, and you’re activated. Do note, that this uses up one USB slot, so if you’re planning to run the scanner, the USB key, and a mouse simultaneously, you’ll need at least three USB slots—or potentially an extra USB hub.
Setting up the scanner is a breeze; just connect it to the computer and a power socket, launch the software and complete calibration. The calibration process itself is quick and even gamified for user engagement: our expert reviewer finished in about a minute, while our novice tester took less than five minutes.
In summary, we were ready to start capturing in under 10 minutes.
Hands-on Testing
We rigorously tested the FreeScan Combo on dozens of parts for this review. Overall, we were pleased, if not downright impressed, with the results.
Let’s delve into some of the specific scans we conducted:
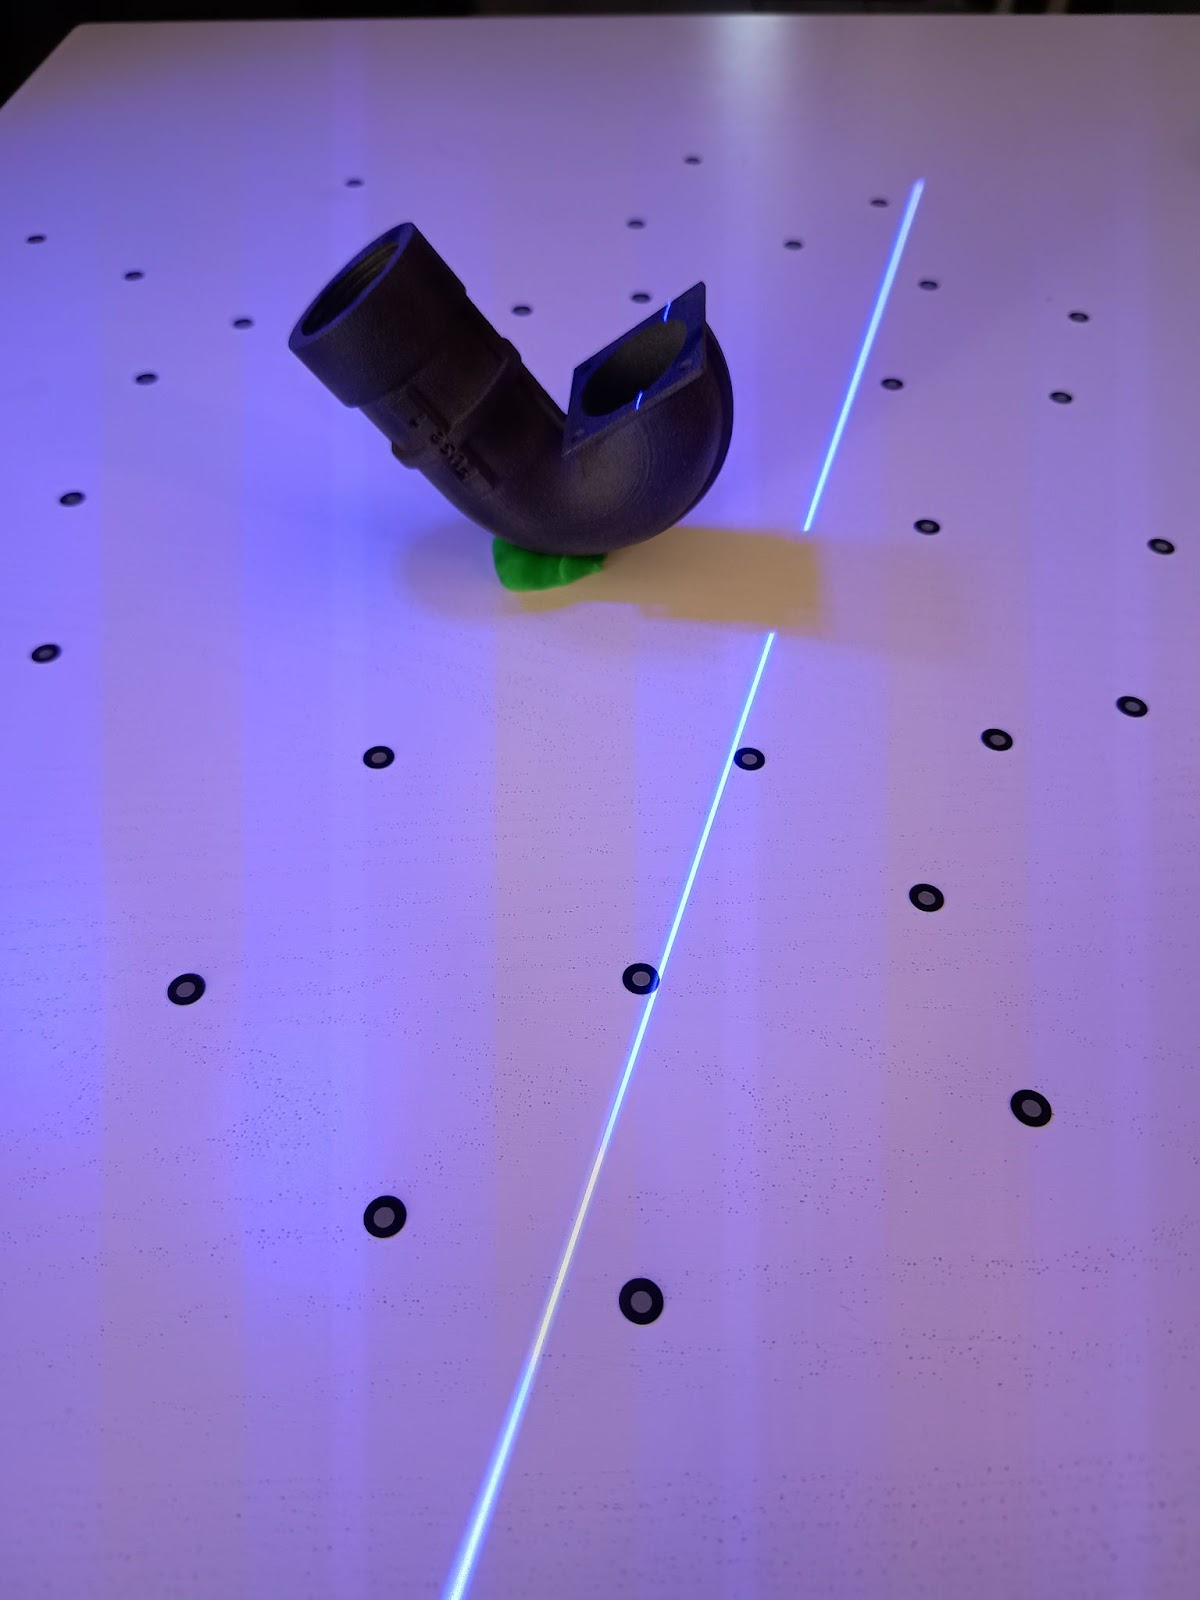
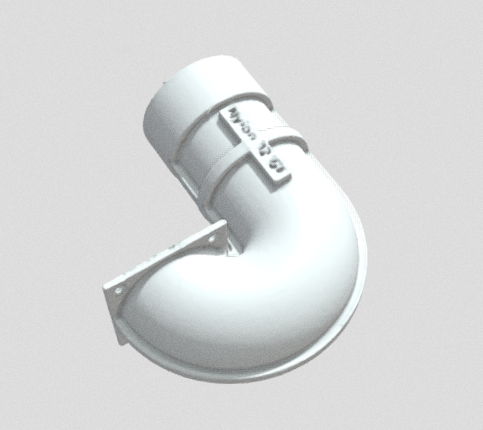
Object 1: PA 12 GF Tube
Part size: Small (<10 cm).
Part difficulty: Hard (complex textures, small details, many cavities).
We kicked off our testing with a tricky subject: a small, dark, matte 3D-printed part (SLS) featuring intricate details. Given its complex shape, color, and size, this part wouldn’t be a good fit for Structured Light scanning. However, it presented an interesting challenge for the Laser technology, particularly to assess how the single-line mode could capture its complex details.
Scan
Scanning conditions: Good.
Mode: Laser – very high resolution (0,2 mm).
Projects: 4.
Capture time: ~25 minutes.
We managed to obtain a great result in under 30 minutes by aligning four different projects.
The Combo even managed to capture the very small external writings.
Object 2: The FreeScan Combo’s case
Part size: Medium (>10 cm, <1m).
Part difficulty: Medium (complex textures, simple but repetitive geometry, some cavities).
We opted to test the Laser’s outdoor mode using the FreeScan’s own case, a part that typically wouldn’t pose much of a challenge for such a sophisticated scanner.
The real obstacle here is the external environment, rather than the object being scanned. Sunlight interferes with the scanner’s emitted light, making laser-based capture challenging and rendering capture with infrared light very challenging.

Scan
Scanning conditions: Very challenging
Mode: Laser – very high resolution (0,2 mm) – outdoor mode
Projects: 4
Scan time: ~20 minutes
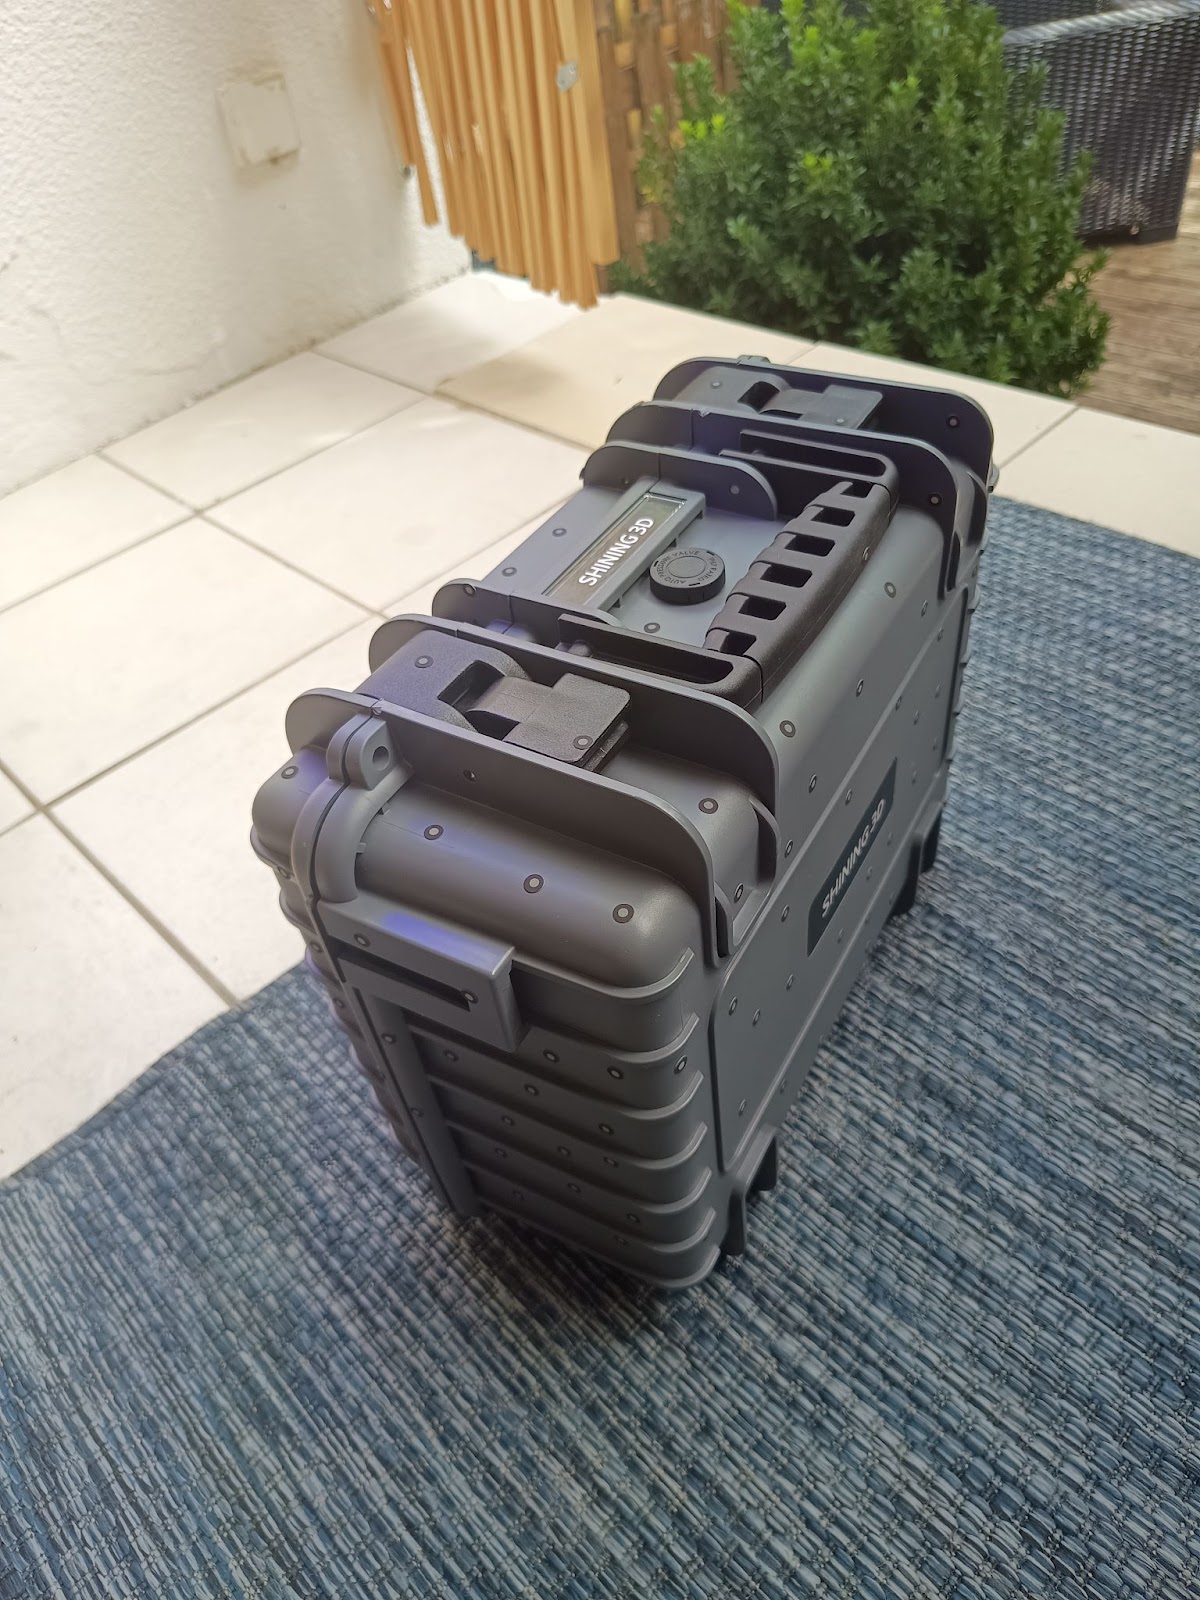
We achieved satisfactory results in under 20 minutes by aligning three separate projects. Successfully capturing this part in sunlight underscores the utility of the scanner’s outdoor mode.
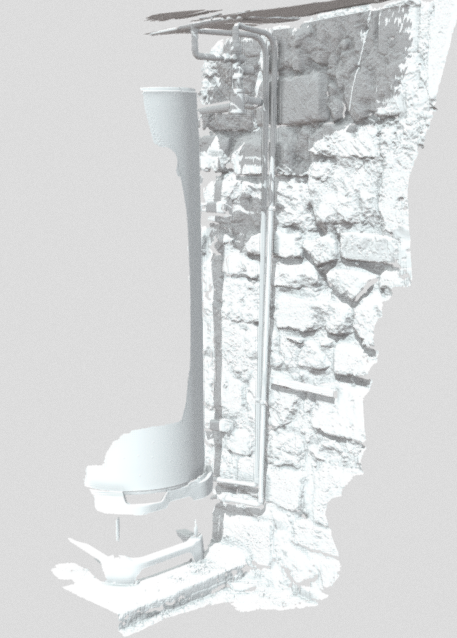
Object 3: Heater and pipes mounted on an old stone wall
Part size: Large (>1m)
Part difficulty: Hard (Shiny and mat parts, lots of parts with intricate geometries)
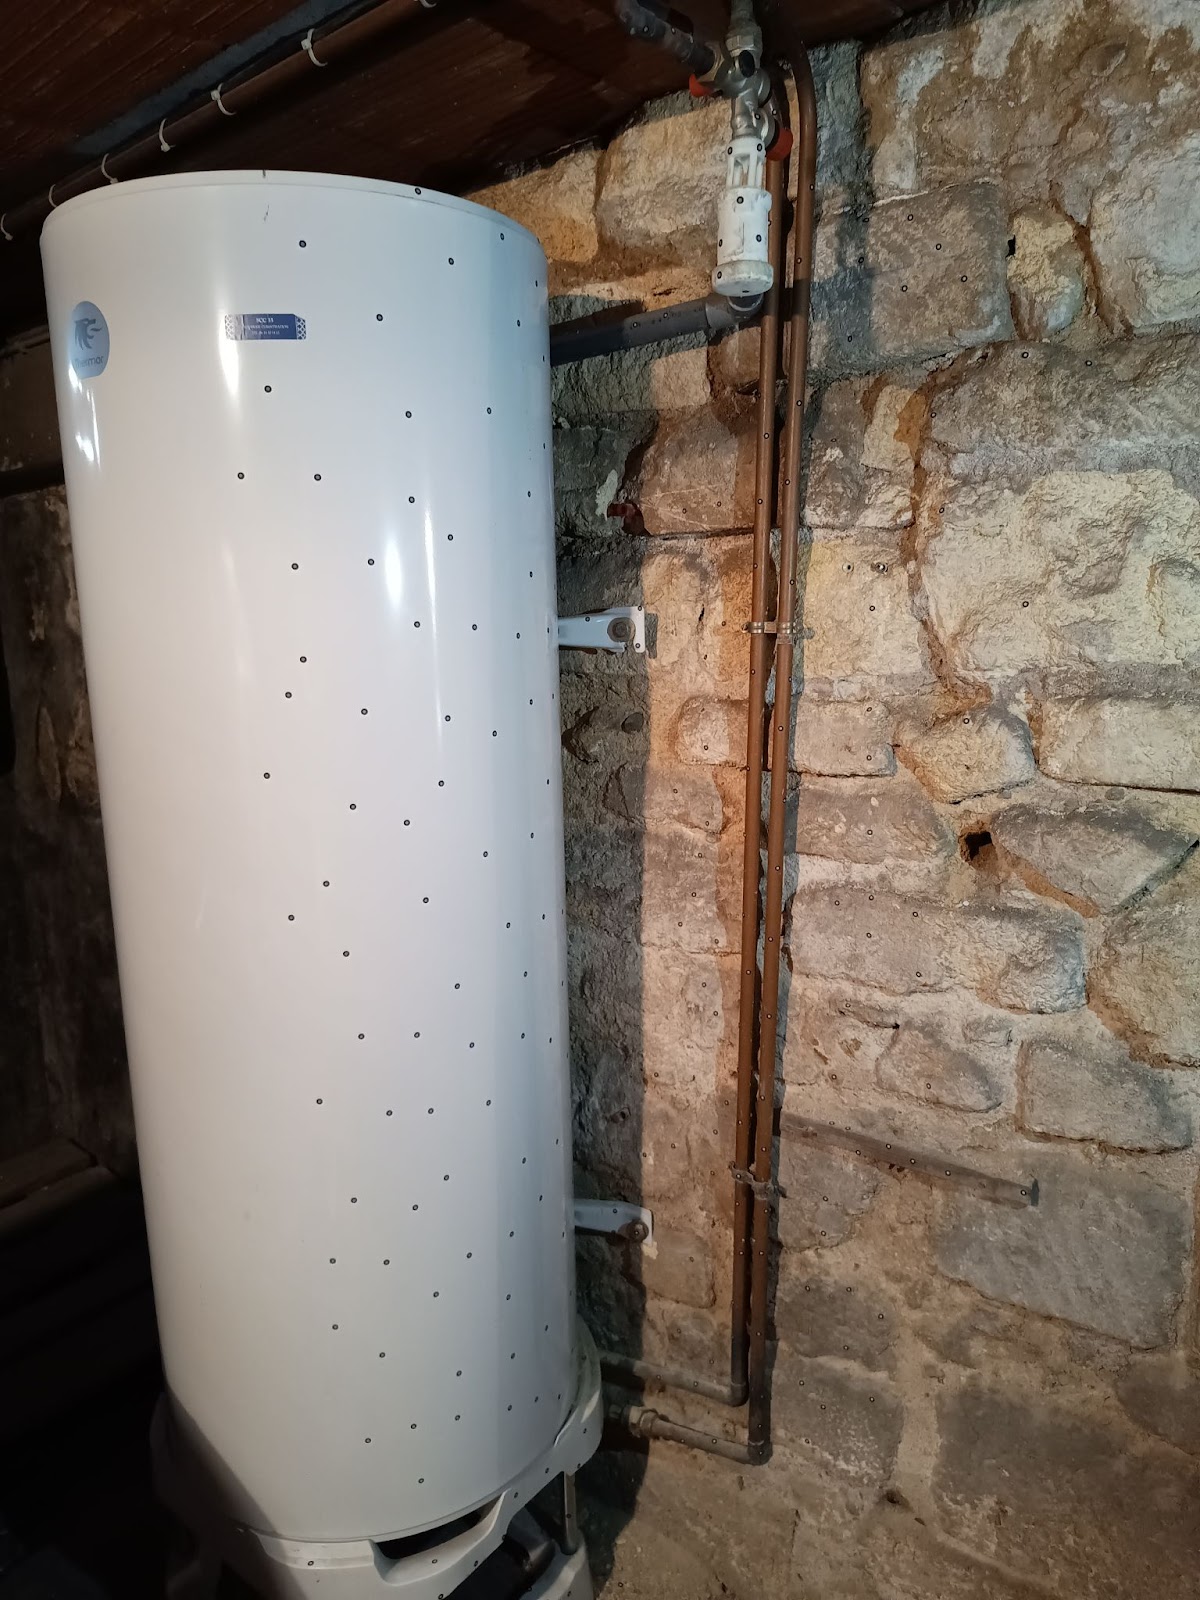
This situation involves a difficult setting, namely a dimly lit basement, and features a mix of intricate metallic and matte plastic components. It’s representative of various use cases: precise measurement of a water heater, maintenance work, or reverse engineering small piping parts. The Combo’s compact design proved to be truly useful for accessing those hard-to-reach areas.
Scan 1
Scanning conditions: Challenging
Mode: Laser – very high resolution (0,2 mm)
Projects: 1
Scan time: ~10 minutes
In this scenario, the three laser modes proved to be highly complementary, each excelling at capturing specific components. We quickly obtained a detailed model with minimal tracking loss. It’s worth noting that the auto-lighting feature worked well in our dim basement setting.
While using the single-line mode, we did experience some screen freezes, but they were manageable.
Pro tip: Be aware that if you switch modes, you’ll need to manually reactivate the auto-brightness.
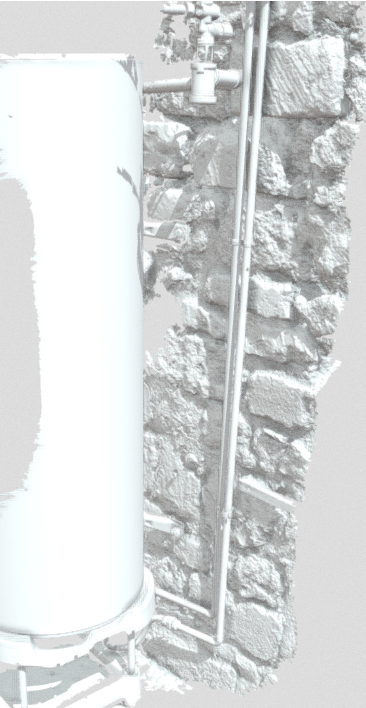
We successfully measured the heights of both the heater and pipes and could isolate specific details in the scan. The resulting model is detailed enough to perform tasks like reverse engineering or quality control.
Scan 2
Scanning conditions: Challenging
Mode: Invisible light – large objects – markers alignment
Capture time: ~5 minutes
We then tested the scene using the Invisible light mode and were pleasantly surprised by its performance. We quickly obtained a high-quality model of the wall, the heater, and even the smaller piping components—significantly faster than when using the laser mode.
We compared the results obtained with the two technologies on the heater and found nearly identical measurements for the height. For more demanding applications like reverse engineering one of the tubes, the quality provided by the laser mode would be more adapted.
Object 4: Handrest
Part size: Medium (>10 cm, <1m)
Part difficulty: Very hard (both shiny and reflective)
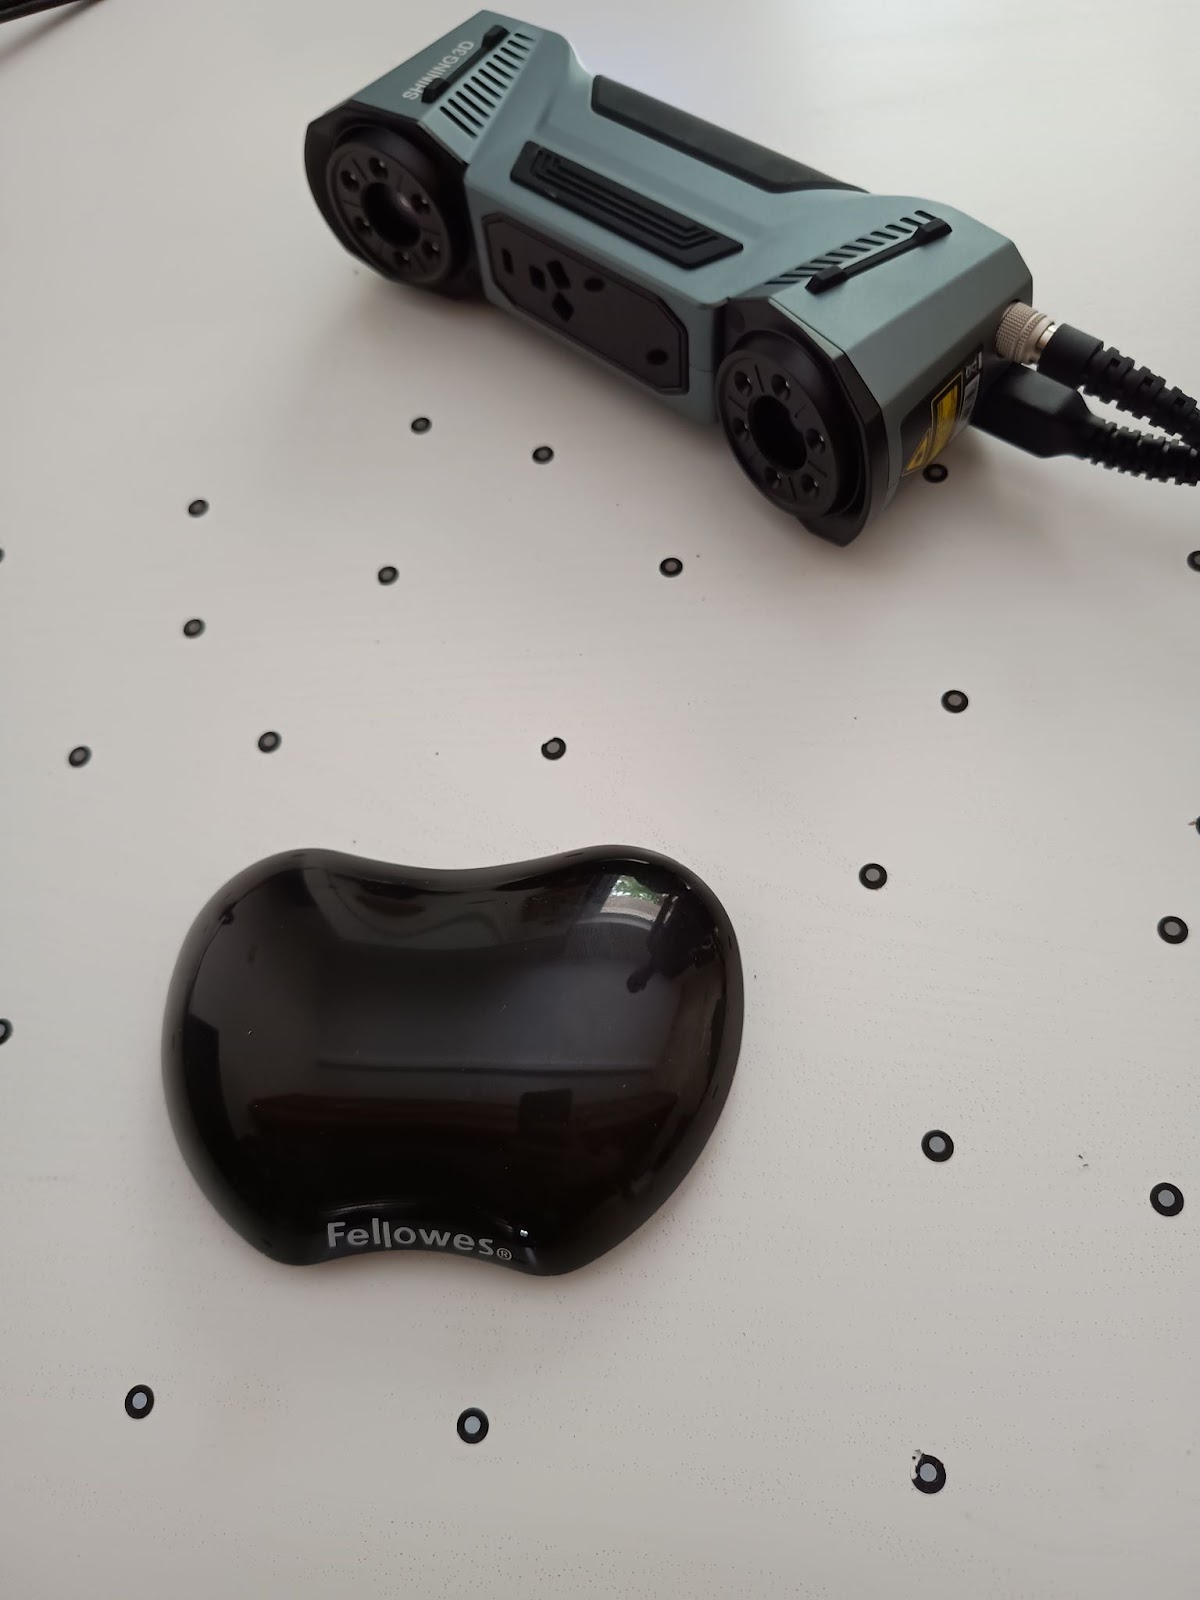
For this test, we decided to really challenge the scanner’s capabilities. This handrest is pretty much a worst-case scenario for a 3D scanner: it’s made of a dark, absorbent material and covered by a transparent, reflective surface. It provided us with an excellent opportunity to test out the scanner’s reflective mode.

Scan
Scanning conditions: Good
Mode: Laser – very high resolution (0,2 mm) – reflective mode
Capture time: ~20 minutes

The scanner automatically set the lighting level to 0, which made sense given the conditions. Activating the reflective mode proved to be a time-saver for us. While the results weren’t flawless, we managed to get a sufficiently detailed model in approximately 20 minutes, suitable for further work in reverse engineering software. Considering we initially thought this part would be unscannable without using a spray, we were genuinely impressed.
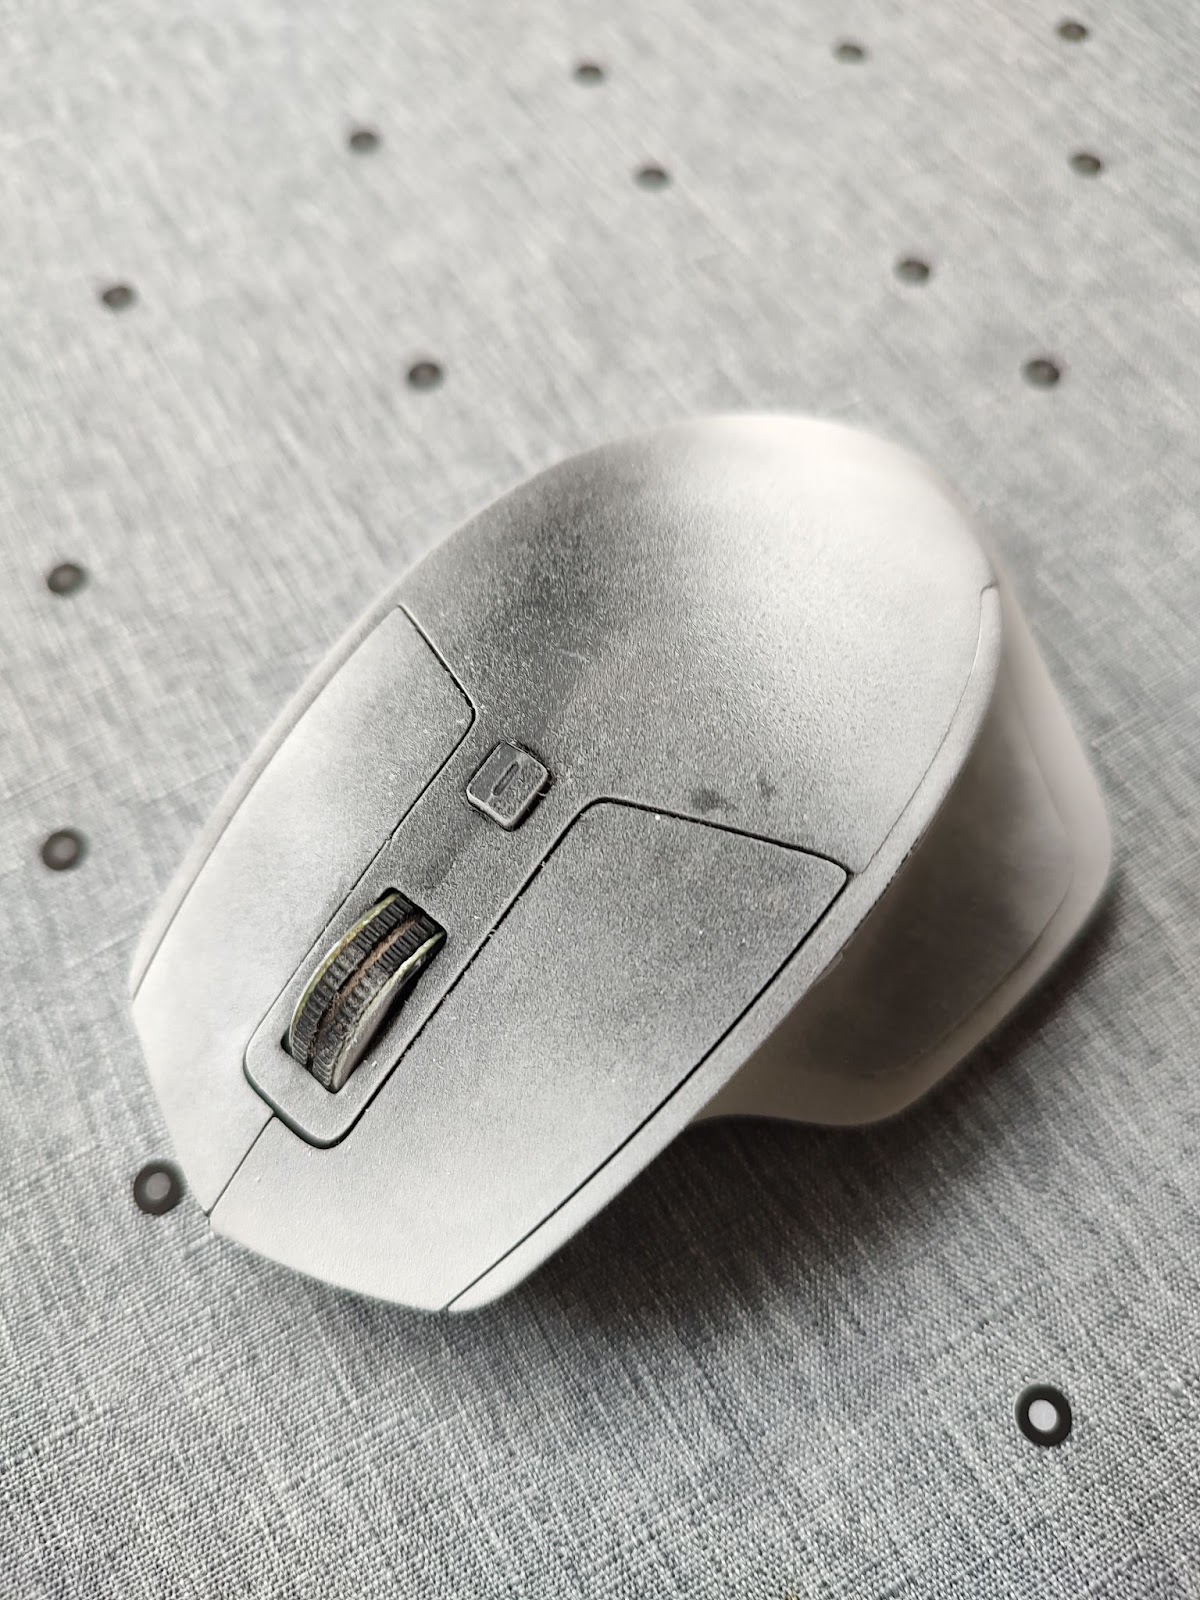
Object 5: Computer Mouse
Part size: Medium (>10 cm, <1m)
Part difficulty: Hard (Absorbent color material, some intricate details)
Scan
Scanning conditions: Good
Mode: Laser – very high resolution (0,2 mm)
Projects: 3
Capture time: ~30 minutes
We opted to use AESUB spray on the Logitech Master MX mouse to mattify its shiny and dark rubber surfaces, aiming for optimal scan results with the FreeScan Combo. The mouse itself is a complex object, featuring multiple buttons, intricate details, and a textured polygonal effect on the sides.
We conducted three detailed scans, each within its own project. We found that removing duplicated information in specific areas, like the side wheel, resulted in excellent alignment and a wealth of detail with minimal artifacts.
For this scan, we pushed the scanner to its limits by using the highest level of detail capture settings—0.1 mm—and even ventured into the high-detail mode set at 0.2 mm. Overall, the results were impressive.
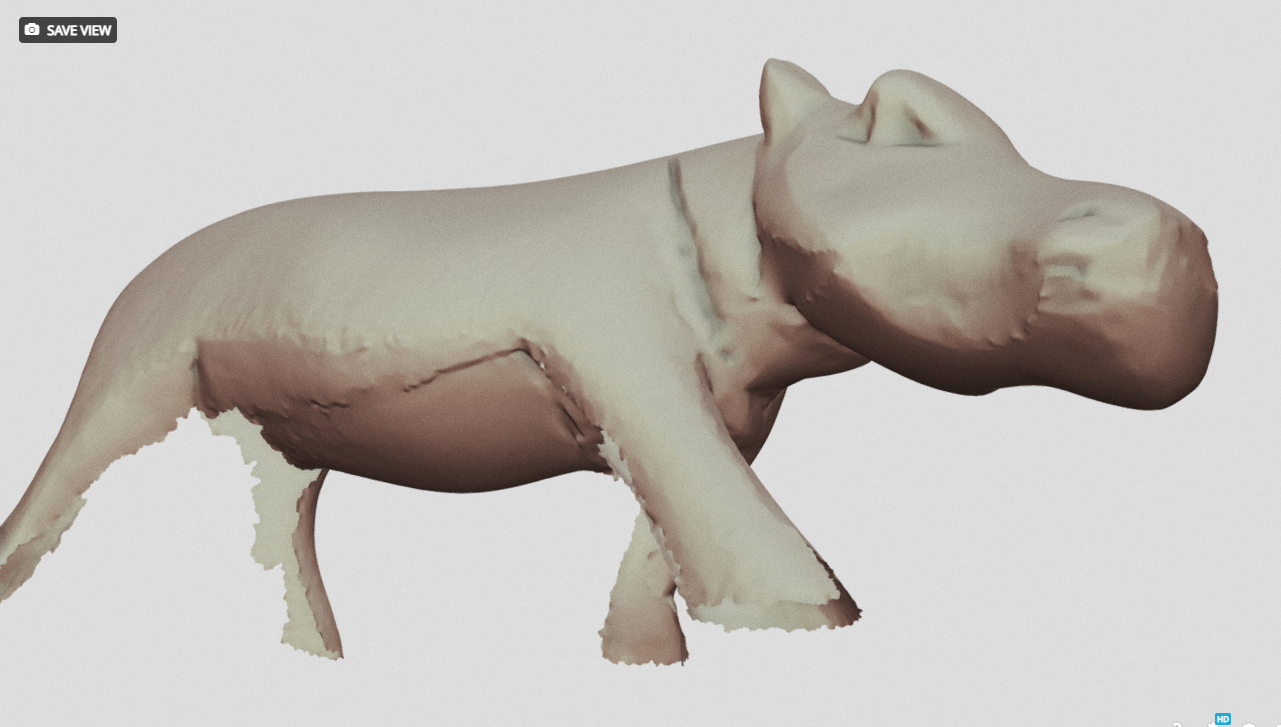
Object 6: Hippo statue
Part size: Medium (>10 cm, <1m)
Part difficulty: Medium (Absorbent color material, some intricate details)
Scanning conditions: Good
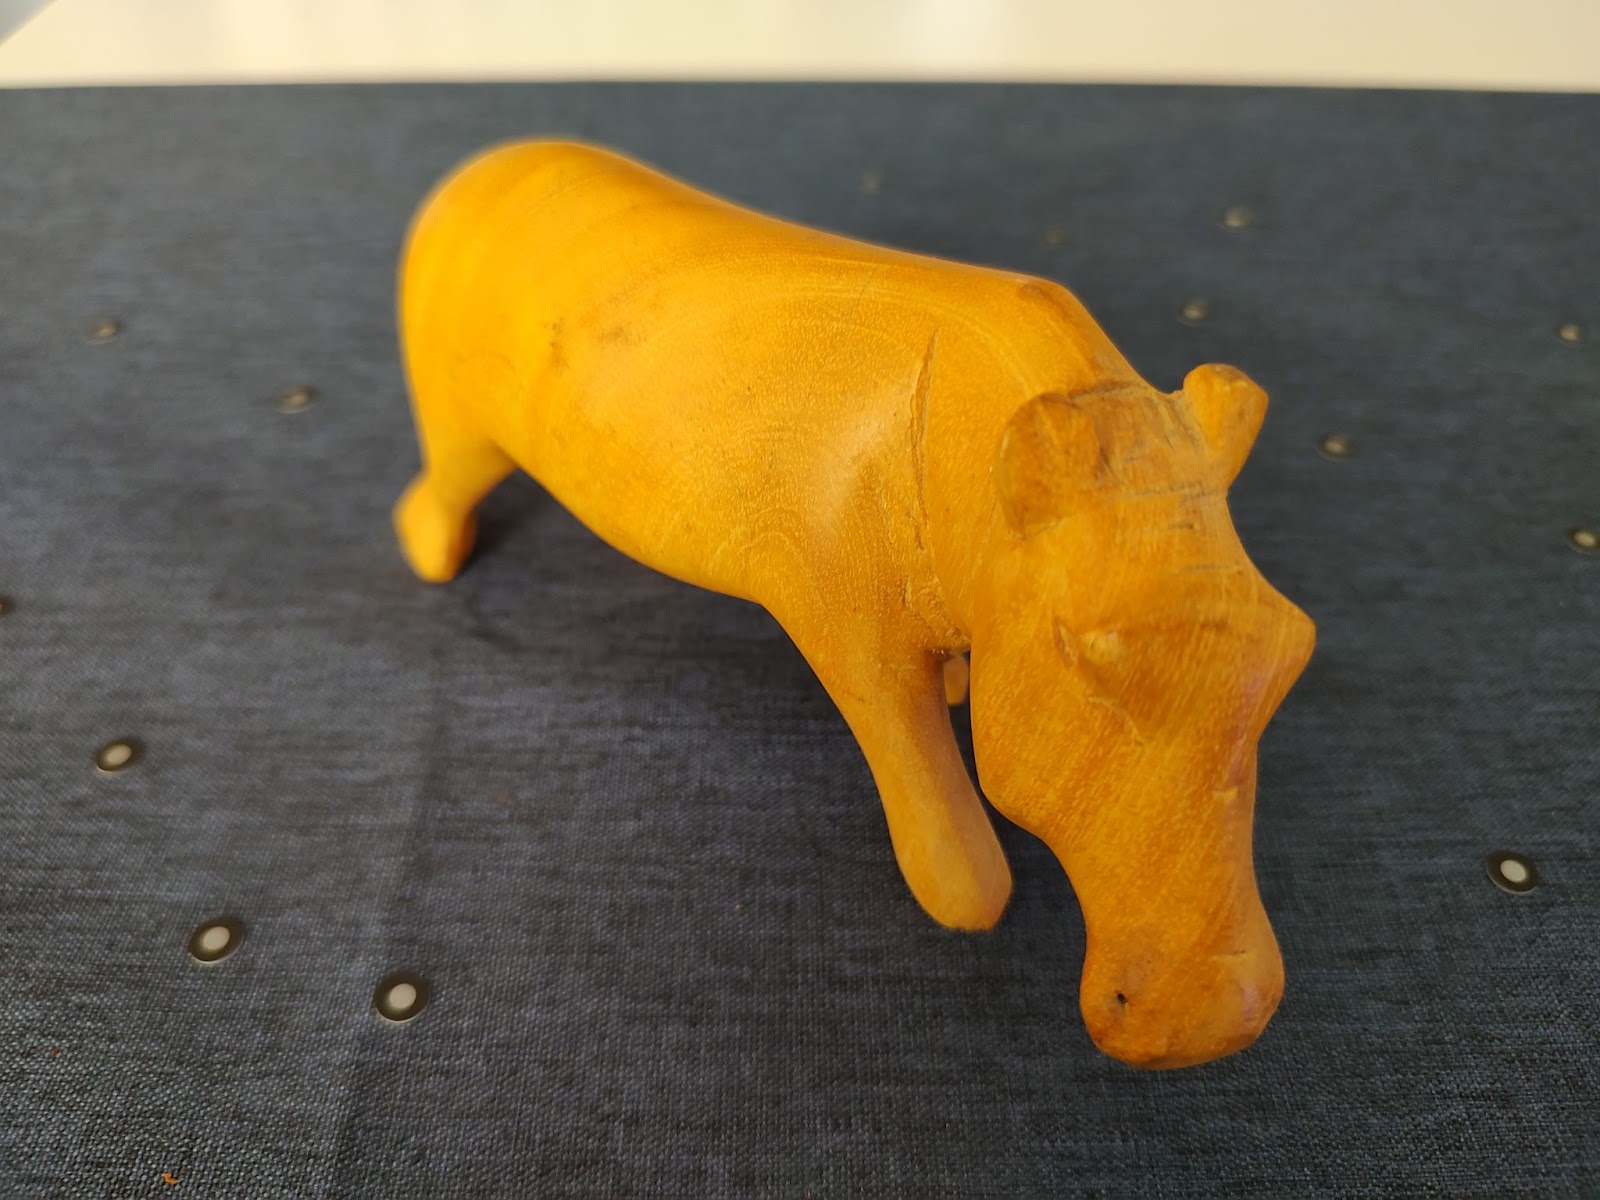
We then decided to test this hippo statue using both Laser and Invisible light scanning methods. We expect the Laser method to work well. However, Invisible light with geometry aligning might face some challenges with these flat areas. We’ll try both methods to see how they compare.
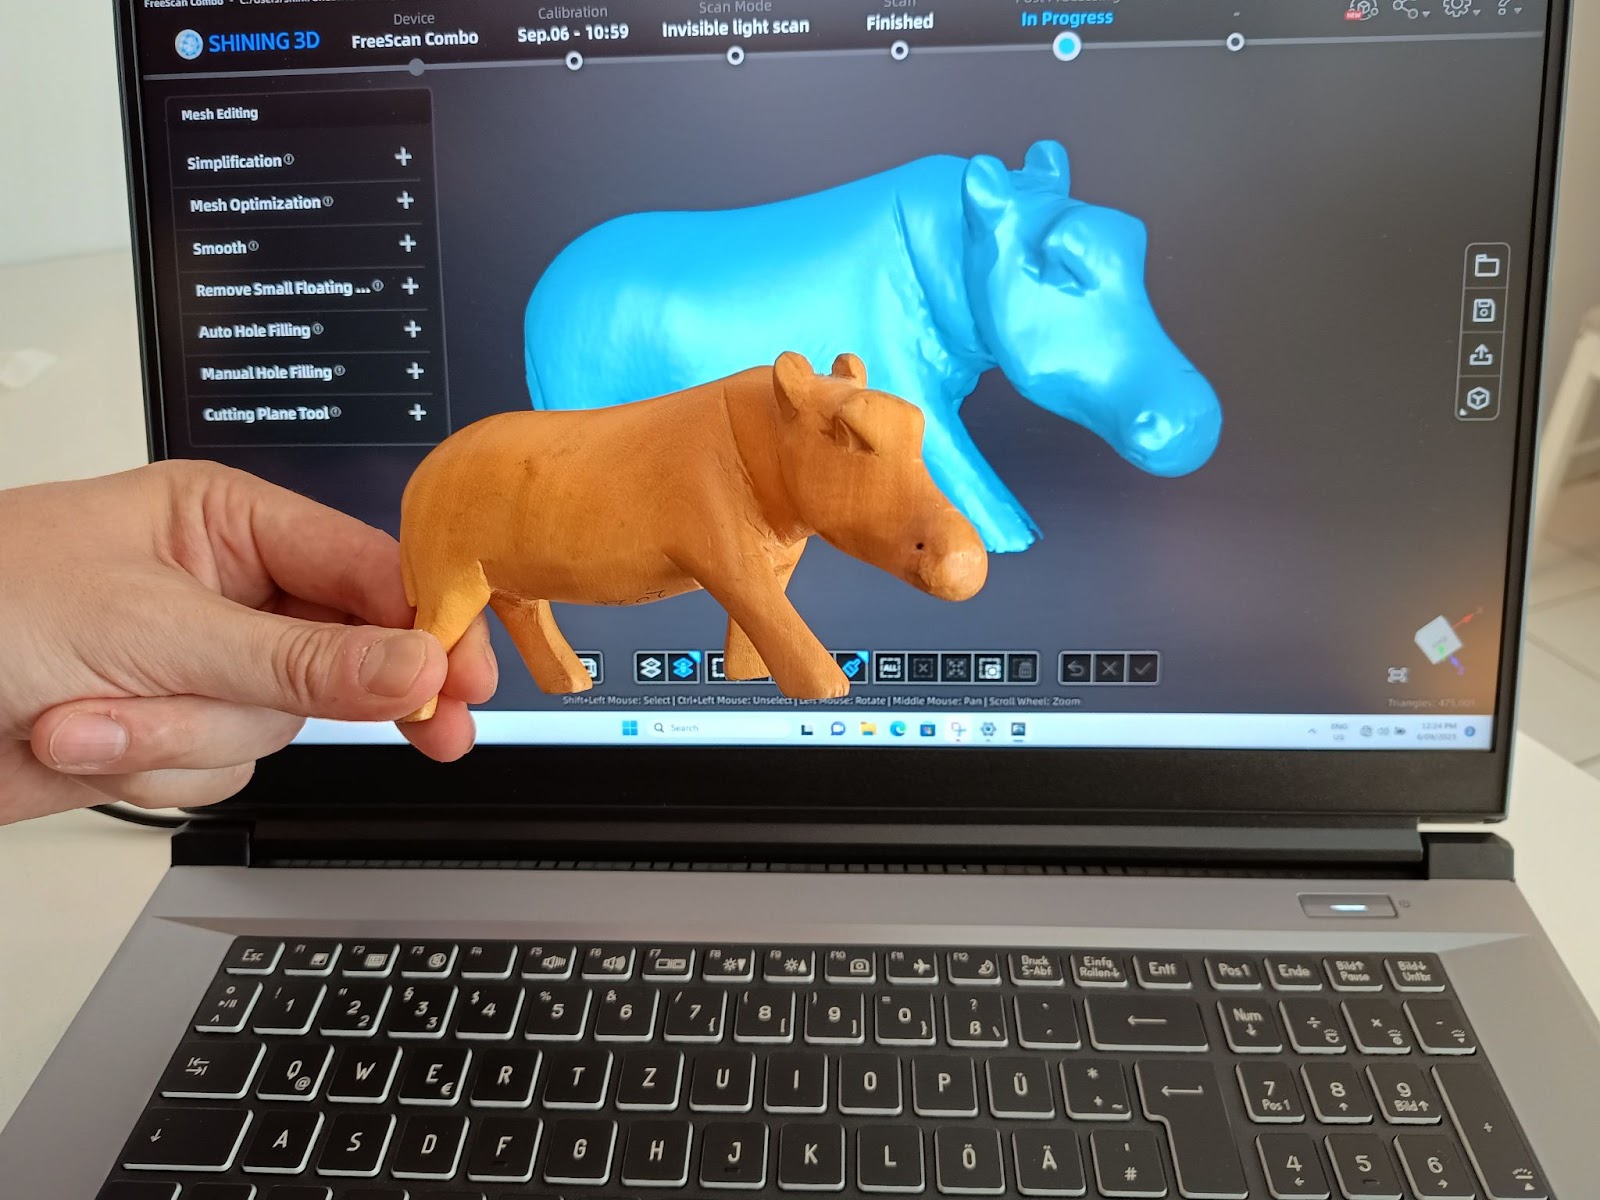
We found it straightforward to scan this part using Laser mode, while Invisible light posed a bit more of a challenge. As anticipated, geometry alignment in Invisible light mode took extra effort and we faced some tracking issues. Ultimately, Laser proved to be both faster and more accurate.
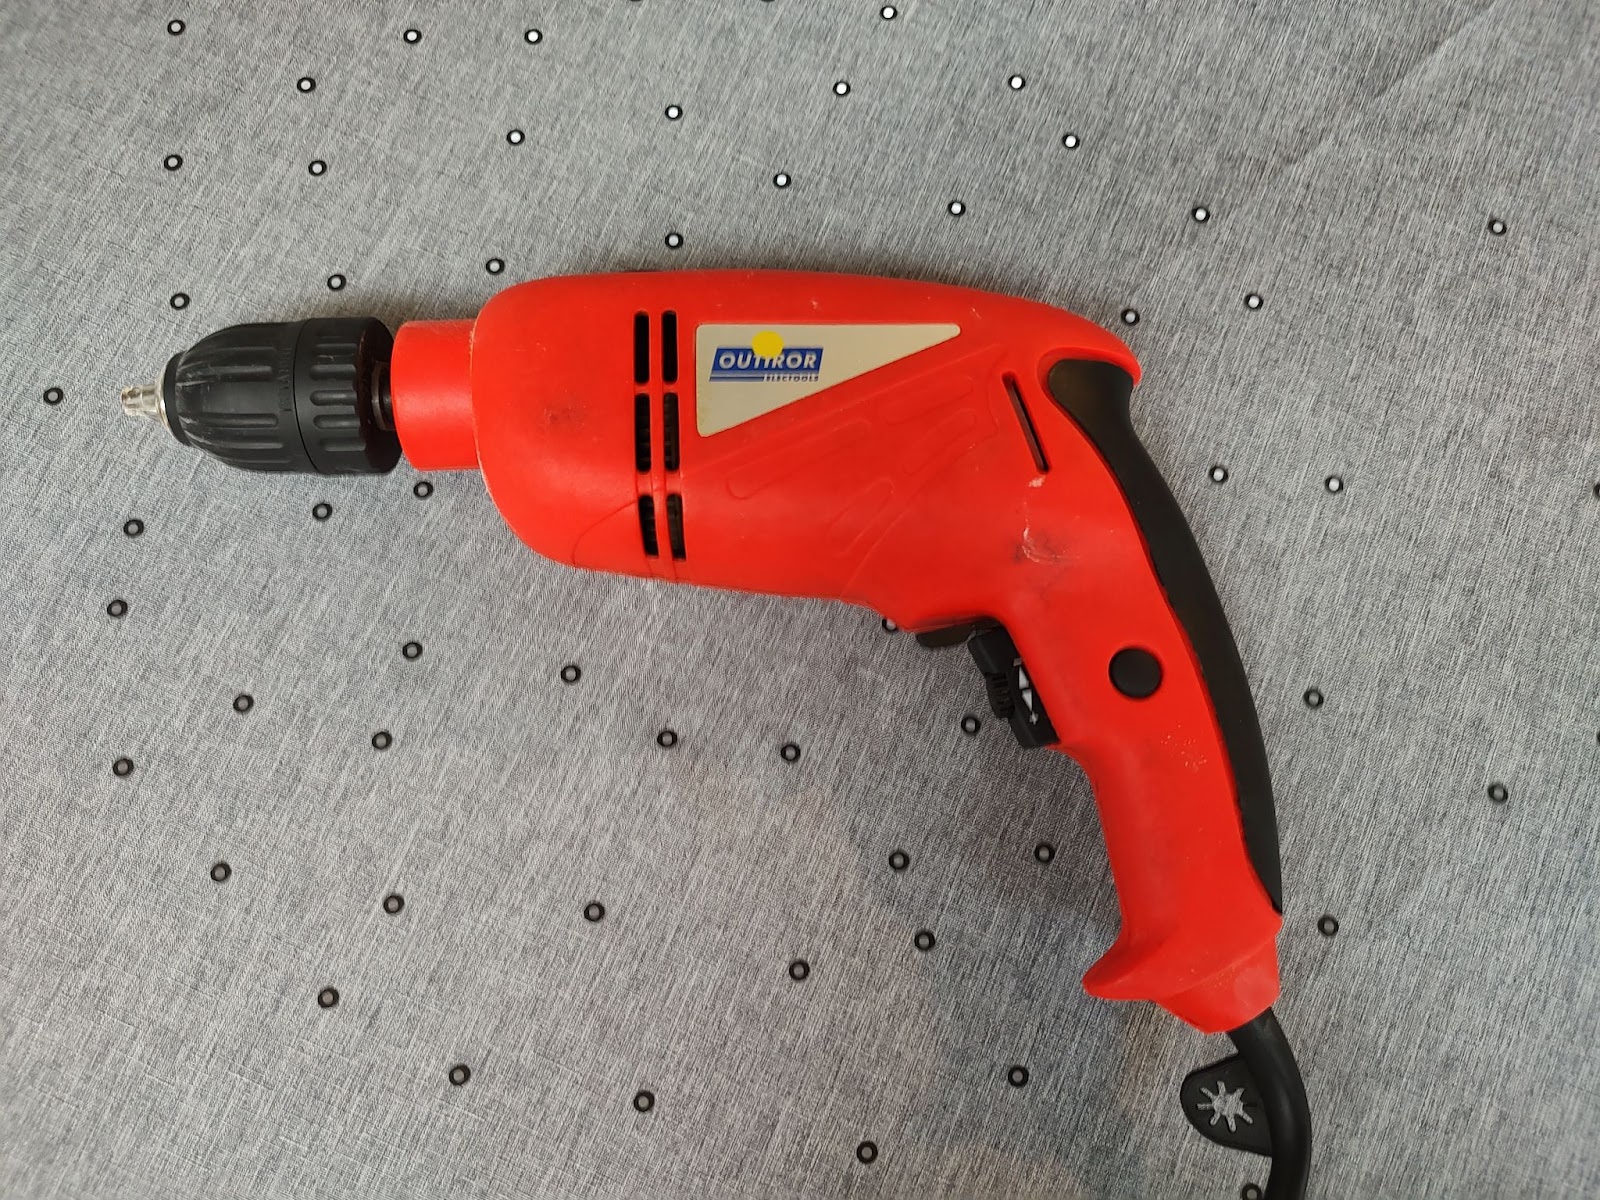
Object 7: Electric drill
Part size: Medium (>10 cm, <1m)
Part difficulty: Medium (Absorbent color material, some intricate details)
The drill presented an interesting challenge for 3D scanning. On the surface, its outer shape might seem simple, but it’s actually filled with intricate grooves and details. Additionally, the drill’s rotating head meant we had to work quickly to avoid any unwanted movements during the scan.
Scan
Scanning conditions: Good
Mode: Laser – very high resolution (0,2 mm)
Projects: 4
Scan time: ~30 minutes.
We tackled the scan with four distinct projects: one for each side of the drill, one focused on the handle’s details, and a final one to capture the head. For expedited results on one side, we used AESUB spray and scanned in less than 5 minutes using the cross mode. On the opposite side, where we didn’t use AESUB, we alternated between parallel and single-line modes to get the best results. Throughout the process, we employed the high-detail mode set at 0.2 mm to ensure we captured every nuance of the drill.
Our findings
Workflow and Software
Selecting a capture technology
The first step of any scan is selecting either Laser or Invisible light mode. These two technologies can’t be mixed in a single project. So, selecting the right mode is essential for getting the most accurate and efficient results.
Here’s a handy guideline for choosing between Laser and Structured light modes:
If your object has complex shapes or tricky textures like reflective or absorbent surfaces, Laser is your go-to. But be prepared for a slower setup and scanning process. Structured light, on the other hand, is generally quicker and often doesn’t require the hassle of setting up markers. Keep this in mind as you decide on the best scanning approach for your project.

Depending on the type of alignment chosen, you will get two different workflows with the scanner.
Scanning with marker alignment
When using marker-based alignment, each side of the object you’re scanning needs its own project file. This means if you’re scanning an object from multiple angles, you’ll have to create a separate project for each viewpoint. After capturing all the sides, you’ll then need to align these individual projects into a unified 3D model. It adds a few steps to the process, but it ensures greater accuracy in the final model.
Pro tip: For optimal results, trim away imperfect scan areas. Overloading a single area with multiple scans’ data can degrade the quality. Focus on capturing only the most accurate data for your model, and try not to overlap too much between projects.
Scanning with geometry alignment
When using geometry alignment (exclusive to Invisible Light mode) scanning multiple object sides is streamlined. Simply pause the scan, rotate the object, and resume. This approach is a time-saver compared to setting up multiple projects for each side.
In geometry alignment mode, dealing with flat or planar objects can be surprisingly tricky. While you might think these simple shapes would be ideal for Invisible Light scanning, the system often struggles to identify distinct features for accurate alignment.
Software Experience
Capture: Laser
We found the Scanning interface to work well in Laser mode.
Even a newcomer was able to complete a basic scan after just 10 minutes of training.
The various modes—26 lines, 7 lines, and single line—offer a versatile toolkit for different project needs.
For our heater project, the 26-line mode excelled in capturing larger areas, while the 7-line and single-line modes provided high-quality details.
The Fine Detail mode is a valuable addition, allowing you to erase the data in specific areas and recapture it with enhanced quality. This proved helpful when we wanted to go back on tiny details after capturing satisfying data for the rest of the part.
Note that toggling between laser modes can affect the ideal scanning distance due to the modified FoV (Field of View), which can be surprising at first.
In laser mode, adjusting brightness is quick and easy, either manually or automatically. Higher brightness helps in dark areas but may add “noise” that needs to be removed in post-processing.
Capture: Invisible light
The Invisible Light capture was on par with its Laser counterpart. Tracking loss was minimal when we used objects well-suited for this mode. The color-coded data quality display—red for incomplete, yellow/orange for correct, and green for high quality—was a particularly helpful feature.

The points where different capture sequences merge, or “seams,” aren’t evident during the capture process. However, these become visible later in the 3D model.
Alignment
We also found the alignment module to work very well.
In most cases, the software’s automatic aligning function worked perfectly and we didn’t have to intervene. In a few cases (with the most complex parts), we had to use the manual alignment function, it was equally efficient, it just required 3 or 4 points to be set manually, which took seconds.
During alignment, parts are grouped and aligned with each other, project by project. At each iteration, the group’s specificities are taken into account to align with the next.
The more projects you align, the better the auto-alignment works!
Post-Processing
The Combo software provides a robust suite of post-processing tools that make it easy to refine scan data—whether that’s eliminating noise, removing extraneous details, or filling ”holes” in the mesh.

Like with alignment, for hole-filling, the automatic mode handled most scenarios well, and when necessary, manual hole-filling came in handy.

The mesh simplification algorithm is another standout feature—it’s fast and effective, reducing file sizes by a factor of 10 with minimal loss in quality.
Lastly, exporting your results is a breeze. With just a single click, you can send your data directly to QUICKSURFACE or other major software suites such as 3D Systems’ Geomagic (included in the package) or Verisurf. It’s incredibly convenient.
Pros and Cons
 Pros
Pros
- Compact and easy to carry
- Efficient and versatile
- Cost-effective
- Easy to get running
- Complete capture, alignment, post-process, and export functionalities
Cons
- Ergonomics could be improved
- Lack of in-session guidance
Conclusion
We put the FreeScan Combo to the test on a wide range of parts, including some challenging ones, and the results were consistently good, if not outright impressive on the largest ones. Most scans, completed in 30 minutes or less, met the demands of high-level applications like reverse engineering and quality control.
The Combo comes packed with two technologies and four distinct modes, making it a versatile tool for tackling diverse objects and scenarios. Its compact size and lightweight design are also notable advantages, ideal for lengthy scanning sessions or on-site work, though a more ergonomic grip and resting hand position would be nice.
The software and calibration process are user-friendly, enabling even beginners to perform advanced tasks quickly. We particularly liked the color-coded guidance in Invisible light mode and would love to see more of this type of feature, especially in the Laser scanning interface.
In summary, the FreeScan Combo delivers on its promise of accuracy, versatility, and compactness. It offers great value, providing metrology-grade performance at an aggressive price point. It’s a standout device in SHINING 3D’s new generation of scanners, and we’re excited to see what they come up with next.
