 English
  Français
The bq Witbox 2, a powerful desktop 3D printer

Introduction
bq is a Spanish company operating in more than 50 countries. bq sells electronic products such as smart toys, smartphones, tablets, computers, robotic kits and they have a dedicated 3D World section with several interesting products: an affordable open-source 3D scanner the bq Ciclop (Kit), an entry-level 3D printer the bq Hephestos 2 and their flagship, the bq Witbox 2.

The Witbox 2 is the second iteration of the Witbox (you could have guessed that!), a desktop printer widely appreciated by the 3D printing community.

bq Witbox 2 overview
The Witbox 2 is a 3D printer produced by bq.
It uses the Fused Filament Fabrication technology to produce thermoplastics parts using filament feedstock.
It offers a build volume of 210 × 297 × 200 mm.
The main improvements of this second version are an upgraded new PCB circuit board, a more intuitive graphic LCD display with higher resolution, and an auto-leveling system. Note that the Witbox 2 is still a PLA-only 3D printer, as it is not equipped with a heated print bed.
3D filaments used for this test: bq PLA 3D filament, bq Bronze PLA (quite similar to the ColorFabb Bronze FILL, as ColorFabb is the manufacturer of the bq brand filament), and Voltivo ExcelFILL Wood Composite.

 Pros
Pros
- Quality of the product and the 3D prints
- User experience
- Frame closed by a key
Cons
- PLA only
- Stickiness to the print bed without BuildTak
- Bit noisy
Packaging
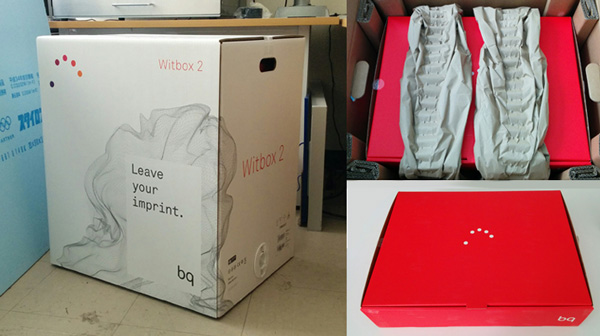
Unboxing: a sleek and functional packaging
The bq Witbox 2 was delivered to our lab in Tokyo, as a loan by a Japanese bq reseller for this test. The packaging was made of several protective layers. The first cardboard protected the main packaging. We must note that the package was really heavy, approximately 35 kg. The 3D printer itself is quite big and heavy with its full metal casing and the accessories are numerous and also nicely packaged.
The supplied filament spool is also included directly in the accessories packaging. Everything is protected with several layers of thick foam and the 3D printer itself is covered with a thin layer of plastic to avoid any scratches. We also received several filaments spools from bq with different properties, for testing purposes.
Instructions manual
A thick and comprehensive manual in multi-languages (Spanish, Portuguese, English, French, German, Catalan, Russian, and Dutch) is included in the accessories packaging. An additional Japanese booklet was also included.
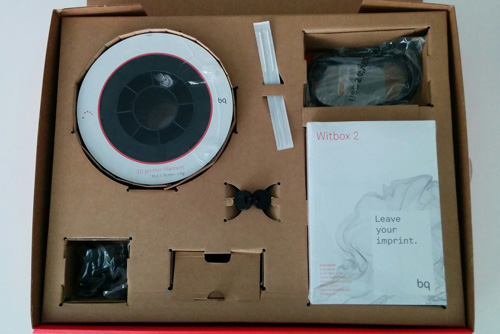
Accessories
All the Witbox 2 accessories are packaged in a specific cardboard box. The Witbox 2 was delivered with a 1 kg spool of PLA, AC adapters, a pair of keys (the frame can be securely closed), and robust spool support to be attached to the back of the 3D printer, entirely made of metal. The package also included:
- Allen keys of 1.5, 2, 2.5, and 4 mm
- Two cleaning needles
- A spatula
- Acrylic side and top panels
- Soft support plastic support legs (3D printed with Filaflex).
Overall the Witbox 2 accessories kit is one of the most complete we have ever get. Noticeably, a 3DHubs card was included in the package, advertising to register the 3D printer on 3DHubs.com. Included in the accessory box is a 3D printed intricate box, used by the manufacturer to check the 3D printer was working right.
Overview and setup
Software
The bq Witbox 2 can be operated under Windows, Mac, and Linux environments. You simply need to download Cura from the Ultimaker (!) website and configure it for a bq Witbox (Witbox 2 is not available as of now). However, both Witbox models share the same characteristics so that is very straightforward. Cura is fast to install but an internet connection is required to download it.
Hardware
The bq Witbox 2 is clearly a high-quality product. It is heavy and sturdy with its metal frame and acrylic panels. Once the setup of the side panels and the top one is completed, the bq Witbox 2 frame is entirely enclosed. The front panel can even be safely locked with the provided pair of keys.
The setup includes positioning the spool holder at the back of the 3D printer and inserting the filament through its transparent guide (Fibonacci spiral) to the extruder head. The print bed (A4 glass cold bed 305 x 220 mm) is included in the accessories cardboard and also needs to be positioned.

The only low-quality part is the plastic part behind the circuit board which also holds in place the LCD screen and the knob. This part has a quite rough finish that strongly contrasts with the rest of the machine.
Because it is slightly misaligned on the top, it is possible to put the SD card in the wrong slot and to lose it inside the printer. In this unfortunate event, you would have to remove the front cover and electronic card to access it.
This 3D printer uses 1.75 mm diameter filament and is compatible with generic 3D filaments. It can only 3D print with PLA-based filament because it is not equipped with a heated print bed.
Getting started
From a hardware standpoint, it is required to first insert 3D filament through the Fibonacci guide tube (the plastic part that goes from the back of the 3D printer to the extruder and conveys the filament).
The LCD screen is controlled by a big flat knob with a smooth touch. Icons are intuitive and easy to understand. The step-by-step instructions are then really easy to follow.
We recommend spraying adhesive material on the print bed or using tape/BuildTak. We started with regular hairspray which usually is enough to guarantee good adhesion on a glass surface. In our case, that did not work and the result was a big blob of melted plastic.
We switched to using BuildTak and in consequence added a small offset of -0,16 mm to increase the gap between the extruder and the build plate. Once the BuildTak is in place we never had adhesion issues anymore and every 3D print came out great.
Then the next steps are really straightforward:
1/ Open the 3D file in Cura
2/ Save the gCode 3D printing instructions on the SD Card
3/ Insert the SD card in the 3D printer and select the right file for 3D printing with the LCD interface
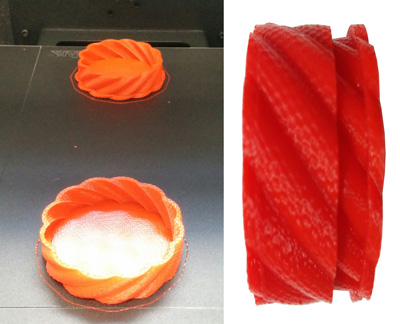
The first 3D print we produced was the included gCode on the SD card of the Twisted box, a complex model.
Experience
Software
The Cura software is pretty intuitive to use and most parameters can be easily found. However, for a first-time user, this software can be a little too complex.
3D printing
The bq Witbox 2 is quite noisy for a closed-frame 3D printer. That is a strong contrast with all the other smooth functions. Once properly calibrated, the bq Witbox 2 produces very good quality prints. From the moment we started using BuildTak and the right offset parameter, the prints came out with good adherence to the build plate and fewer imperfections.
It is very fast to pre-heat the extruder to the correct temperature and start 3D printing. Changing filaments is also a fast process, via two easily accessible functions from the LCD screen, to insert or extract the filament.
3D printing results
1. Benchy

To evaluate the performance of the bq, we started by printing some Benchys. Sure there are a lot of other options available in terms of 3D models but the Benchy is sort of the “standard 3D model” used to benchmark 3D printers and evaluate several parameters (surfaces, level of details, overhangs, ….).
We printed the first tests with the filament provided by bq, their PLA 3D filament, and then switched to more elaborated filaments: bq Bronze PLA (in fact ColorFabb Bronze FILL) and Voltivo ExcelFILL Wood Composite.

All 3D prints came out successfully, with layer thickness ranging from 100 to 300 microns. In our case, we found that the 150-micron layer thickness offered the best quality to print speed ratio.
2. Twisted Vase and T-Rex
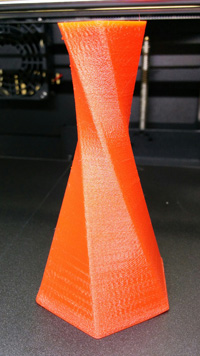
Twisted Hex Vase by bkpsu
A nice-looking vase, perfect to evaluate the 3D printer’s ability to print clean and smooth surfaces. It has a large base so can be hard to unstick from the print bed and can create warping. Because all the Benchys were so successful, we wanted to test the very high resolution of 50 microns layer thickness. The test was conducted with the standard bq PLA.
On this model, the bq PLA 3D print gives a very good result, but a slight warp was noticeable at the bottom of the model.
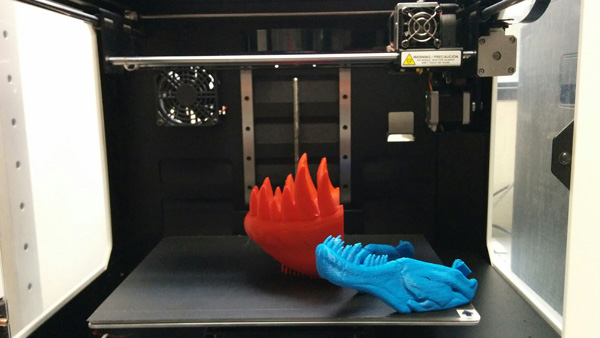
T-Rex by Makerbot
This 3D model is a cool T-Rex skull with complicated overhangs and tiny details (the teeth). Because the previous models were successful with a high level of detail, we used the Netfabb software to model a bigger version of the skull and cut it into several parts to assess the performance of the bq Witbox 2 with bigger size prints.
We used again bq PLA filament. At a 200-micron layer thickness, it was a 9 hours print. The result is excellent and we intend to 3D print the full skull at this scale.
Value
The bq Witbox 2 is a very good and reliable 3D printer but is quite expensive for a PLA-only machine, running with Cura. The overall offers stand interesting with a robust build, a closed frame and a large build volume.
Conclusion
Our conclusion reflects our experience with the bq Witbox 2, printing with the bq PLA, bq Bronze PLA (Colorfabb BRONZE Fill), and Voltivo ExcelFill Wood Composite filament.
The bq Witbox 2 is an excellent desktop 3D printer with a great user experience and capable of producing very high-quality 3D prints. This 3D printer offers an overall print experience and reliability close to an industrial-grade product (except for the plastic part that holds the SD card reader and the LCD screen).
However, the bq Witbox 2 is a bit noisy and does not come with its dedicated software. We strongly recommend the use of BuildTak, and without it, we must admit the experience is likely to have been more painful.
With a price tag of 1,690€, the Witbox 2 is a very good deal if you’re in the market for a serious desktop 3D printer. At this price point, some of its competitors offer dual extruders (Flashforge Creator Pro) or ABS capabilities (Zortrax M200) but for a first time user or hobbyist only looking to 3D print PLA based filament, the Witbox 2 is one of the best options on the market and we strongly recommend it.
