English
  Français
Raise3D E2CF review: a compact carbon-fiber low-volume production 3D printer for under 4k€?

Introduction
We’re stepping out of Raise3D’s flagship lineup of large-format 3D printers, the Pro 3 series, to take a look at the E2CF from the E2 range. Whereas the original E2 is a fine choice for standard materials, the E2CF is specifically designed to 3D print composites such as carbon fiber (CF) and glass fiber (GF) -filled materials.

Both 3D printers sport the same robust frame, dimensions, Easy Swap IDEX system, flexplate, HEPA filter, onboard camera, and many other features that make Raise3D’s professional-grade machines very user-friendly.
So: what sets the E2CF apart and makes it so suitable for composites and their enticing strength-to-weight ratios?
The Raise3D team armed the E2CF with tough, silicon carbide nozzles to counter the abrasivity of composite materials, which would quickly cause damage to a standard brass nozzle. The printer’s extruders boast reinforced gears, as well, to push the filament through the nozzles. Raise3D also mentions adding a new “auxiliary process” to improve the printer’s automatic nozzle height calibration accuracy, resulting in better first layers– composites can be whimsical– and support adhesion.

Continuous, reliable 3D printing for small batch production is another important part of the E2CF’s value proposition. Contrary to the E2, it comes with two filament dry boxes to protect the materials from dust and humidity. Keeping the filaments nice and dry contributes, along with ideaMaker’s thoroughly tested and authorized material profiles, to the E2CF’s ability to work 24/7.
After several long, non-stop hands-on printing sessions (adding up to over 200 hours of printing), this is our comprehensive Raise3D E2CF review.
 Pros
Pros
- Cost-efficient
- High-quality, repeatable parts
- Suitable for unsupervised low-volume production
Cons
- Tedious slicing and filament-loading workflows
- Profile installation issues
- Restricted to fiber-reinforced filaments only
First impressions
Unboxing
We received the E2CF in a big cardboard box on a pallet. It was well-packed and protected, with foam and wedges in all the right places. To safely take the printer out of the box and place it on your benchtop, we recommend employing a second pair of arms. The E2CF weighs 35kg and is a bit chunky, measuring 607 x 596 x 465mm.

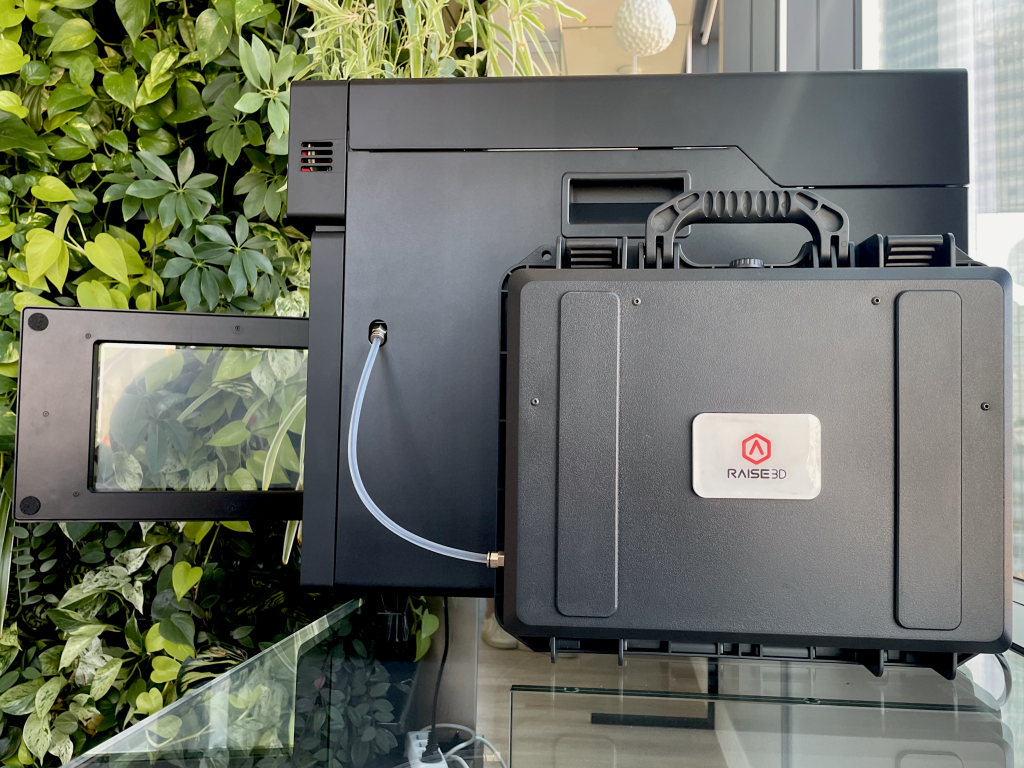
Once we shed the 3D printer of its cardboard and foam packaging, we quickly noticed the front side’s black, braided mesh finish, a strong nod to typical carbon fiber weaves. The rest of the printer’s sides boast a rubbery, anti-static coating that’s just as sleek, but tricky to clean. (A week later, we wanted to clean the dust off for the photo session and almost made it worse– don’t use a paper towel, or tread cautiously.)
Aside from the 3D printer, the box includes a variety of tools for maintenance and general handling– gloves, tweezers, a scraper, Allen keys, and so on–, a stick of Magigoo, and a few small replacement parts. Raise3D also sent us plenty of filament spools to test on the E2CF, including PA12 CF, PPA GF, and their breakaway support materials. Each spool came in an airtight package containing desiccant, as should be the norm these days.
The global package was well-thought out and everything from the hardware to the accessories looks and feels qualitative.

Zoom in: E2CF compatible materials
It’s important to note that the E2CF can only 3D print with Raise3D-authorized materials. On the upside, controlling exactly which materials can go into the E2CF is what enables Raise3D to guarantee users such high quality and reliability. They create material profiles for each new filament (after kilos of filament and hours of printing), to provide the perfect parameter recipes for successful prints. On the downside, not being able to print basic PLA or other non-certified third-party filaments can be frustrating.
The E2CF only works with composite filaments: thermoplastics that have been reinforced with short strands of materials such as carbon fiber, or glass fiber. These composite materials are interesting for their superior mechanical properties compared to their “pure” thermoplastic counterparts, but not only: parts produced with these composite materials tend to offer a smoother finish and better layer adhesion.

Raise3D’s portfolio of authorized materials covers their proprietary PA12 CF, PPA CF, and PPA GF (and support materials), and the team has recently released more bespoke filaments. These 32 third-party filament include cost-efficient options such as eSun and Polymaker’s reinforced filaments as well as options from premium brands such as BASF, Jabil, Kimya, and LEHVOSS.
Raise3D hooked us up with several spools of proprietary materials for our tests, and doubled down on PA12 so we could leverage the IDEX system in Mirror mode. They sent along:
- x2 spools of PA12 CF
- x2 spools of PA 12 CF Support
- x1 spool of PPA GF
- x1 spool of PPA Support

PA12 CF ($189.99/kg at Raise3D) is a strong material composed of polyamide (nylon) and chopped carbon fiber. By adding carbon fiber to a matrix material like PA, you obtain a stronger and stiffer part than you would with a non-filled material. Carbon fiber strands also offer heightened dimensional stability, helping prints resist shrinkage and warpage during the cooling process.
PPA GF ($219.99/kg at Raise3D) is made of chopped glass fiber and polyphthalamide, a material that is sometimes referred to as “high-performance” nylon. Compared to regular nylons, PPA offers higher overall strength, better thermal performance, lower moisture absorption, and excellent chemical resistance. These properties are further improved with the GF reinforcement, making for a solid and cost-effective alternative to other high-performance polymers.
Each of these materials can be paired with their dedicated support materials. They were specially formulated to create stable support structures for specific composites while being easy to break away from them.
Last but not least, you can up to double some of these materials’ mechanical properties by annealing the parts. Dr. Jin from Raise3D’s material science team shared the following insights: “Annealing is a very important post-processing step. It accelerates the post-crystallization of the parts, improving their stiffness and dimensional stability. We recommend baking your prints with their support material at 80 to 100°C for around 8 hours, a pretty reliable and accessible process that can be conducted using a regular household oven.”
Calibration
Calibrating the E2CF was a quick process (same as with the Pro3 Plus). You can conveniently launch the automatic bed leveling function from the printer’s generous 7-inch touchscreen, and access other settings such as nozzle offset, temperatures, and more.

Some users like to calibrate their printers before each print, while others only double-check the bed level and nozzle offset every once in a while. We’re the latter kind and found that, within a few weeks’ time, we didn’t need to recalibrate the E2CF at all. At one point, we even moved the printer to the opposite side of the office floor and launched a successful print without having to recalibrate the printer.
One thing you do have to do more regularly is spread some Magigoo (one tube included) on the flexible build plate to set your first layers up for success. A thin layer every three or four prints work like a charm, or even less if your prints aren’t too complex. We successfully launched five consecutive prints with the same layer of Magigoo.
In sum, the E2CF doesn’t require much maintenance, and when you do need to calibrate it, the process is easy and only takes a few minutes.
Filament loading
Loading the filament doesn’t take very long either, though the process is a little more complex than what we’re used to with most FFF 3D printers. Raise3D designed a system combining a special Dry Box (exclusive to the E2CF), fine-tuned parameter profiles, and a robust extrusion system.

At first glance, the extruder looks like a Bowden-style system, while it is in fact a powerful direct drive installation– all the gear torque comes from inside the print head. The filament goes through a long PTFE guide tube, going from the side of the printer all the way up and down to the direct drive extruder.
In order to load the filament, you must first put your spool in one of the dry containers, centered on the built-in suspension tray (allows for smooth unwinding). Each dry box stores two, fat packets of desiccant, which you can reuse for years. All you need is to microwave them for 3 to 5 minutes every month.
Once that’s all set, you can gently– we insist on ”gently” because carbon fiber is brittle and will easily snap– insert the end of the filament into the output tube and latch it all up. Then, you can secure the container on either side of the printer.
Before you insert the filament into the printer, the extruder needs to be at the right temperature. You must select which nozzle (left or right) you wish to load, and indicate which material you are loading.
When you select a material profile, the extruder will quickly heat up to just the right temperature so that you can load it at the end of the PTFE tubing. For reference, it took about 7 minutes to heat up one of the extruders to 280°C and the build plate to 60°C. You can see each extruder’s status on the touchscreen and receive a notification when everything is ready.
Note that, by default (and it’s hard to change), the left extruder is parameterized for the main material extrusion, while the right one is set up for support material.
ideaMaker slicing software
Raise3D’s software ideaMaker is similar to most major slicers, with a familiar interface, a comprehensive set of parameters, and the usual 3D model placement and basic editing tools. We had already quickly gotten acquainted with it during our time with the Pro3 Plus.
Our experience with the E2CF
Overall, our experience with the E2CF was a quite pleasant one. It churned out some great prints, was in general easy to use, and its sleek design fit perfectly in our office environment.
It’s worth noting that the printer heats up quite quickly, saving a lot of time for maintenance like loading/unloading filaments. This also means a shorter wait until the first layer, which every 3D printer operator generally stays around for to ensure prints start successfully. We let the E2CF run unattended over several weekends without any issues, our longest print having lasted over 70 hours.
There’s a lot more to say, so let’s go over some of the features that stood out to us!
Boosting production rates with IDEX
While the E2CF isn’t the first printer to offer IDEX (Independent Dual Extruders), it is one of the only carbon-fiber-optimized printers that do. This is a strong advantage that allows users to double their production rates for composite parts that don’t require support structures.
There are two ways to speed up prints with independent dual extrusion (IDEX): mirror mode and duplication mode.
In Mirror mode, the two nozzles each print one half of the same object, starting from opposite sides. If you’re printing a large part that doesn’t need support material, this is a great option to cut down on your production times.
Duplication mode is another way to reduce the total print time by up to 50%. The two printheads carry out the exact same movements, to print the exact same parts. It’s a real time-saver that, coupled with the hardware’s reliability, makes the E2CF a great partner for small batch production runs.
We successfully tried both (see Results section), though these modes do have a few limitations.
First of all, if you are leveraging Mirror or Duplication mode for a print, this means that you cannot use breakaway support material. You can build support structures with the main material you’re using, but they will be hard to remove and will leave marks.
Rafts are also pretty much off the table. Composites are really strong and the layers adhere really well to each other. On one batch of PA12CF parts in Duplication mode, we had included rafts and had the hardest time removing them! We managed to do so, but at the cost of damaging the first layers. When you’re printing in only one material (without breakaway support), we recommend spreading a new layer of Magigoo rather than using rafts. We did not encounter any issues using this technique.
Thus, the two IDEX modes are highly useful, but only for 3D models with extrusion-friendly overhangs.
One last thing to note is that ideaMaker software offers an automatic placement tool for your models. We found that this feature did not work very well and experienced a bit of trouble when preparing one of our batches; you must place the parts in a manner that the extruders don’t bump into each other. ideaMaker highlights problematic parts in red, so you can’t slice anything you won’t be able to print.
Office-friendliness
Just like the Pro3 Plus we tested before, the E2CF is very silent while operating, and it has a built-in a HEPA filter system to reduce odors.
While we didn’t notice any odors at all while printing ABS on the Pro3 Plus, something did wrinkle our noses when printing with the E2CF. We could notice a mild, plasticky odor in a 1-meter radius around the printer.
We suspect this is not the HEPA filter system’s fault, but rather an issue with air tightness. There’s a 1 or 2-mm wide opening on both sides of the printer, between the hood and the rest of the chassis, from which unfiltered air can escape. The smell isn’t that strong, but it could be worthwhile to find a way to seal it during printing (perhaps with some tape), especially if you’re running this workhorse 24/7.
Aside from this minor shortcoming and the printer’s bulkiness, the E2CF fits pretty well in our modern office environment.

Filament changing
We described the filament loading process earlier and mentioned that it was a tad complex compared to other desktop 3D printers. Filament changing involves the same steps, and a bit more.
After printing numerous pieces in PA12 CF, we wanted to try out the PPA GF. We used the “unload filament” function on the printer to heat up the extruders to the right temperature and be able to tug out the previous filament. Then, we replaced the spools in the dry boxes and wanted to use the “load filament” function to insert the PPA GF. But the PPA GF material profile was nowhere to be found!
We soon realized we had forgotten that the material profiles (aside from the flagship PA12 CF) do not come preloaded on the 3D printer. Since our printer could not be connected to wifi for security reasons, we had to follow a “manual process” to update its firmware: download the RaiseTouch update from the Raise3D website, save it to our USB key, plug it into the E2CF, and restart the printer. If you are in the same situation, our recommendation would be to do this firmware update first thing out of the box, to avoid some head-scratching.
When the extruder heats up to the right temperature, you can insert your new filament. This involves unplugging the PTFE tubes– a tricky task at first! You need to pull pretty hard because they are tightly and securely fastened to the printer.
Other than that, once you have all your profiles saved on the printer, the process is pretty smooth. You just need to gradually know your way around the menus which can sometimes be a bit of a maze.
3D printing results
We completed dozens of prints on the E2CF, so we’ll only showcase a few of them here. You can see more photos in the Gallery section at the end of this article.
Wi-Fi router support part
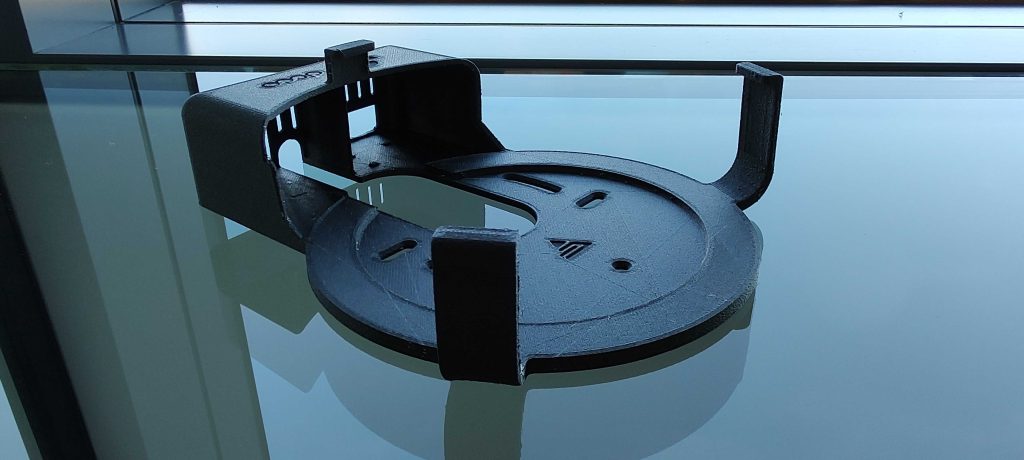
Immediately after calibrating the E2CF, we wanted to challenge it with a medium-complexity part. We chose to print a Wi-Fi router support, a part with a rather simple geometry but large overhangs: we launched our first 18-hour print in PA12 CF with supports.

We were very happy with the result of this first print. After easily removing most of the supports by hand, we were able to remove those in intricate regions of the parts with the tweezers provided with the E2CF, without leaving any marks.
Nuts and bolts
We wanted to try 3D printing a large number of small parts in one go to see how repeatable the E2CF is. Nuts and bolts appeared to be a nice set of batch-compatible parts that we could try out. Don’t get us wrong– additive manufacturing, and FFF in particular, is far from being the best fabrication method for nuts and bolts.
But this file allowed us to test the printer’s accuracy on parts with tight tolerances and was quick to demonstrate. After printing, we were able to screw all the nuts and bolts together. The E2CF printed these small parts with fine details reliably and with great accuracy.
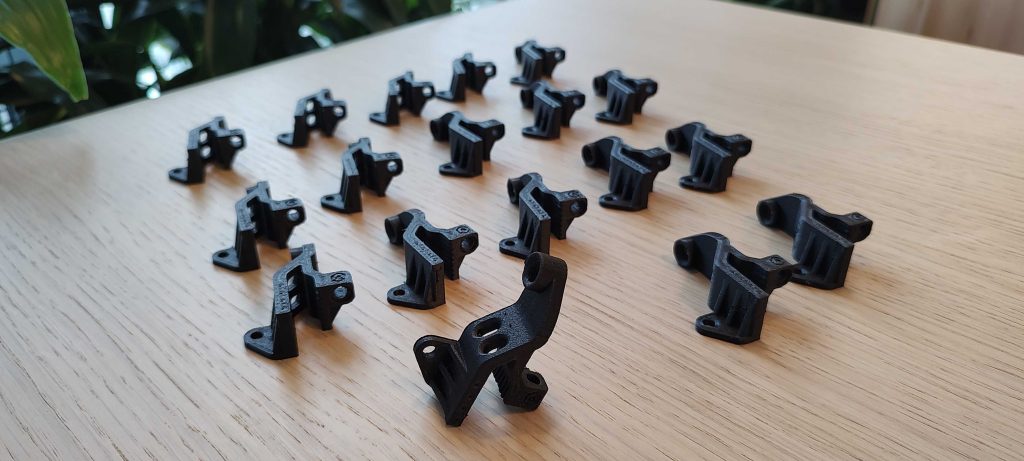
Batch of fixtures
We printed this batch several times to achieve better results through trial and error.
Batch 1 (Duplication mode, x2 parts, High-Quality profile): The result was pretty good, but there were a few minor failures on complex overhangs and the PA12 CF raft was very difficult to remove.

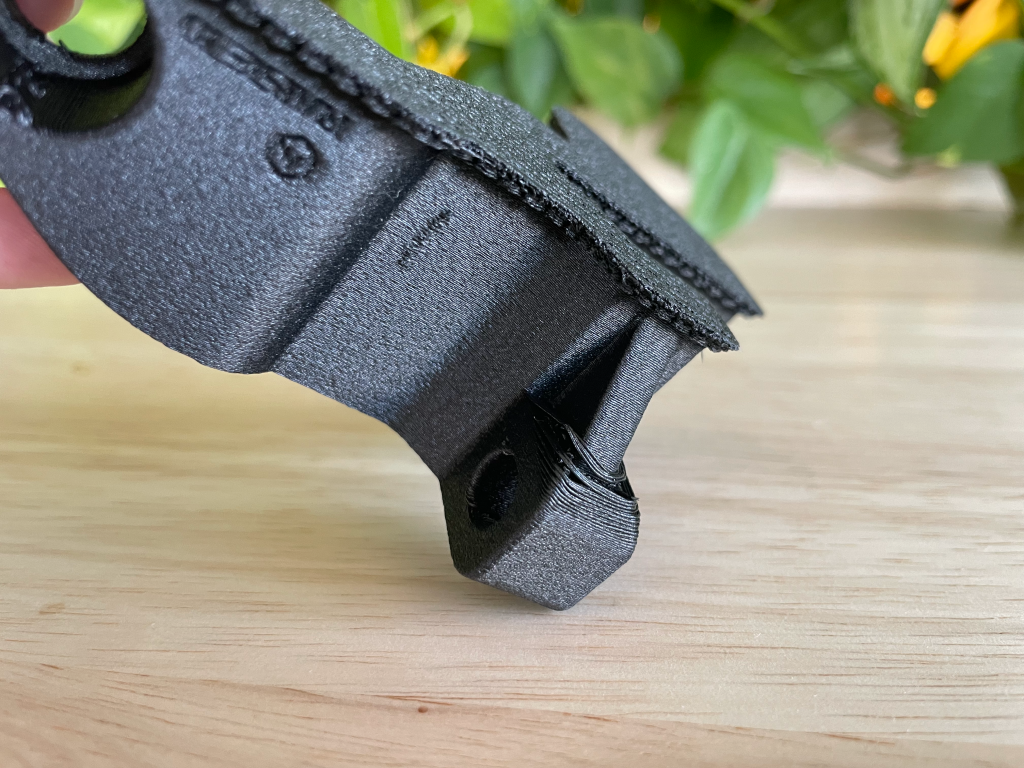
Batch 2 (Normal mode with supports, x6 parts, High-Quality profile): This batch turned out nicely, except for a few flaws left by the support material. The “zits and blobs” can easily be sanded away.

Batch 3 (Duplication mode, x18 downscaled parts, Medium Quality profile): By downscaling the parts, we were able to fit more of them onto the build plate and the E2CF dealt with the overhangs even better. The prints look good.
Manifold
The large manifold print turned out really nicely with ultra-smooth surfaces. We had printed it before on the Pro3 Plus, which surprised us by nearly impossibly 3D printing the manifold’s extreme overhang without supports.
This time, we did not wish to tempt fate and potentially waste expensive material (and 70 hours). We used the special PA12 CF support material and the result is magnificent.
On one hand, we were extremely happy with the result. On the other, we cursed the support structures. While they’re super easy to detach from regular surfaces, it was tedious, tedious work removing the structures from behind the valves. Make sure you think of how you’ll remove the support structures before printing them (or designing your model – wink to DfAM!).

Our verdict
After 8 days, 7 hours, and 20 minutes of 3D printing in under two weeks, with different materials and IDEX modes, we gathered and wrapped up our notes to write this E2CF review. Our verdict?
We churned out some good, strong parts and were able to leave the 3D printer unattended for several days while it did all the work. Even while it printed Raise3D’s high-performance PPA GF at over 300°C.
Some of our prints needed a bit of post-processing, as is usually the case in AM, but we didn’t encounter any printing issues whatsoever. No spaghetti-ing, layer shifting, nozzle jams, overheating– the printer just worked, out of the box.
The IDEX function was also a pleasure to use (and watch!). We printed the majority of the objects twice as fast, allowing us to try the printer on a lot of different object types and sizes. In terms of user-friendliness, we have experienced more streamlined workflows, namely on the Pro3 Plus. That said, the snags we described were minor.
At the attractive starting price of $4,499, the E2CF is a great option if you or your company are looking for a cost-effective compromise between a desktop printer and a larger, industrial-grade 3D printer. As long as you’re ok with the limited filament options and provided you treat it right (i.e., use perfectly dry filament with the right profiles), you’ll be dealing with a reliable workhorse that can quickly produce batches of strong, carbon-fiber-reinforced parts.

E2CF tips
- Download and transfer all material profiles to your E2CF first thing out of the box.
- If your nozzle jams or if your parts are stringy, it probably means that you should dry your filament. Heat it up to 80°C between 6 to 12 hours for best results.
- Every few months, microwave your desiccant for 3 to 5 minutes to maintain its drying capabilities. Then, you won’t need to change the desiccant.
- Spread a new, thin layer of glue onto your build plate every 3 to 5 prints (or more, if printing without rafts made of breakaway support material) to ensure optimal adhesion.

Raise3D E2CF overview
The E2CF is a 3D printer produced by Raise3D, a manufacturer based in the United States.
It uses the Fused Filament Fabrication technology to produce thermoplastics parts using filament feedstock.
It offers a build volume of 330 × 240 × 240 mm.
Gallery