 English
  Français
Tiertime UP mini 2 ES review: an affordable plug-n-play 3D printer packed with features

Introduction
Priced at $699, the Tiertime UP mini 2 ES is a mid-range desktop 3D printer for beginners. It boasts several features that make this 3D printer cost-effective and user-friendly: automatic calibration, heated print bed, touchscreen, closed frame, HEPA filter, material detection, etc. The UP mini 2 ES is a follow-up to the UP mini and UP mini 2.
Tiertime UP Mini 2 ES overview
The UP Mini 2 ES is a 3D printer produced by Tiertime, a manufacturer based in China.
It uses the Fused Filament Fabrication technology to produce thermoplastics parts using filament feedstock.
It offers a build volume of 120 × 120 × 120 mm.
French retailer Machines-3D lent us the UP mini 2 ES so that we could test it. This 3D printer e-shop is based in Valenciennes, France, and ships 3D printers and consumables to France, Belgium, Switzerland, Germany, Spain, and the UK.
 Pros
Pros
- Easy calibration
- Automatic material detection
- Excellent 3D printing quality
- Interchangeable build plates
Cons
- UP Studio software lacks options
- Small build volume
Unboxing
Packaging
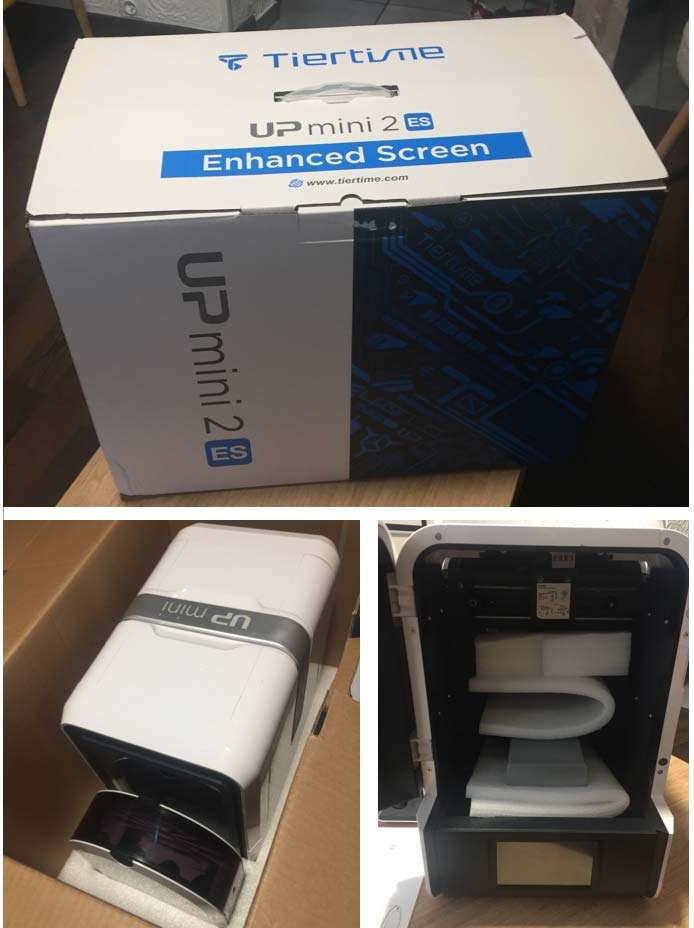
The Tiertime UP mini 2 ES is unsurprisingly packed inside a box, which Machines-3D inserted inside another box for increased protection during shipping.
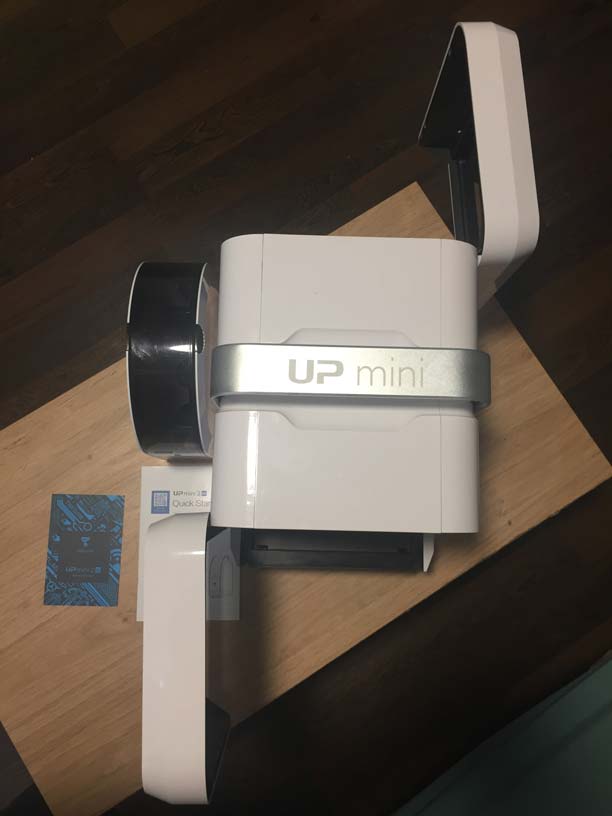
Inside the original Tiertime box, the 3D printer rests tightly and safely inside styrofoam blocks. There’s also foam inside the 3D printer to prevent the build plate from sliding or jittering. The UP mini 2 ES’ filament holder is placed in a dedicated slot within the styrofoam padding.
Machines-3D also sent us a 500g spool of white Tiertime ABS filament to test the 3D printer with. This ABS filament was delivered in a small, separate package.
Instruction manual
The instruction manual– or quick-start guide– that comes with the 3D printer is simple, well-illustrated, and easy to read. The manufacturer’s website offers some additional information via their YouTube channel. More information is also provided on their website.
Accessories
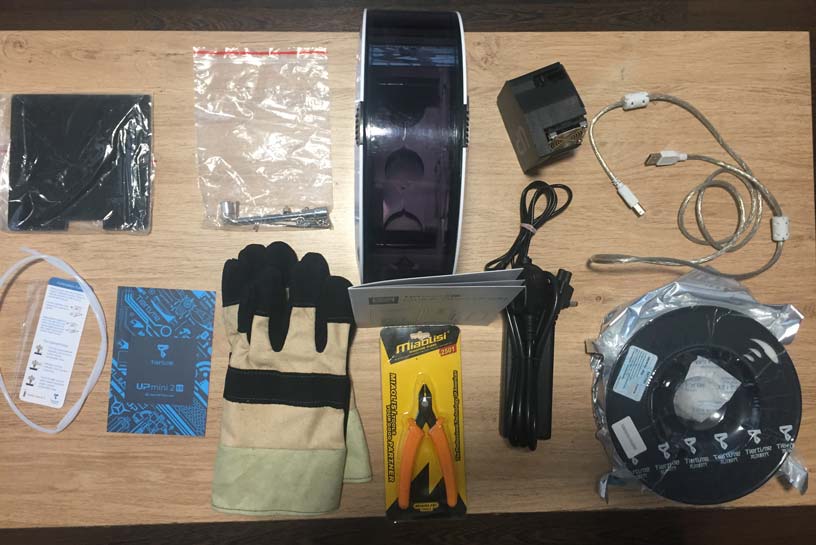
Apart from the quick-start guide, the following accessories are included in the box:
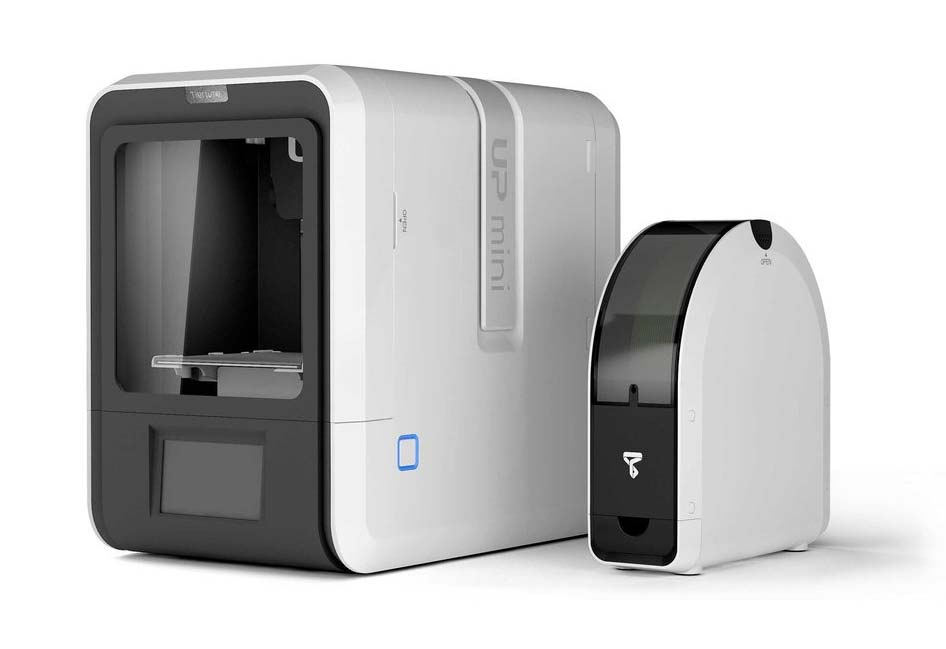
- The closed filament spool holder
- Filament guide tube
- Pliers and gloves
- Set of tools
- Good-quality USB cable to connect the 3D printer to a PC
- Calibration card
- Two extra build plates
On the manufacturer’s website, it says that the UP mini 2 ES comes with a scraper as well, but we didn’t receive one in the box.
Overview and setup
Software
Users can download UP Studio, Tiertime’s proprietary slicing software, from the manufacturer’s website. For MacOS users, there is a link to the Apple App Store in order to download the software as an app. As we were using a MacBook, this made the download really easy and there were no installation steps required.
Upon launching the software for the first time, we saw that UP Studio was quite simple, organized, and intuitive to navigate.

Hardware
This plug-n-play 3D printer’s design has a very sleek and modern appearance. The outer shell is made of white plastic, and there’s a useful handle atop the 3D printer to easily lift it or move the Tiertime UP mini 2 ES from one desk to another.
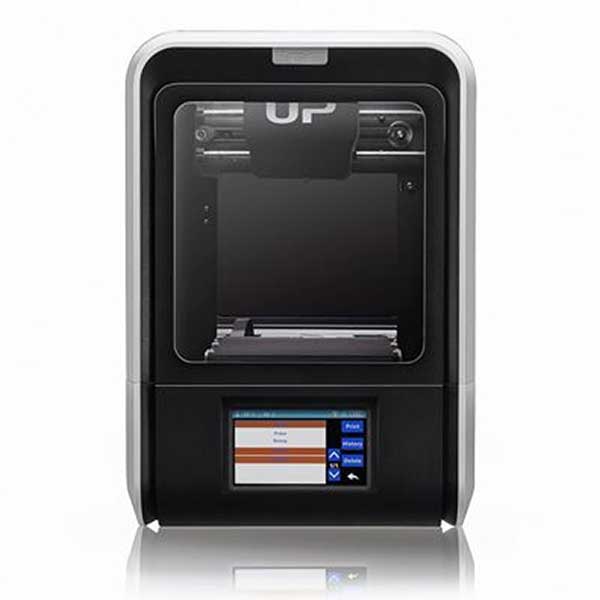
On the front of the 3D printer, there is a large color touchscreen. The power input, power switch, USB port, and Ethernet port are all placed on the back. On the 3D printer’s right-hand side, there’s a square button with a green or red backlight depending on the 3D printing status.
The UP mini 2 ES 3D printer features various openings to access its interior:
- One front door
- One back door
- Two magnetic pieces above the print head
Inside the desktop 3D printer, below the print bed, there is the air filtration system (HEPA) to reduce particle emissions.
Getting started
The touchscreen takes about 20 seconds to load the main menu, which is neatly organized in six square buttons:
- Material (automatic recognition or manual input)
- Print (choose a preloaded file)
- Calibrate (auto-leveling or manual)
- Information
- Initialize
- Config (lighting on/off, sound on/off, preheat, Wi-Fi setup)

Each time the 3D printer is turned on, it must be initialized. The build plate and print head are homed, and then users can choose to 3D print a small test cube.
Only then it is possible to access the 3D printer’s other options, such as Wi-Fi setup. We, unfortunately, weren’t able to test the latter, as there wasn’t enough character room to enter our entire, lengthy password (which, long story short, we didn’t have the option to change while we had access to the UP mini 2 ES).
Hence, we had to connect the 3D printer to a computer via USB for each 3D print job. The 3D printer sat on a desk next to the computer anyway, so in our case, it wasn’t particularly problematic. Also, we couldn’t test the mobile app since the 3D printer wasn’t connected.
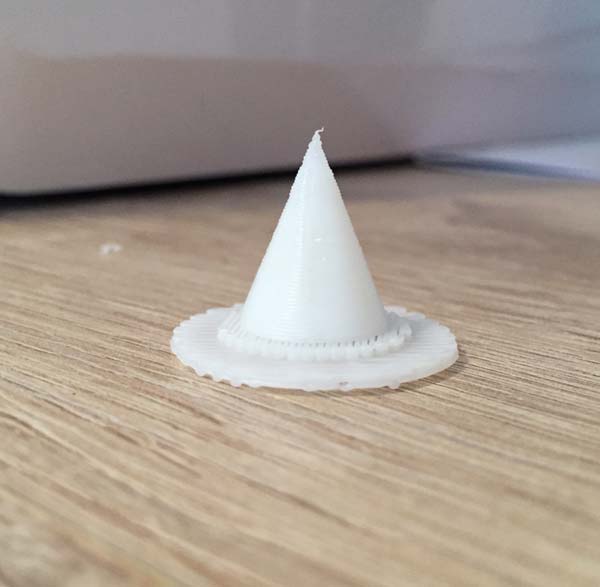
We got started with a simple test cone after calibrating the print bed and we encountered no problems, resulting in a smooth test print.
Experience
Software
Tiertime’s UP Studio software is intuitive and easy to use, but the tradeoff is a lack of settings, especially in comparison with Ultimaker Cura. Even beginners may quickly want to go beyond what’s available and tinker with different parameters.
There’s a small window for basic settings, and the possibility to expand to “Advanced print settings”. These “advanced” settings were disappointing, especially in contrast with unimportant options such as choosing the color theme of the interface. We think that the developers’ efforts could have been of better use elsewhere.
For example, users can only choose between starting the first layer directly or inserting a raft. There is no option to include a brim or a skirt. It isn’t possible to choose a specific print speed either, there are just three presets: normal, fine (slow), or fast.

On the upside, the software automatically adjusts temperature settings according to the detected material, given that it is from the Tiertime range of filaments. There’s also a selection of basic shapes (cones, cubes, letters…) to 3D print.
Plus, there’s the possibility to import a 2D photo to 3D print (lithophane). We tested the lithophane photo functionality with a family portrait. It’s a fun feature and users may choose the thickness.
Overall, UP Studio isn’t incomplete considering that this desktop 3D printer is designed to be easy to use and plug-n-play. The software achieves its primary function– it goes straight to the point, which is to slice STL files into GCode. Therefore, in its context, UP Studio is a decent piece of software to access basic 3D printing functions (it isn’t bad, it isn’t great, but it does the job).

3D printing
The UP mini 2 ES is relatively quiet, emitting about 60 dB when 3D printing. Also, unless the sound option is manually deactivated in the configuration menu, the 3D printer beeps for each step of the process (calibrating, launching a print, finished print, etc.). It isn’t vital but can be pretty useful especially if the 3D printer is in a separate room.
Furthermore, the enclosed design and HEPA air filtration system do a great job of reducing the smell of melted ABS (although this doesn’t exempt users from ensuring the room is well-ventilated). The closed structure is definitely one of this affordable 3D printer’s strong points.
That being said, it makes it more difficult to observe the 3D printing process as the door is tinted. We had to make sure to turn on the LED light manually in the configuration menu before launching a 3D print. Otherwise, it lights up for the first minute or so and then turns off automatically.
When it comes to actual 3D printing, we found that the UP mini 2 ES was fast and accurate, and we didn’t run into any filament jams, layer shifting, or other problems that can be associated with more affordable 3D printers.
Warping and calibration
In the beginning, though, we did encounter some warping issues. It took a few warped prints and some time trying to tweak the few slicing settings available to finally realize that the print head wasn’t close enough to the build plate. We hadn’t initially thought of looking into this as the cause, because we used the automatic calibration function. After manually raising the bed (with up and down buttons on the touchscreen), we resolved the warping issues.
Apart from this calibration-related issue, the UP mini 2 ES does a really impressive job at 3D printing ABS material, which is famous for warping if it is not 3D printed at the right temperatures (among other variables).
It’s a shame that the automatic function isn’t highly accurate, but “manual” calibration is so easy that it doesn’t really matter. As the manufacturer clearly states and warns, it’s important to wait until the nozzle is cooled down. Otherwise, it can accidentally damage the build plate. This happened to us at one point; after releasing the “up” button, the touchscreen didn’t detect that there was no longer finger pressure applied. Thus, the build platform kept moving up and ran into the hot nozzle, which caused some slight damage to the plate’s surface.
3D printing results
Overall, we obtained very good quality 3D prints. All of the models were 3D printed in white Tiertime ABS filament.
Benchy
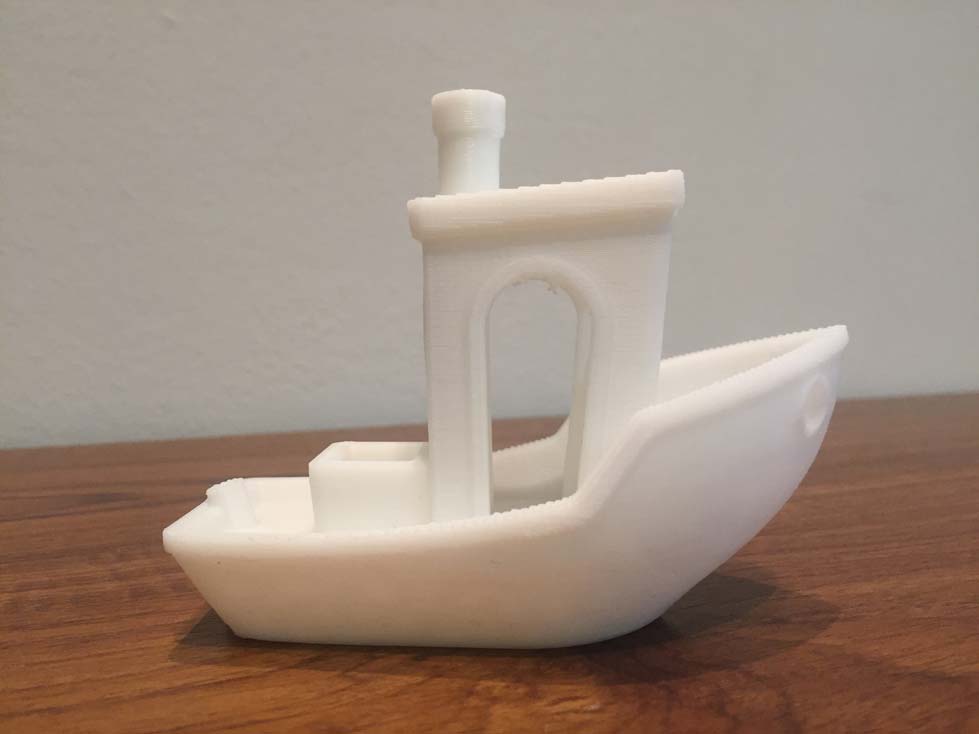
It’s almost a crime to not 3D print a Benchy when testing a new 3D printer. But we are diligent 3D printer reviewers and 3D printed the famous little boat.
The outer layers are neatly stacked upon each other and the overall detail is pretty satisfying. There are a few imperfections in overhang areas but zero oozing, scars, or blobs. We are happy with the result.
Designer: Creative Tools
Free STL file on Cults.: #Benchy – The jolly 3D printing torture-test
Wavey Love
To take part in the #WaveyWednesday Twitter movement, we 3D printed one of FerJerez’s “Wavey Love” vases. The result is extremely smooth and almost mesmerizing, with absolutely zero imperfections.
We had one small issue with it though. When removing the raft, the base of the bowl came off with it, but the model still looks great as a shelf or desk decoration.
To avoid this problem, users can increase the number of full bottom layers in UP Studio, or 3D print the object without a raft (but beware of warping!).
Designer: Fernando Jerez (a.k.a. FerJerez)
Free STL file on Cults: Wavey Love

Flexi Rex
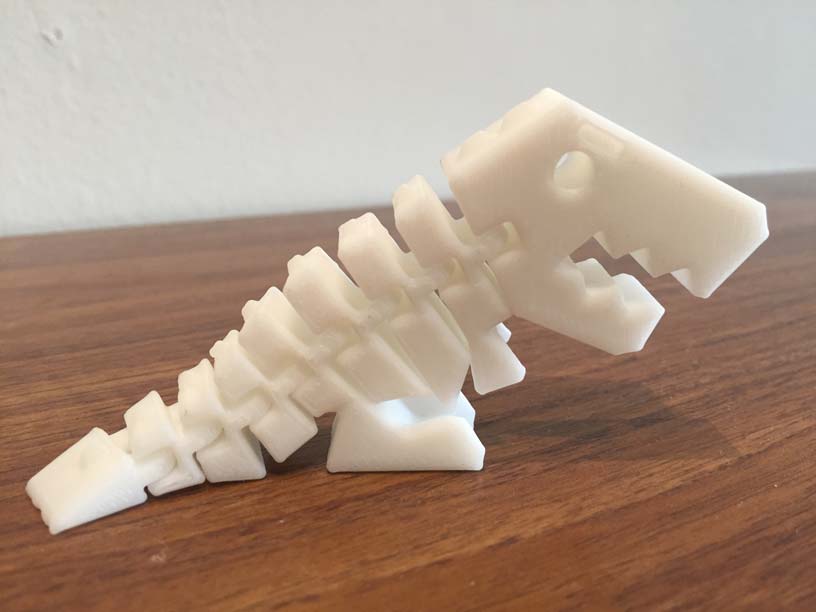
We have fallen in love with this cute, articulated dinosaur model. The Tiertime UP mini 2 ES 3D printed it with ease and speed, and the critter looks wonderful.
It’s a bit tricky to remove from the build plate though, and we didn’t have a scraper to help. This is where we truly appreciated the fact that the build plate is removable and flexible! Otherwise, we imagine it would have been very difficult to remove the model.
Designer: DrLex
Free STL file on Thingiverse: Flexi Rex with stronger links (an adaptation of Kirbs’ original design)
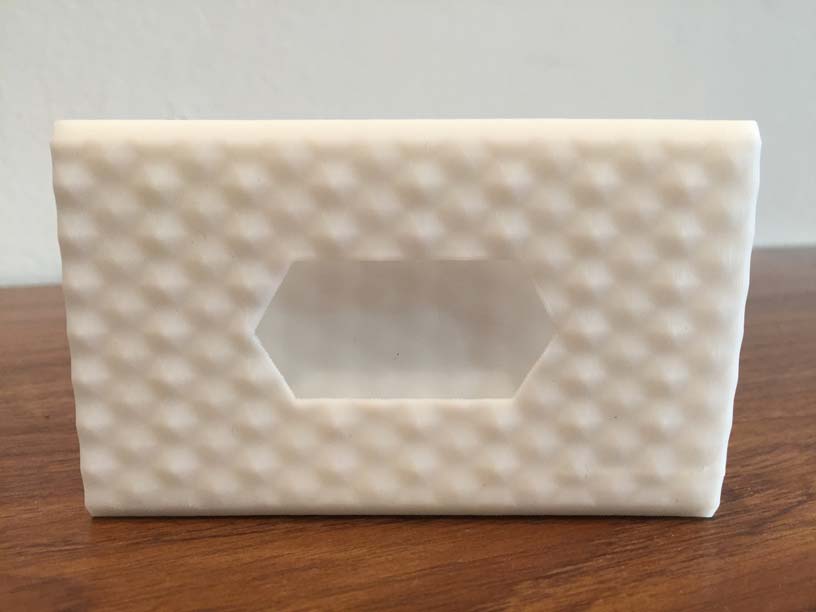
Business card holder
We stumbled upon this model and appreciated its design. We 3D printed two of the business card holders side-by-side and there was no oozing, which can often happen when 3D printing multiple tower-like objects. The cardholders turned out nicely and with great detail.
Designer: YSoft_be3D
Free STL file on Thingiverse: BUSINESS CARD CASES
Value
Globally, this desktop 3D printer offers a good price-to-performance ratio. It is easy to use and boasts a wide range of features that various more expensive 3D printers lack, and that are quite rare in the UP mini 2 ES’ price range.
The main downside of this desktop 3D printer is the software that accompanies it, but it is possible to use alternative software to slice files and import them. There are also a few occasional touch recognition problems (touchscreen), but nothing that would dissuade a user from considering the UP mini 2 ES a good 3D printer to buy.
Tiertime’s UP mini 2 ES is ideal as a 3D printer for beginners, but could just as well suit basic professional needs thanks to its closed frame, small footprint, and 3D printing quality.
