 English
  Français
The Artec Eva, a powerful handheld 3D scanner

Introduction
The landscape of portable 3D scanners is pretty scarce. We wrote a full article on the topic here and listed only a handful of models. Among these 3D scanner brands, the two most established and biggest players in the industry are Creaform (from Canada) and Artec (from Luxembourg).
Artec 3D company is an international group, headquartered in Luxembourg, with subsidiaries in the USA (Palo Alto) and Russia (Moscow). Artec has developed two well-known handheld 3D scanners, the Artec Eva (which we are testing today) and the Artec Spider, available in two versions (Artec Spider at $22,600 and Artec Space Spider at $27,600). The Spiders are the high-end products of the Artec product line, the Eva being the most affordable.

| Technology | Structured light |
| Max resolution | 0.2 mm |
| Weight | 0.9 kg |
| Price | $ 19,800 |
Artec 3D Eva overview
The Eva is an handheld 3D scanner produced by Artec 3D, a manufacturer based in Luxembourg.
The Eva Artec 3D uses the structured light technology.
In addition to these portable 3D scanners, Artec also offers a 3D body scanning booth and service called Shapify and Shapify Booth.
Back to our test of the day! The Artec Eva is a versatile handheld 3D scanner, capable of 3D scanning a wide range of objects. In our experience, this portable 3D scanner gives the best results for Medium and Large objects (the Artec Spider is generally recommended for smaller size objects with intricate details).

The 3D scanner we tested belongs to a university lab. It was originally an Artec Eva Lite, a lighter version of the Artec Eva without the texture/color scanning option, which was upgraded to an Artec Eva. The software we had, Artec Studio 9, was upgraded into the much more powerful Artec Studio 11 version for this test, thanks to Artec.
Objects used for test 3D scans: a human chest, a human foot, a human face, a shoe, a sheep plush, and a big suitcase.
 Pros
Pros
- Overall performance and 3D scans quality (meshes)
- The user experience of Artec Studio 11 Ultimate
- The user experience of the Artec Eva
Cons
- Price: definitely an expensive device, albeit a powerful one
- Connectivity and alimentation cables
Packaging
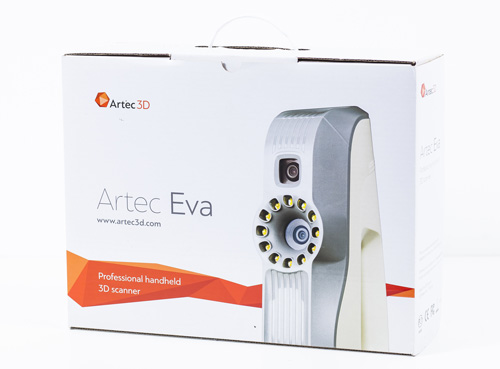
Unboxing: a simple cardboard case
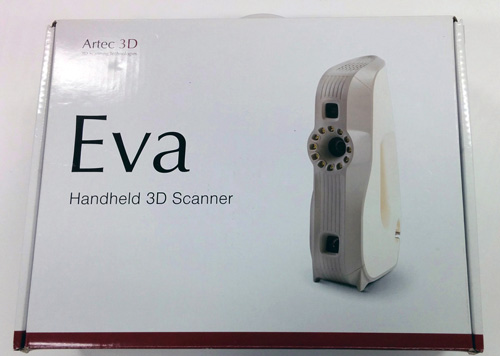
The Artec Eva is delivered in a rigid cardboard case, inside the shipping package. Please note that we have our Eva since 2014, so the design of the box has been now updated, as depicted in the picture below.
The rigid cardboard case is enough for storing the 3D scanner but for transporting it around, a rigid case is strongly needed. Artec sells theirs at a $400 price tag. Ouch! For the price tag of the Artec Eva, we think a proper case should be included and we reflected that in the Value section of our review. We bought a rigid case (the Trusco TAC-15) online for $120, which fits perfectly for the Artec Eva.
Instructions manual
The documentation we received with the Artec Eva consists of registration and login codes to access the Artec Installation Center and tutorials center. This simple solution requires internet access. Regarding the instructions, we must stress the fact that the support team of Artec was really effective every time we had any question, mostly software-related.
Accessories

The Artec Eva is delivered with very few accessories. The only things provided in the box are an alimentation cable and a USB cable. Nothing more is needed to operate the 3D scanner.
Note that Artec sells those items for a very expensive price if they are broken or lost (USB cable at $30, Power supply at $140). In option, a battery pack is also available for an additional $850.
Overview and setup
Software
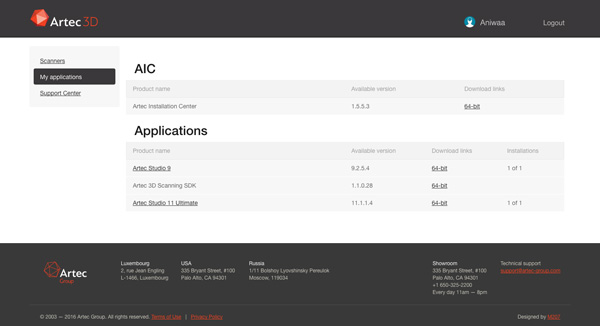
The Artec Eva requires a Windows OS to be operated. The software can be installed directly from the Artec website, simple to access at my.artec3d.com.
With a steady internet connection, it takes only minutes to download Artec Studio in its latest version and install it from the Artec Installation center. The Artec Scanning SDK is simultaneously installed. We encountered a few glitches in the install related to our internet configuration: in our lab, the connections are secured through proxies, and it might cause you some issues if don’t take care of that first.
For this Artice Eva review, Artec provided us with their latest software, Artec Studio 11 Ultimate. As users of Artec Studio 9, we must say that the update to Artec Studio 11 version radically improves the user experience of the Artec Eva. Once the software had been installed and activated (just one additional click required in the Artec Installation Center), we were able to plug our Artec Eva and start the tests.
Note that Artec Studio 11 Ultimate requires a 64 bits Windows OS, and a powerful computer (see in Experience below for the exact description of our laptop).
Hardware
The Artec Eva is a well-manufactured product with a nice sturdy feel. The assembly is clean and without any defect, as you could expect from an industrial-grade product at this price level. However, we can’t help but notice the Artec Eva design looks a bit like an electric kettle! It’s not as “sexy” as it could be. That being said, this 3D scanner will fit perfectly as it is in a medical environment, one of the most popular professional targets for Artec.

The Eva is very conformable to hold with its smooth handle, and it offers a nice weight balance as long as it’s held vertically. It rests nicely straight when not in use thanks to the discreet “feet” visible on the bottom right corner of the picture above. The Arte Eva weighs 0.85 kg.
The provided cables (power and connectivity to the computer) are both long enough and of good quality. They are easy to connect and hold in place firmly once plugged.

The Artec Eva relies on the white structured light scanning technology. A white pattern is projected on the object to a 3D scan. Two cameras record the deformation of the pattern due to the object’s shape, then the 3D scanner can compute the 3D surface. This technology is very effective (fast and accurate) but does not work under bright daylight (the casted structured light is dwarfed by the sun power).
However, it works outside has Artec demonstrated in one of their fossils’ digitalization. The strong flashes of the structured light will also blind you if directly looked in the eye. That is why face-scanning requires the user to close his or her eyes. The famous Obama 3D model was made from a 3D scan by the Artec Eva, which was then modified to integrate open eyes.
Getting started

Getting ready for your first scan once the software is installed is really easy with the Artec Eva. You just have to plug the USB and alimentation cables, then launch Artec Studio 11.
On the left of the screen are several icons which trigger the different step of the 3D scanning process, from acquisition to publishing, going through all the preparation and optimization steps. The top one is used to start scanning in 3D (see the screenshot of Artec Studio 11 below).
Once the 3D scanner is connected, you can activate the preview mode and register the scans. This can be achieved by clicking the button in the software interface or directly from the Eva front top button, signaled with a small arrow, similar to a “Play” button.
A very important point: the Artec Eva does NOT require any calibration, a huge advantage compared to some of its competitors.
In the main Artec Studio 11 interface, the green bar acts as an indicator for finding the correct 3D scanning range. Too close or too far won’t work: the user is required to stay within a fixed distance between 400 and 1000 mm of the object.
A few other options are also available at this point, among which:
- Capturing or not the texture of the 3D object.
- Using targets.
- Activating real-time fusion.
- Enabling automatic base removal.

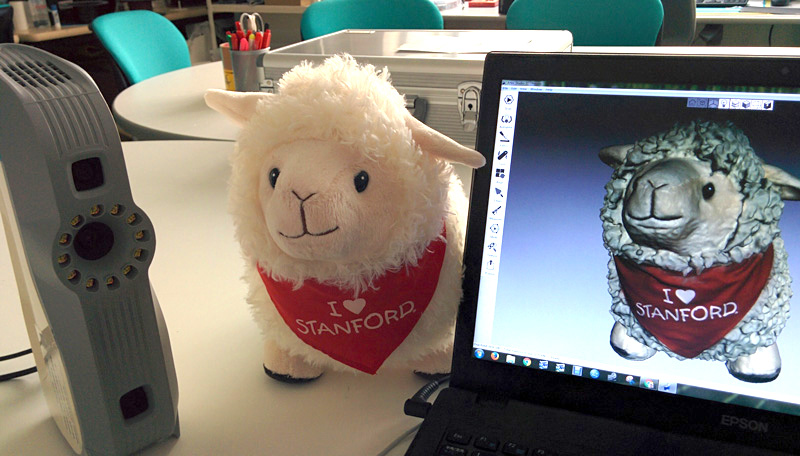
For our first tests, we used the default parameters and started 3D scanning a mid-sized sheep plush, the famous “Stanford sheep”. We chose this object because it was easy to manipulate and with distinctive features and textures, knowing the wool texture would be challenging to capture. The Artec Eva did a great job, which is detailed in the Results section of this article.
The main steps for getting started with the Artec Eva are the following:
- Start Artec Studio 11.
- Plugin the 3D scanner.
- Activate the preview.
- Start 3D scanning.
- Perform the 3D scans cleaning, alignment, and reconstruction.
- Save and/or publish the 3D models.
Experience
Software
The Artec Studio 11 Ultimate software is really great. Compared to Studio 9, which we usually use, the gap is huge. Without entering too much into technical details, let’s focus on two major improvements.
Automatic base removal
When 3D scanning, the 3D scanner usually acquires everything: the object and its environment. This means that when you scan an object on a table, the table is 3D scanned at the same time. As several 3D scans are often required to obtain a complete 3D model of a single object or part, a lot of unwanted data of whatever surface your object is standing on is also generated throughout the process.
With the “Automatic base removal” feature, the software automatically detects the flat surface on which your object is standing, and gets rid of it. This step was one of the most time-consuming for Artec users using a previous version of the software.

Autopilot
To us, Autopilot is the killer feature of Artec Studio 11. It is a step-by-step tutorial where the user is guided through the most difficult steps of the reconstruction process. The scans generated by the 3D scanner need to be cleaned, aligned, and stitched together before making a complete 3D virtual object; the “real” 3D scan you need to use.
The Autopilot features make these steps much easier by asking a few simple questions, such as: What is the size of the object? How good is the object to be 3D scanned? Autopilot takes away a lot of the struggle that comes with 3D scanning an object. However, some manual operations often stand necessary, such as alignment, one of the most critical steps.
Some manipulations (such as pan and rotate for alignment of 3D scans) inside the software are not always intuitive and require the use of several different shortcuts. Of course, everything is explained during the tutorials but a few additional cues could still be useful to help non-expert users, such as museum conservationists or doctors, who are not used to manipulating a 3D scanner and might have a hard time ramping up their 3D competencies.
3D scanning
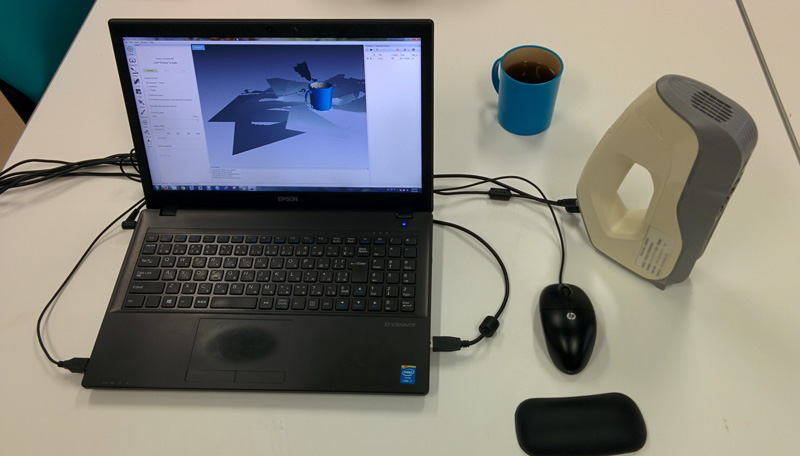
Before starting with the 3D scanning process itself, we must stress that it’s a requirement to own a (very) powerful laptop. As a reference, below are the characteristics of the computer we have been using. Consider this setup as an absolute minimum. The 3D scanning process is very stressful for the computing resources, especially the CPU, the GPU (Graphics Processing Unit), and the RAM. An SSD (Solid State Drive) is a big plus.

The 3D scanning process with the Artec Eva and Artec Studio 11 combination is very smooth, thanks to the effectiveness of the Autopilot mode. The Artec Eva is a quite ergonomic device, comfortable to hold and manipulate. After a few 3D scans, it is possible to anticipate the correct scanning pace to avoid a loss of focus from the 3D scanner, and also to anticipate what is the correct distance towards the subject or object, neither too close nor far away.
The only flaw of this 3D scanning process is dealing with the cables. Several times we tangled them, walked on them and even 3D scanned them by inadvertence. We know the wireless connectivity and battery power are trades-off with dimensions and weight, but these are two important (and missing) features on a handheld 3D scanner. This is partially solved by Artec with their optional $850 battery pack option. That said, the most portable 3D scanner is not fully wireless (see here for the complete list of wireless 3D scanners).
As with every 3D scanners that cost less than $100,000, there are some technical limitations. First, the level of details and hanging features are very difficult to acquire. The dark, transparent, and reflective object is also hard to 3D scan. This type of object can be coated with non-reflective removable paint.
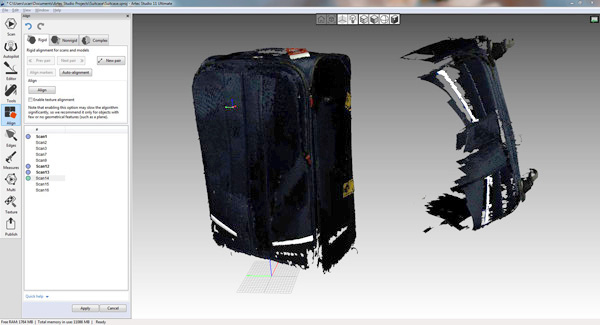
On big objects, such as the suitcase we 3D scanned, the difficulties often arise from uniform surfaces, which prevent the software from doing a proper alignment. An option can be to use removable tape to create some distinctive features which can be captured more easily by the 3D scanner. All in all, our Artec Eva did a very decent job on most of those complex challenges, the suitcase 3D model pictured above and below is a very good example.
3D scan results
To evaluate the performance of the Artec Eva with its software Artec Studio 11 Ultimate, we conducted several 3D scanning tests, including human parts and small and big objects with various types of surfaces. We did not have the opportunity to test the Artec Eva performance for an industrial use case such as scanning metal pipes or some technical part, but given our other tests we are pretty confident to say that as long the object does not have too small features (less than 5 cm) or a reflective/transparent surface, the result will be great.
1. Human foot
Scanning in 3D the foot of a person standing is a popular use case for orthopedics and prosthetics applications. The 3D scan below was captured in less than a minute, with only 10 minutes of 3D preparation. The result is good. Note that a 360 degrees scan of a human part is very difficult as it requires the user to be completely still, which is a challenge even for a few seconds. The little glitches on the shin are due to the user’s movement.
2. Human face
We performed a 3D scan of our own heads in less than 20 seconds. Reconstruction time took less than a minute. The result is very good, with a lot of details. Like all the 3D scanners based on structured light, the Artec Eva does not work very well on hair, especially when they are dark and/or curly. For dealing with such challenging use cases Artec recommends applying water on them and to raise the sensibility level in the software.
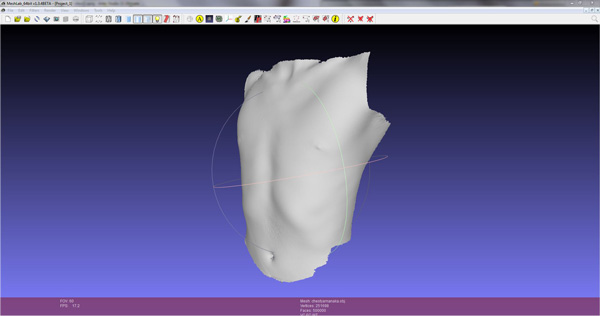
3. Human torso
3D scanning human parts is a popular use case for the Artec Eva. It can be done for medical applications. The biggest challenge for the 3D scanner and software combination is to capture swiftly the 3D information, as any movement or breathing of the user can ruin the process. The result obtained (seen in Mesh lab) is clean and detailed.
4. Shoe
We decided to 3D scan our (worn out) Adidas Stan Smith shoe test the Artec Eva on a medium-sized object. A white shoe is a challenging object to 3D scan, as the textures are uniform and the material a bit reflective. Inner parts and laces are also very difficult. In the end, the Artec Eva did a really good job with a quite detailed 3D model as a result.
5. Standford sheep plush
We thought the Stanford sheep plush was an interesting object to 3D scan, as it is highly detailed with difficult material and challenging details, including small hanging parts. The result is very satisfying with a nicely rendered wool and a realistic bandana! The Autopilot mode was a precious help to accelerate the process, but we had to manually align the 3D scans to get a full watertight mesh.
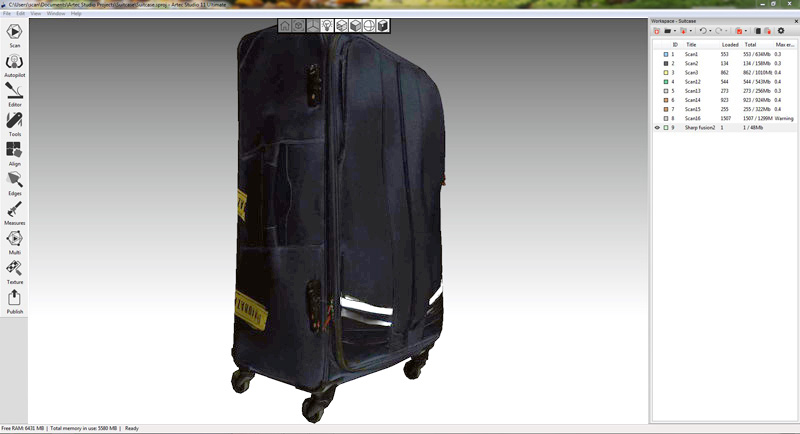
6. Big suitcase
After performing several 3D scans of small objects we decided to test the Artec Eva performance on a big-sized suitcase (1.2 x 0.8 x 0.6 meters) of dark blue color, with reflective features and small rubber wheels. This is a quite difficult object to 3D scan, and yet we obtained amazing mesh results. The colors are too dark, but that can be fixed with a little work on the texture file.
Once again we had to manually align the 3D scans as the automatic feature did not manage to get it right. We also put some yellow tape on the back of the suitcase to have a few distinctive features to perform the alignment of the 10 different 3D scans we collected.
Value
The Artec Eva and Artec Studio 11 Ultimate combination are very effective, offering an excellent user experience. For professionals who want a powerful and flexible portable 3D scanner, the Artec Eva is one of the best options on the market.
However, at $19,800 (without counting a very powerful computer) this 3D scanner does not come cheap and that can be a serious turndown for small businesses and companies. We believe Artec could include in the Artec Eva package some of the optional equipment to make it more appealing, such as the rigid transport case and the battery pack.
Conclusion
Aniwaa’s opinion
The Artec Eva and its software suite is a very interesting product, tailored for 3D experts and other professional applications such as cultural heritage preservation, 3D body scanning, and even crime scene investigation. With its new Autopilot feature, Artec Studio 11 offers an amazing user experience compared to its previous version, it is a big step towards making 3D scanning accessible to entry-level users and more efficient for advanced 3D scanner users.
The Artec Eva has the ability to produce detailed 3D scans of almost all types of objects, as long as they are not too small. For dealing with transparent and reflective surfaces, the cheaper and most effective way is to buy a special spray. We praise the intuitive user experience of the 3D scanner and the Artec Studio 11 software, as well as the quality of the 3D scans produced.
Note that for entering the portable 3D scanning galaxy, a powerful (and therefore expensive) computer is needed. Our only regret about the Artec Eva is its lack of autonomy, and we would like the battery pack to be included in the package, along with Wifi connectivity, to allow for a truly wireless experience.
As a portable 3D scanner based on structured light technology, the textures generated by the Artec Eva are good but cannot compete with photogrammetric-based solutions in terms of chromatic fidelity.
Even in this quite high price range, the Artec Eva does not have a lot of professional portable alternatives.
The Artec Spider and Artec Space Spider can be interesting if you consider using them on smaller objects with more detailed features. If you are on a budget, the Shining 3D EinScan-Pro can be an interesting option, starting at $3,999 (+$600 for the color capture module), but you definitely won’t get the same level of performance and reliability. Also, note that the Shining 3D software is a far cry from Artec Studio 11. Another promising but not yet available product is the Thor3D Drake, with its swappable lenses system, which we should review soon.
