 English
  Français
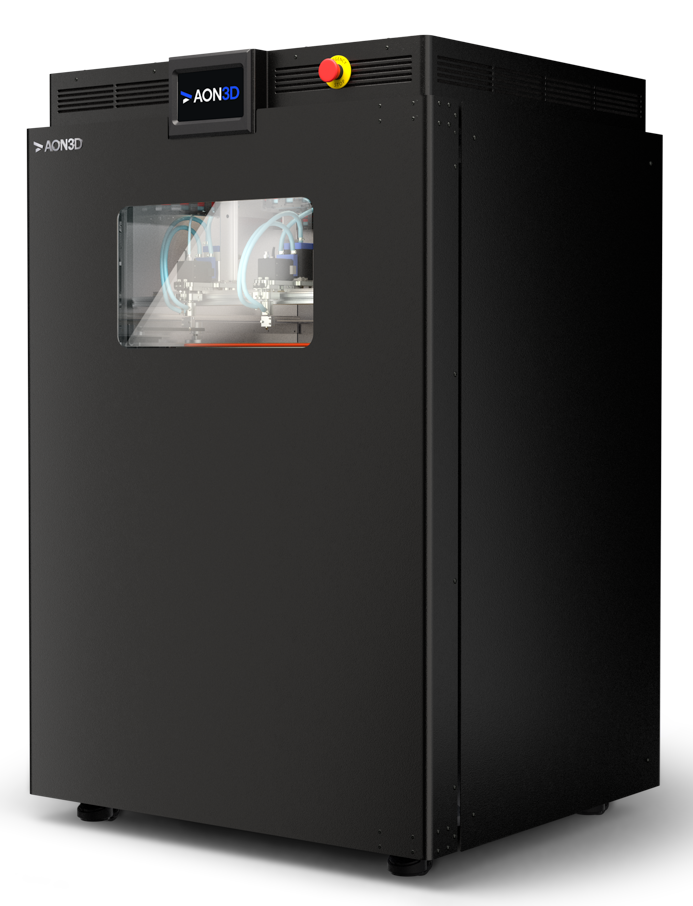
Discovering the AON M2+ high-temperature 3D printer at AON3D’s Montreal HQ


A few words about AON3D
University is full of distractions. For most people, such distractions include sports, student societies, or nightlife. However, when Kevin Han, Randeep Singh, and Andrew Walker were studying Materials Engineering at Montreal’s prestigious McGill University, time between lectures was spent differently: the trio formed a 3D printing startup that would go on to challenge some of the industry’s major players.
Seven years on from the 2015 founding of AON3D, via a successful Kickstarter campaign in 2016 and several multi-million-dollar funding rounds, the former students are still in Montreal, only now they can be found at their company’s sprawling office-factory space in the city’s former garment district, surrounded by more than 60 co-workers.

Kevin’s initial idea of a low-cost machine for high-performance polymers has matured over time into the AON M2+, the company’s fifth-generation 3D printer that is used by high-profile customers like NASA, Boeing, Xerox, and, fittingly, McGill University. Kevin, Randeep, and Andrew might have worried a few professors with their time-consuming side project, but last year the three entrepreneurs found themselves in Forbes’ 30 Under 30 directory. Clearly, there are worse forms of distraction.
In late May 2022, I made the short trip to AON3D’s Montreal headquarters to meet co-founder Andrew and the company’s Head of Business Development, Leif Tiltins. The pair gave me a tour of their office, factory, and print lab and provided a hands-on demonstration of the AON M2+ 3D printer.

Building on the success of its four predecessors, the M2+ retains key value propositions like its large build volume and open material compatibility while introducing important upgrades such as a vacuum bed and improved Z-axis calibration. This review contains my impressions of the M2+, focusing on its key features and user workflow.
 Pros
Pros
- Largest build volume in class at an affordable price
- Swappable build surfaces with vacuum chuck for improved flatness
- Can print high-performance materials without rafts
- Advanced training and expert customer support
- Sealed chamber with good thermal efficiency
Cons
- Higher chamber temp needed for larger prints in materials like ULTEM 1010
- Uses open-market slicers that are not tailored to industrial users and which lack production features such as machine automation
First impressions
First, some background on the printer. Launched in the summer of 2021, the M2+ is a high-temperature, industrial-grade machine boasting a large build volume, independent dual extruders, and compatibility with materials like PEEK, PEKK, and ULTEM. It offers an extrusion temperature of 500°C+, a bed temperature of 200°C+, and a chamber temperature of 135°C. Layer heights can go down to 0.05 mm and travel speeds up to 500 mm/s.
AON3D AON M2+ overview
The AON M2+ is a 3D printer produced by AON3D, a manufacturer based in Canada.
It uses the Fused Filament Fabrication technology to produce elastomers and thermoplastics parts using filament feedstock.
It offers a build volume of 450 × 450 × 565 mm.
While I was taking a first look at the M2+, Andrew and Leif explained that the company has always favored a streamlined and simplified machine over one packed with onboard features that could break and require maintenance. The M2+ doesn’t have a heated dry box, for instance, as the AON3D team found that the benefits of such a feature (able to dry standard materials but not performance materials) did not outweigh the risks (potentially introducing moisture, pre-softening the materials, and causing retraction issues); but the printer still offers several handy features like auto bed leveling, filament runout detection, and a water cooling system for keeping critical components at a working temperature.
This is the fifth generation of 3D printer from AON3D, offering a handful of improvements over its predecessor (the discontinued M2 2020) such as improved Z-axis calibration and a revamped system for swapping out build surfaces, which we’ll discuss later in the review. Visually, the new model can be identified by a smaller window looking onto the build chamber, a change that has improved the thermal efficiency of the machine.
At nearly one and a half meters tall, the AON M2+ is not what most people picture when they think of an FFF printer. There’s no mistaking its status as an industrial-grade machine, and its considerable footprint (955 mm wide and 1150 mm deep) is necessary to accommodate the machine’s large build volume (450 x 450 x 565 mm) and high-temperature hardware. That being said, it is actually shorter than many comparable high-temperature FFF machines.

At the time of my visit, AON3D had five machines up and running in their print lab. And while not all users will have the luxury of a dedicated printing environment like that, the fully enclosed M2+ is safe to use in places like an office or a university classroom. However, physically getting the machine into such an environment can be a tight squeeze: it can just fit through a standard 32” door. Fortunately, the printer moves easily on its casters, so installation is not as daunting as it might first appear.
Getting hands-on with the AON M2+
To demonstrate the M2+ in action, the AON3D team agreed to print some sample parts, going through the typical printing workflow, from filament preparation to part removal.
As my trip to the AON3D headquarters was set to last for around five hours, we decided to print a batch of small parts: a quartet of threaded nuts printed in aerospace-grade ULTEM™ 9085. The aim here was to go through the entire printing workflow (part design aside) to evaluate the overall user experience for the M2+.
Before that, however, I was shown the results of a print job that we asked AON3D to carry out the previous day in order to demonstrate the large-volume printing ability of the M2+. The part was a 142 x 107 x 290 mm fluid mixer, printed in highly chemically resistant PEKK and quartered for better visibility of the internal sections.

Although I did not see the print take place — it took 28 hours, longer than our allotted meeting time — it was still attached to the build surface upon my arrival. I was thus able to remove the part from the surface without a scraper, by rocking it back and forth. A timelapse of the printing process can be seen later in the article.
Preparation: heat-up, calibration, and material loading
The four threaded nuts were the focus of the day, and the first step towards printing them took place shortly before I arrived. That involved heating the AON M2+ to its required temperature, a process that takes about two hours.
For some users, this delay might seem like a bit of an obstacle, though it is — as things stand — an unavoidable aspect of high-temperature printing. (For what it’s worth, Leif says the ultimate target for future AON3D machines is a 10-minute warmup time, though there is no timescale on this.)
The second step in the workflow gave the AON3D team an opportunity to demonstrate one of the main advantages of the M2+ over its predecessor. Equipped with a more accurate Z probe, the M2+ offers significant improvements in Z-axis calibration, leading to improved flatness, better first layers, and better part quality. This calibration process took about two minutes (using the default probe bounds) and only required three taps of the printer’s LCD display: navigating to the Control page, selecting the Z Calibration tab, and pressing Start.
Next up, the M2+ had to be loaded with a spool of SABIC ULTEM™ 9085 filament. Like its predecessors, the M2+ is open in terms of material compatibility, and the AON3D print lab was, unsurprisingly, well-stocked with high-performance materials from a range of chemical giants and 3D printing specialists. The team uses a gravity convection oven from Quincy Lab to dry out its materials before printing and recommends M2+ customers use similar equipment.
The SABIC ULTEM™ — one of 14 third-party materials to have undergone full material validation by AON3D’s Applications Engineering team — was a suitable choice for this quick print. On the M2+, the spool holder is located on the back of the printer within an airtight filament storage and feeding box that keeps material dry.

Inside the dry box, the team had placed a packet of molecular sieve desiccant, which they say is better for humidity control than silica gel or an onboard heating system. Filament loading should take no more than five minutes (unless also swapping hot ends), though this obviously shortens with experience, as Andrew loaded it up in about two minutes.
Another step in the physical preparation of the printer was selecting and installing a build surface. Easily swappable surfaces are another new feature of M2+, and for these ULTEM parts a reusable CF-PEEK surface had been installed before the printer started heating up. The M2+ uses a vacuum chuck system for sealing the build surface to the bed, a process that, when also accounting for inspection and cleaning of the surface, should take less than a minute.

Slicing and first layer
AON3D recommends Simplify3D for slicing, and that’s what we used to generate the g-code for the sample prints. Although these small nuts weren’t a particularly demanding build for the M2+, some parameters in the print profile will seem fairly extreme to desktop FFF users: the nozzle temperature was 385°C (still well below its max temp of around 500°C), with a bed temperature of 170°C and a chamber temperature of 135°C. As the AON3D team already had a print profile for the sample parts, slicing did not take long.
For the batch of duplicate parts, sequential printing mode was used. This meant instructing the printer to print each nut in its entirety before moving on to the next (rather than printing the first layer of all four nuts, then the second, and so forth). In addition to its surface finish benefits, sequential printing meant that, if we decided to end the print early, we would still have some completed parts to examine.
These were the key settings for the print:
- Layer height: 0.15 mm
- Shells: 2
- Internal fill pattern: Fast honeycomb
- Internal fill density: 20%
- Print speed: 50 mm/s
While the first layer was printing, Andrew made a small Z-offset adjustment (tweaking the distance between the nozzle tip and build surface) using the printer’s display. Though not of major importance, it’s a nice touch for the GUI to use the unambiguous language of “Farther” and “Closer” (from/to the build surface) when adjusting the Z-offset, as opposed to simply using positive and negative values, which are not necessarily intuitive to beginners.

It’s worth mentioning that AON3D achieves raftless prints. Rafts are generally used as a preventive measure to limit warping on first layers, but AON3D’s material expertise and focus on optimized print parameters allows them to print parts without any rafts.
For remote operation, the M2+ can be accessed by web browser on any computer on the same Wi-Fi as the printer, and the browser interface is identical to that on the printer’s physical LCD display. (There is no cloud access to the printer, so off-site printer management would require remote desktop access or another solution.) For this print, we uploaded the g-code to the printer via Chrome on a desktop PC in the company’s print lab. This process was fairly straightforward, with no network issues, and the printing commenced with a couple of clicks.

Satisfied with the first few layers of the sample prints, we left the M2+ to continue printing unattended for a few hours. Despite its size, the M2+ was fairly quiet during operation, and there was minimal residual heat from the machine despite the high chamber temperature.
3D printing results
Fluid mixer (PEKK)
Although I wasn’t present for the printing of the large PEKK fluid mixer, the results were impressive. Despite its size, the part had no visible warping or artifacts, the surface finish was excellent, and it felt stiff and solid.
The part had been printed using a 0.6 mm nozzle, 0.15 mm layer height, and 30% infill. To improve the surface finish on overhanging sections, the AON3D team had used a slightly lower nozzle temperature than recommended for this particular PEKK filament. A time-lapse video of the part being printed can be seen below:
Small batch (ULTEM™ 9085)
The batch of ULTEM™ nuts was also of high quality. The internal threading of each nut was well-defined, even without support material between its ridges. There were no evident deformations on any of the duplicate parts, nor was there any warping — though, as mentioned, the dimensions of the parts perhaps did not push the M2+ to its limits.
Although we had instructed the printer to make four copies of the nut, we decided to end the print early due to time constraints. This allowed me to see the intuitive “Pause” and “Stop” buttons on the GUI’s home screen working as intended. Powering down the heated areas of the M2+ was equally intuitive.
With protective gloves, I was then able to remove the hot ULTEM™ parts from the build sheet and then remove the build sheet itself once the vacuum had been disabled. The three completed nuts took under three hours to print.

I might have been able to pop the parts off the build sheet at this point, but due to a small mishap, the printhead had (accidentally, but helpfully) done this for me. Because the printer — printing the parts sequentially, remember — had just started on the first layer of the fourth nut when we paused the print, the low-hanging printhead collided with the three finished nuts on the way back to its home position, knocking the parts free from the build surface. This would have been avoided if we had set a maximum height clearance value on the slicer prior to printing or paused the print before it had started on the fourth nut.

Fixture (CF-PA and soluble AquaSys 120)
Although our on-the-day test print didn’t involve the printing of support structures with the second extruder of the M2+, I did want to get a feel for how prints with soluble supports turn out — and how easy it is to remove those supports.
The AON3D team therefore showed me a pre-printed CF-Nylon part with support structures printed in AquaSys® 120, a fast-dissolving material developed by Infinite Material Solutions (IMS) that can be safely poured down the drain.

Using an ultrasonic water tank set at 60°C, the supports were adequately loosened up after around 30 minutes, and could be removed easily with a bit of manual brushing:
The CF-PA fixture also served as evidence of the composite printing ability of the M2+, which has a printhead equipped with a hardened steel nozzle that is tough enough to print abrasive materials such as carbon-fiber-filled filaments.
Success Plan and future improvements
Throughout our meeting, Andrew and Leif were keen to stress that the AON3D mission is more about helping customers discover new high-value material applications than it is about providing machines.
In line with this attitude, you’ll notice that the AON3D website offers a number of custom solutions like Advanced Additive Training, DfAM, materials selection, and development of print process parameters for specific applications. Such services are included when ordering the M2+ on the “Success Plan,” a kind of all-in-one consulting, development, and upgrades bundle. Although this wasn’t exactly a feature I could test out for myself, it warrants mentioning as it is clearly quite an important aspect of the overall M2+ package.

In practice, the Success Plan gives customers direct access to a dedicated customer service rep — always someone with an engineering background — who can become a de facto material scientist for the customer, offering expert advice and, if required, technical instruction via video call. For North American customers, the package even includes on-site support.
The plan also includes upgrades to the M2+, the most significant of which is tentatively expected this fall. That new feature, Duplication Mode, will leverage the IDEX system to effectively double the machine’s production rate. Developing this feature has been a long endeavor. For the feature to work successfully, the nozzle tips need to be perfectly aligned and the build surface perfectly flat — whether at room temperature or, more challengingly, at 135°C. Changes in temperature can cause minor expansion or shrinkage of materials that can undo this precise calibration, and accommodating these high temperatures requires close analysis of factors like crystallization kinetics and convection across the build platform.
A more imminent development regarding the M2+ is its pending CE certification under the Machinery Directive, expected this June, meaning the printer will soon be widely available throughout Europe.
And, on another note, AON3D is also conducting research in interlayer shear testing in collaboration with the National Research Council of Canada and Toronto Metropolitan University. Together, their goal is to develop a test standard for the industry to characterize the interlayer weld strength of FFF parts. AON3D will in turn be able to maximize printed parts’ mechanical strength in the Z-axis by further fine-tuning process parameters.
You may also like:
Leading the development of AM standards with interlayer strength characterization

Conclusion
Not many FFF 3D printers can print high-performance materials like PEEK, PEKK, and ULTEM™ to an industrial standard, and even fewer come with a modest five-figure price tag.
In the high-temperature printing market, the AON M2+ sits somewhere between low-cost options like the INTAMSYS FUNMAT PRO 410 (the build volume of the M2+ is just over three times bigger and 45°C hotter) and the premium Stratasys Fortus 450mc (which, at around $90,000 minimum more than the M2+, has a higher chamber temperature but a significantly smaller build volume). The M2+ does, as the company says, “democratize access” to a form of 3D printing that was, until very recently, prohibitively expensive.
Apart from a greater emphasis on filament drying and a longer warmup time, the M2+ printing workflow does not differ greatly from that of a standard FFF machine. The use of non-proprietary slicing software (and materials) adds to this feeling of familiarity, although some industrial users might find the lack of automation and intuitive cloud access to be a limitation.
Overall, the M2+ delivered excellent printing results in the short time I was able to see it in action. Furthermore, Andrew and Leif demonstrated a deep interest in what customers were doing with their machines, and there is evidently a willingness among this team to help users squeeze every last drop of potential out of the M2+.
At $59,400 (and with financing available), buyers are getting a high-end machine and a serious amount of materials expertise to go with it.
