Geeetech E180 review: a desktop 3D printer for beginners

Introduction
Geeetech, also known as Shenzhen Getech, is one of the biggest 3D printer manufacturers in China and was founded in 2011. However, they chose to launch the E180 through Kickstarter in September 2017. The Geeetech E180 is based on the manufacturer’s MeDucer 3D printer, which boasts a slightly bigger build volume.
This budget 3D printer, available for purchase on GearBest at around $275, is delivered fully assembled. It looks very similar to the Monoprice MP Select Mini.
 Pros
Pros
- Low price and preassembled
- Intuitive touchscreen with bed leveling assistance
- Compact size
- Pause and resume (works in case of power failure)
 Cons
Cons
- Abrupt, unsolicited pauses
- Easy nozzle jam
- Faulty screen firmware
Packaging
Unboxing
We received the Geeetech E180 in a medium-sized cardboard box, seemingly a bit worn out from shipping. After opening the box, we found two styrofoam blocks taped together, taking up the whole space. The instruction manual and quick guide rested atop these blocks.
Once we take out the styrofoam, we notice that the power cord is on one side. On the other side, there are more accessories (details further on). Between the two styrofoam shells, we can finally see the actual, pre-assembled 3D printer. The packaging is simple and efficient.


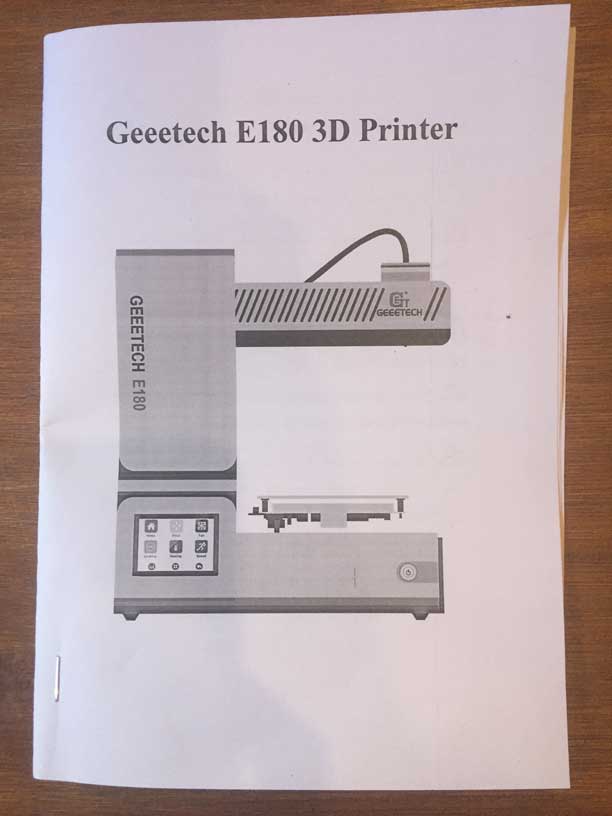
Instruction manual
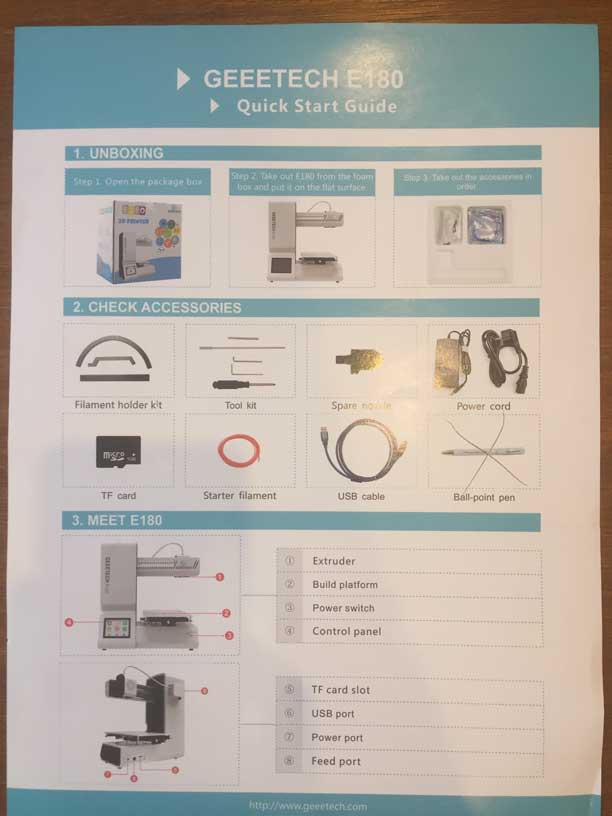
Geeetech provides two different support documents: a quick start guide and a specifications/contact leaflet, both in English. The quick start guide provides an accessories checklist, indications of the 3D printer’s parts (extruder, build platform, connectivity ports, etc.), and how to to get started with the E180.
This quick start guide’s instructions only show basic functions, such as loading filament and starting a 3D print. There is no information about the bed leveling assistant or other settings. The full user manual is available on Geeetech’s website.
Accessories
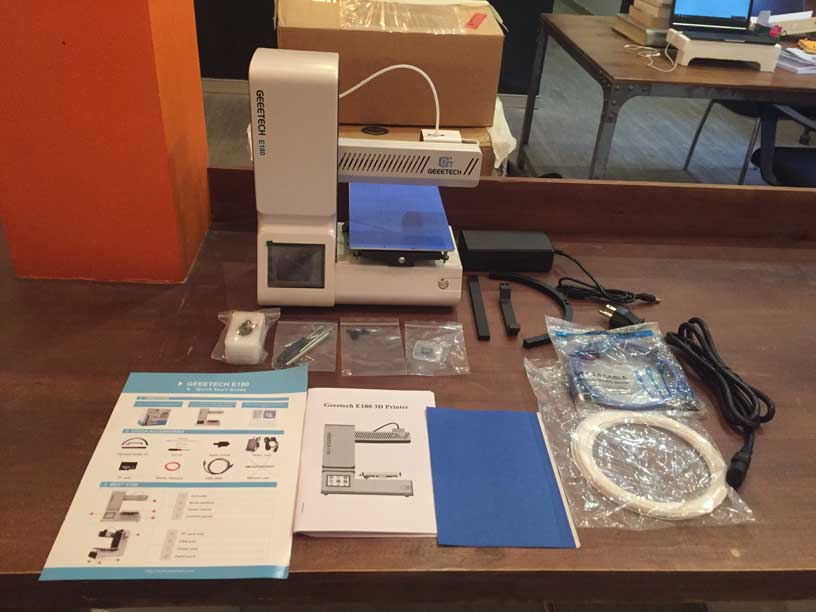
Geeetech includes a few accessories with the E180:
- Starter filament
- Spool holder kit
- Micro SD card
- Tool kit
- Spare nozzle
- Power cord
- USB cable
There is no adapter or card reader for the micro SD card; fortunately, we have our own. The toolkit is composed of two Allen keys, a small screwdriver, and a rod to push filament through the nozzle.
Overview and setup
Software
Since this 3D printer is open source, basically any slicing software is compatible. Geeetech’s three recommendations are Simplify3D, Ultimaker Cura, and their proprietary software EasyPrint 3D. Geeetech’s free slicing software, EasyPrint 3D, is simple enough for beginners to use.
It is easily downloadable for Windows on Geeetech’s forum and features the basic functionalities common to any standard slicing software. Geeetech also provides its own mobile app to control the 3D printer, share feedback with other E180 users, and even directly use ready-to-print 3D models. The app’s interface is, at first glance, intuitive and simple to use.
Hardware
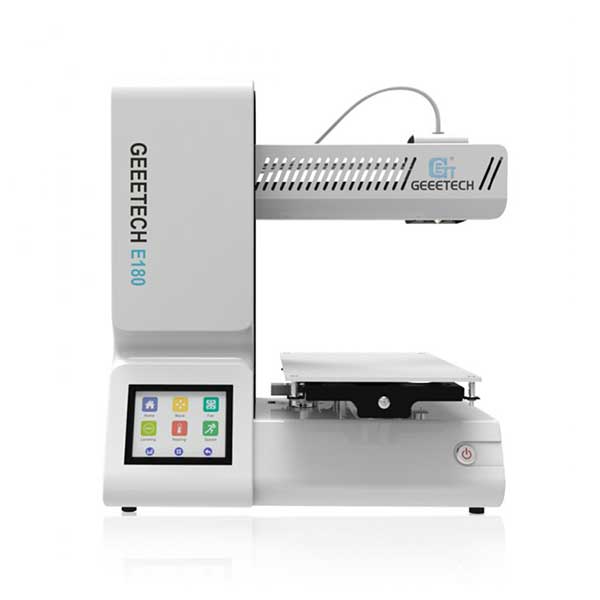
The Geeetech E180 is a small, pre-assembled 3D printer that can fit on any desk thanks to its compact dimensions: 284 x 156 x 320 mm. Plus, the E180 only weighs 4 kg and is easily movable.
The E180 features a 3.2” color touchscreen on its frontside, where users have the possibility to tweak settings, use the bed-leveling assistant, or launch a 3D print.

The extruder is mounted “Bowden” style, meaning that it is separated from the hotend. This decreases the weight that is put onto the moving printing head. The nozzle has a protective cover all around to help prevent users from burning themselves (unless they touch the very tip of the nozzle). Also, the print bed doesn’t have a heating function.
Design-wise, the E180 isn’t the most modern-looking machine out there. However, it is simple and friendly. There are no apparent cables or bare components.
Getting started
Getting started with the Geeetech E180 is quite easy, although we do have to mount the spool holder beforehand. This only takes about a minute.
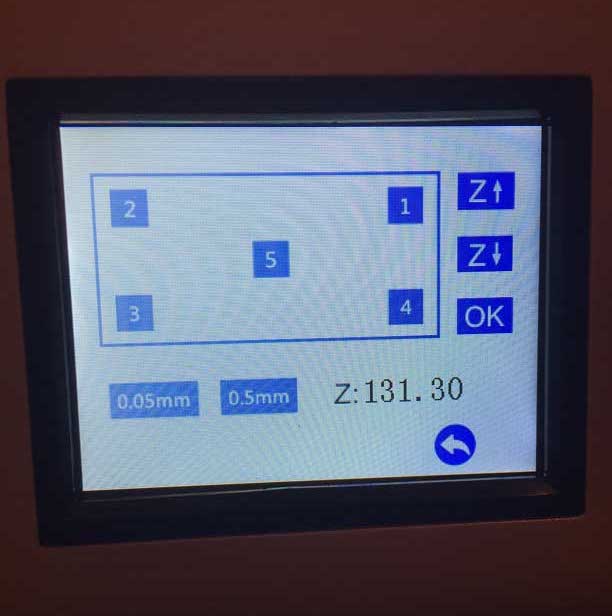
Then, we must check to see if the bed is leveled with the E180’s bed-leveling assistant. It’s quite easy to proceed to build plate calibration with the touchscreen’s 5-point guidance.
After that, we have to heat up the nozzle to over 200°C in order to feed the filament through. There is a heating function on the touchscreen. Then, we insert the filament through the Bowden extruder (or “feed port”) on the back of the 3D printer.

Once the filament feeding is done, we can insert the Micro SD card loaded with a Gcode file. Then we just need to press print on the touchscreen to select the file and launch the 3D print.
Experience
Software
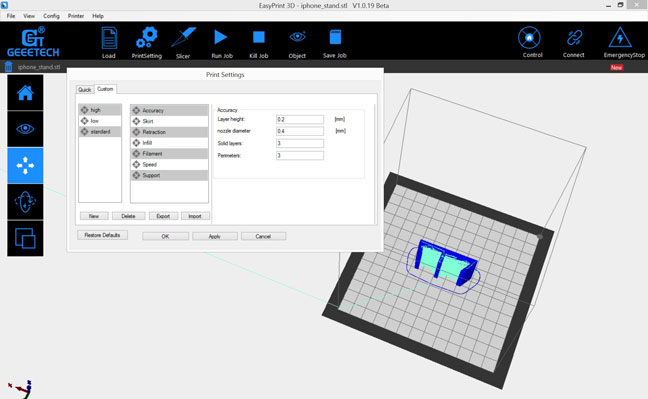
EasyPrint software is easy to use and features basic functionalities. As Geeetech’s proprietary software, it includes presets for all of the manufacturer’s 3D printers.
The software allows users to move and scale a 3D model, and to tweak basic yet important settings such as:
- layer and wall thickness
- nozzle temperature
- infill density
- support structures
This slicer gets the job done, but Ultimaker Cura has a much nicer interface and provides users with more advanced settings.
Regarding the EasyPrint app, it’s a good feature to have, but only if it works. We couldn’t connect our Geeetech E180 to the Wi-Fi network, so we didn’t have the chance to use the app as a remote controller. The app also has quite a low rating on the Google Play Store, confirming its ineffectiveness.

3D printing
Interesting features
In the heart of Phnom Penh, Cambodia, it’s not unusual to experience power outages. This can be frustrating when in the middle of 3D printing. That’s why we were pleasantly surprised when we were able to resume a 3D print after a power cut!
The bed-leveling assistant is also quite nice. There are five points to move the 3D printing head to: the four corners and the very center of the print bed. Users still need to use a sheet of paper and do manual adjustments, but it’s much more fluid than having to move the print head and build plate by hand.
Furthermore, the modular nozzle is easily swappable. This is useful in case of a nozzle jam.
Disappointments
We had to unjam the nozzle several times, and often the E180 would just abruptly stop 3D printing without reason. It may be due to overheating, but neither the touchscreen nor the instructions manual mention this issue.
Also, sometimes the layers would completely shift. This wasn’t due to a file problem, as it would happen randomly at different heights. We think it may be caused by the cables on the 3D printer’s arm blocking the head from moving.
Another inconvenience: bizarre screen display. One day we turned the 3D printer on to find the screen display completely bugged. This is apparently a common issue for users, who either experience the display bug or end up with a completely black screen.
The solution is to remove the black side panel from the 3D printer and take out the SD card from the back of the screen. Then, delete the files on the card and replace them with downloaded files available on the Geeetech forum. Put the SD card back, and turn the 3D printer on.

Noise
The Geeetech E180 doesn’t go unnoticed when 3D printing, emitting about 60 dB. Even when it is not 3D printing, there is a 40 dB noise level. That said, the noise is definitely bearable!
3D printing results
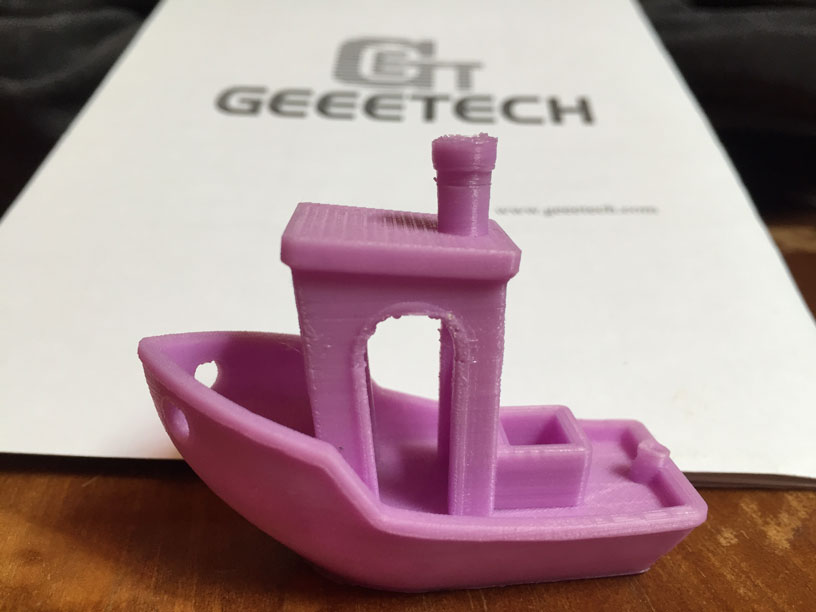
We used Sunlu’s noctilucent purple filament for testing.
1. Benchy
The Benchy is one of the most famous 3D printable models available online. This 3D model enables users to identify which settings they need to adjust to successfully take on other models.
We did a few of these, to finish with an OK result. There was a bit of oozing but, overall, it is good enough for a low-cost 3D printer.
Test settings: 40 mm/s print speed, 3 mm brim, 0.2 mm layer thickness
2. Make: torture test
The walls are rather smooth, and the E180 does a good job with the first layers! It isn’t so much the case for overhangs, however. We tried this torture test three times with different settings and didn’t manage to get a decent bridge. Maybe it could be achievable after more tweaking. There’s also some oozing, and gaps between the infill and the outline.
Test settings: 40 mm/s print speed, 8 mm brim, 0.2 mm layer thickness

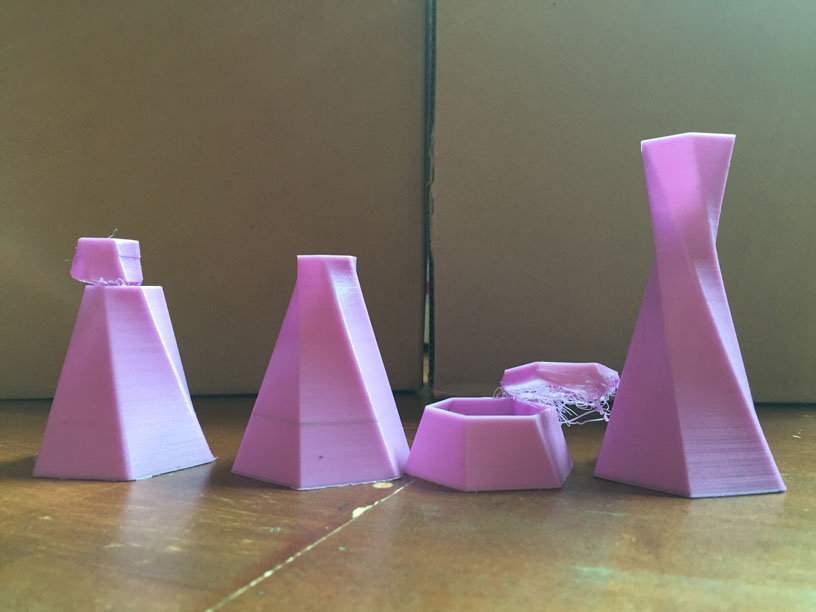
3. Twisted Hex Vase
We only got the full object on the fourth try – previous tries were thwarted by shifted layers! The final result is really impressive though. There are just a few blobs/zits towards the upper layers, but the walls are otherwise very smooth.
Test settings: 40 mm/s print speed, 3 mm brim, 0.15 mm layer thickness

4. Lattice cube
This model was a bit of a surprise. We launched the print without expecting it to actually end up building correctly. Sure, there’s stringing and oozing – but it’s a complex structure, 3D printed with a 300-dollar 3D printer.
Test settings: 35 mm/s print speed, 3 mm brim, 0.2 mm layer thickness

Value
This budget 3D printer has a good price-to-performance ratio when it comes to 3D printing quality. It’s capable of achieving smooth layers and outer walls, without requiring much tweaking as a DIY 3D printer would. However, it’s not comfortable with demanding overhangs.
Also, we did experience a few problems such as mid-print stops, layer shifting, and touchscreen bugs. Mid-print pausing may have been due to overheating and shifted layers may have been caused by the extruder cables. These issues are solvable with some adjustments, and the touchscreen issue requires users to reformat the SD card
After our Geeetech E180 review, we’d say that this budget 3D printer is a good fit for beginners or basic users. It does have a few issues, but nothing that would make the E180 good to go to the trash can. Aside from that, 3D printing results are quite good for this price range.
Final Rating: Aniwaa’s opinion
This budget 3D printer is suitable for beginners and hobbyists, but mostly as an introductory 3D printer. Due to its small build size, lack of a heated print bed, and the issues it presents, users (especially advanced users) will quickly grow out of the E180.
At $275, the Geeetech E180 could make for a nice gift during the holiday season or for a birthday. However, it is quite similar to the Monoprice MP Select Mini, a popular budget 3D printer which is cheaper and does feature a heated print bed.
