English
  Français
Raise3D Pro3 Plus review: A large, professional workhorse


Introduction
Raise3D launched its first 3D printer series– the N Series– on Kickstarter back in 2015. At the time, their mission was to “raise” 3D printer standards to the next level. Raise3D was indeed a forerunner with features such as a large touchscreen interface, dual extrusion, and a resume printing function to work around power outages. These features are ubiquitous today, but having them in 2015 was quite the upgrade, and at a much lower price.
Hence, Raise3D held its own over the years, receiving extensive praise and reviews from professionals all over the world. The team built on their experience to launch the Pro2 series in 2018, leading us up to today’s Pro3 series (2021).
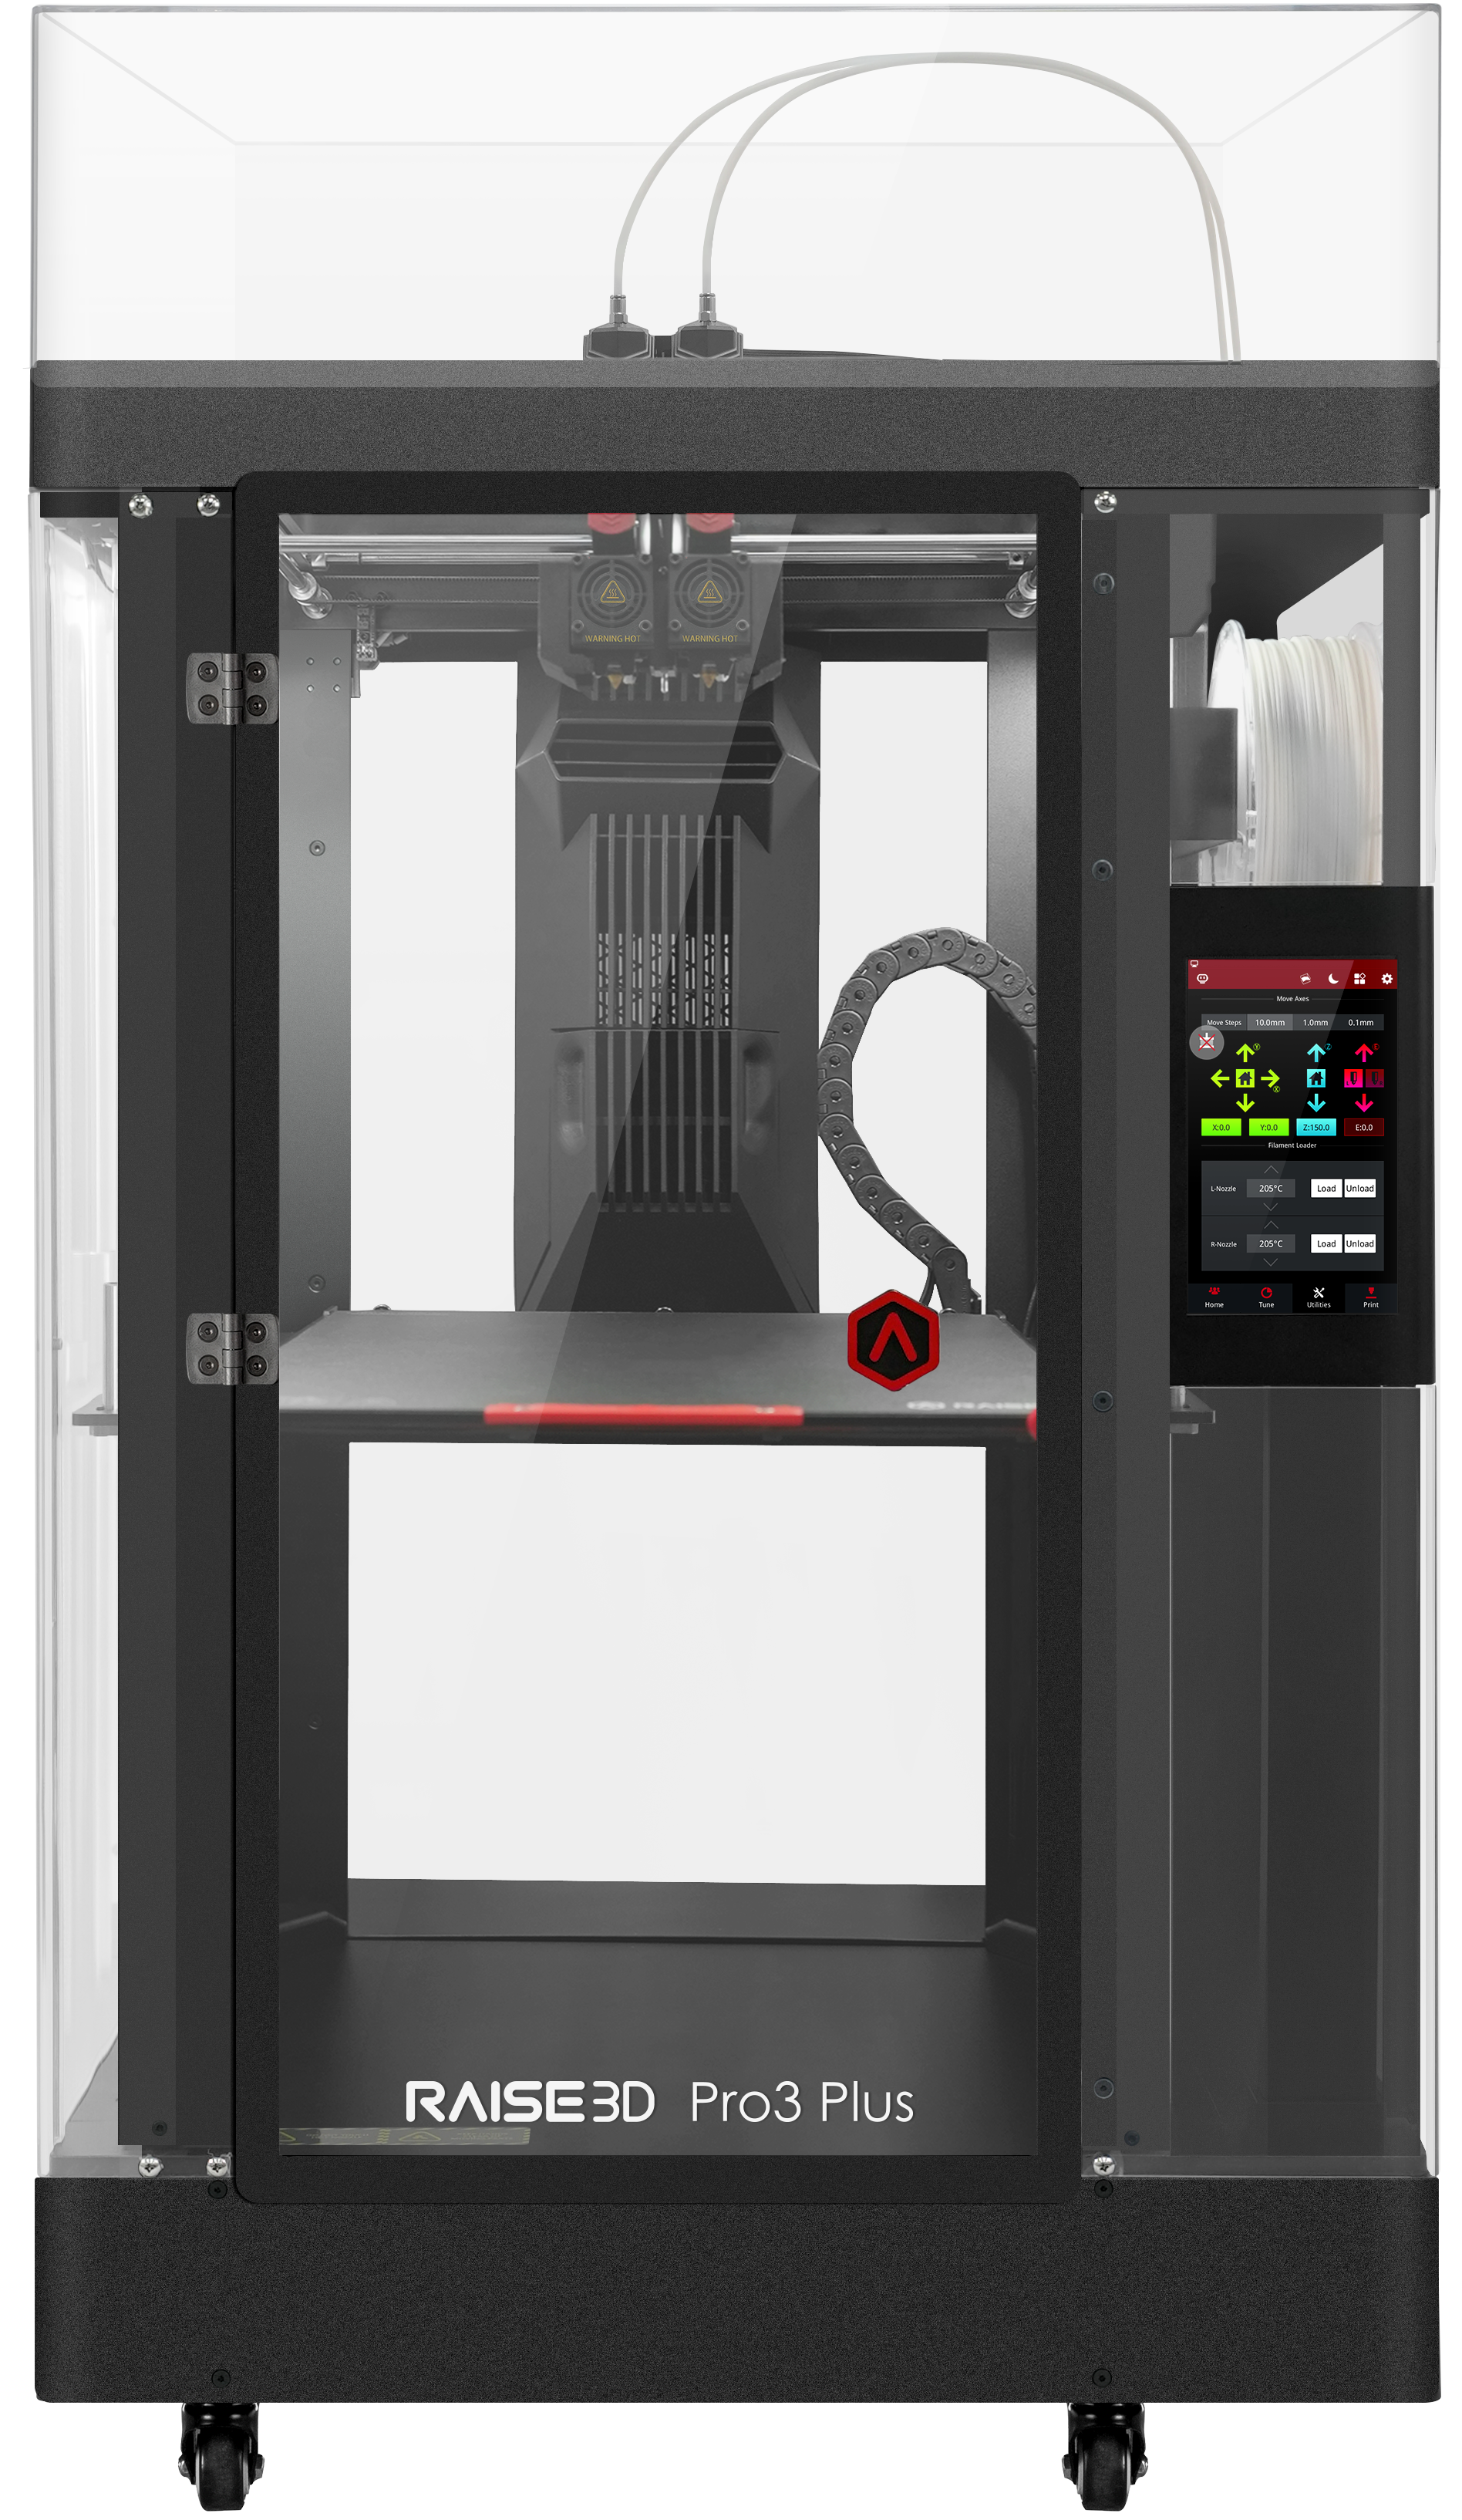
Raise3D Pro3 Plus overview
The Pro3 Plus is a 3D printer produced by Raise3D, a manufacturer based in the United States.
It uses the Fused Filament Fabrication technology to produce elastomers and thermoplastics parts using filament feedstock.
It offers a build volume of 300 × 300 × 605 mm11.81 × 11.81 × 23.82 in.
Raise3D’s Pro3 series includes the Pro3 and the Pro3 Plus which only differ in their build volumes. The regular Pro3 offers 300 x 300 x 300 mm of build volume, while the Pro3 Plus stretches up to 605mm in build height. We tested the Pro3 Plus version.
Here’s a brief summary of its pros and cons before we dig in:
 Pros
Pros
- Easy workflow
- Consistent quality
- RaiseCloud
- Customer service
- Built-in, online assistant (EVE)
- Large touch screen and UX design
Cons
- Sensitive filament detector
- Door opening could be slightly wider
First impressions
Unboxing
The Pro3 Plus is much bigger than it can seem online. We had seen it (and its previous versions) several times at 3D printing events, but receiving the Pro3 Plus on a transport pallet was something.

The Raise3D Pro3 Plus (backside) on its transport pallet. Source: Aniwaa -
Top view of the printer before installation. Source: Aniwaa

The package contains everything you need or might need, including :
- A pair of industrial gloves for protection
- Extra nozzles and all the tools required for their maintenance
- Allen keys for each type of screw on the machine
- AC cables for every country
- USB key
- Metal calibration card
Also included were two spools of red and white Raise3D PLA filament. For such a powerful machine, higher-performance plastics (such as ABS or PC) would have been appreciated. We asked Raise3D for some extras and they sent us some ABS and PC.

Once we were done unboxing the printer– with clear, step-by-step instructions from EVE, the “smart assistant”– we immediately tried the RaiseCloud app and registered our Pro3 Plus. Our colleagues were able to easily join the Aniwaa team from their own phone and, later, check in on different prints. The whole operation was done in less than 15 minutes and worked smoothly.
The Raise3D Pro3 Plus stands firmly on 4 small casters that can each be locked separately. They make the 3D printer extremely easy to move around, yet surprisingly stable when locked in position.
Calibration
We used EVE for the calibration process. Bed leveling is fully automatic, with 63 measurement points for advanced leveling or 9 points for speedy, on-the-run prints.
The Pro3 Plus automatically recalibrates its print bed when necessary. For example, when we launched the huge manifold print, the printer considered it necessary to calibrate the bed again.
It is also necessary to calibrate the nozzles from time to time, a semi-automatic process. The process is very easy with step-by-step guidance from EVE and involves using a metallic card (included) to measure the perfect distance between the nozzle and the bed. Compared to using a business card or a piece of paper, the metallic card makes the bed leveling process much easier– a nice, thoughtful detail from Raise3D.
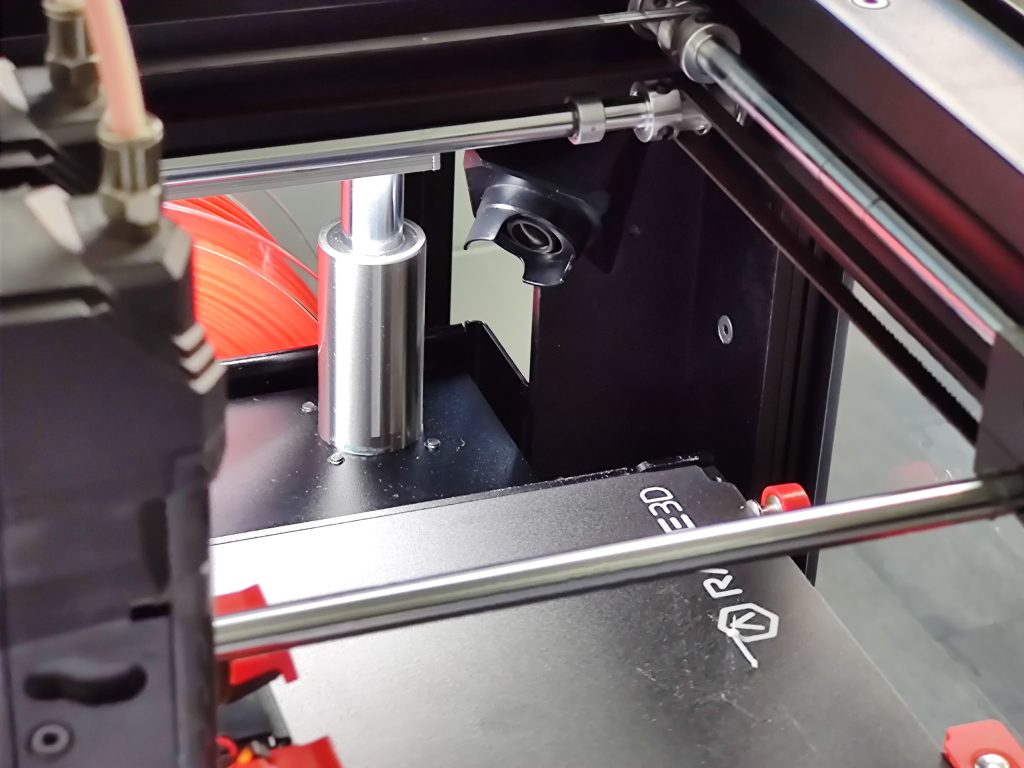
-
EVE guides you step by step. -
Closeup of the nozzles and calibration card.


Filament loading
Loading and unloading are just as easy to carry out and can be managed via the large touch screen interface of the 3D printer. The app gives clear, easy instructions for this process. It also tracks each gram of material you use, so you always know exactly how much filament you have left.
Slicing with ideaMaker
ideaMaker downloads in a few seconds and is easy to install. Once ideaMaker software is installed, it can automatically detect the 3D printer if the computer is connected to the same Wi-Fi network.
Users can choose from useful, preset profiles based on the material they are using. This can help save a lot of time, not only but especially for beginners. Numerous settings are still available for more advanced users.

ideaMaker also offers basic model editing features, enabling users to add shapes, crop specific areas, and more. For the full list of features, visit Raise3D’s ideaMaker page.
Our experience with the Pro3 Plus
ideaMaker software
Raise3D’s proprietary ideaMaker slicing software is a breeze to use. It efficiently slices 3D models in seconds and automatically repairs them if needed. The software is surprisingly fast, even when running on an office laptop with an average graphics card.
We noticed a few minor translation errors, but globally, the software (and the printer’s OS) gives off a very good sense of professionalism and quality.
RaiseCloud software
RaiseCloud is a cloud 3D printer management software solution. It can of course manage Raise3D printers but also accepts other brands (we did not try this functionality). RaiseCloud is really useful to monitor all the 3D printer’s parameters (e.g. extruder, bed temperatures, remaining filament, …) in real time, from anywhere.
It is extremely simple to create a RaiseCloud account and connect it to ideaMaker software. Once one account has been created, it is possible to add and manage several users and give them rights on the platform. The screenshot below, for example, was taken from Elliot’s account:

RaiseCloud is also available as a smartphone or tablet app (Android and iOS), which we’re huge fans of. We used the RaiseCloud smartphone app quite often to perform spot checks on our prints while away from the office. The Raise3D Pro3 Plus’ embedded webcam allows for semi-live print observation. By semi-live, we mean that the camera sends an image every 5 or so seconds. Hence, you can see your print progress, but can’t follow each nozzle movement.
Here are a few screenshots from the app for a part that we were worried about (more on that later):
3D printing and workflow
Once your sliced 3D model is ready, it’s super easy to send it to the printer with the click of a button.
Some warm-up time is necessary depending on which material you’re printing. For ABS, it took about 10 minutes to heat the print bed up to 100°C. The hotend is faster to heat up, taking about 30 seconds to reach 250°C during our ABS printing tests.
During printing, the Pro3 Plus was quite silent compared to most 3D printers we’ve tried over the years. We measured a noise level of about 40 dB during a print, which feels like the equivalent of a tower PC running. Even typing on a computer keyboard seems louder than the Pro3 Plus.
We printed numerous files and they all came out very nicely. There were some minor stringing issues, but nothing prohibitive.
It was particularly easy to remove prints thanks to the magnetic, flexible build plate, and support structures are just as easy to detach from the print. There’s just one small downside, the build plate is almost as wide as the door, so you need to fully open the door in order to get the plate out. A little extra margin could have been more practical.
Customer service
We encountered a small problem with the printer’s filament detection system. First, we used EVE to troubleshoot. This chatbot-like AI assistant works well for most common issues, but here we were unable to resolve the problem. Thus, we anonymously contacted Raise3D’s customer service. (In the meantime, we deactivated the end-of-filament detection feature and went on to print without any issues).
The team got back to us in a timely, professional manner– more points for Raise3D– and we were able to fix the issue, which was caused by the filament itself. After a filament switch, the problem was solved for good. Since it happened with Raise3D-branded PLA filament, we would however recommend Raise3D to lower the sensor’s sensitivity.
Quick zoom on other features
The printer boasts safety sensors on all of its doors. The goal is to pause prints as soon as the printer detects that one of its doors is open. After trying it once (it works perfectly), we deactivated it for easier print observation during the rest of our testing. This feature can come in handy for schools or, in general, any environment where anyone can come see and touch the printer.
Its power recovery function also works very well. We pulled the plug mid-print, and the Raise3D Pro3 Plus was back to work after only a few minutes. It just took the time to heat the extruders and build plate back up to the right temperatures. We were almost expecting the print to bear a mark between the pre-pause and post-pause sections, but you really can’t tell with your bare eye that there’s been a power cut.
The Air Flow Manager (AFM) seems to fulfill its purpose of (a) filtering particles and smells, and (b) managing the heat inside its chamber. We printed some parts with ABS, which can tend to smell, and didn’t notice anything at all while standing right next to it in our office. The smell of ABS isn’t unstandable like resin odors, but if you’re used to printing mostly PLA, it can be surprising at first. ABS is also known to warp easily, but our ABS prints came out very nicely thanks to the AFM.
We also tried swapping hotends to see if the process really was as easy as Raise3D claims it is, and it is. It literally takes just seconds once the filament has been unloaded, and it’s very useful in case you want to replace the full hotend or simply replace the nozzle.
3D printing results
This extensive review of the Pro3 Plus took us 10 days of testing and 180+ hours of 3D printing. We tested the included Raise3D materials (red and white PLA), as well as a spool of Octofiber Blue ABS we had in the office.
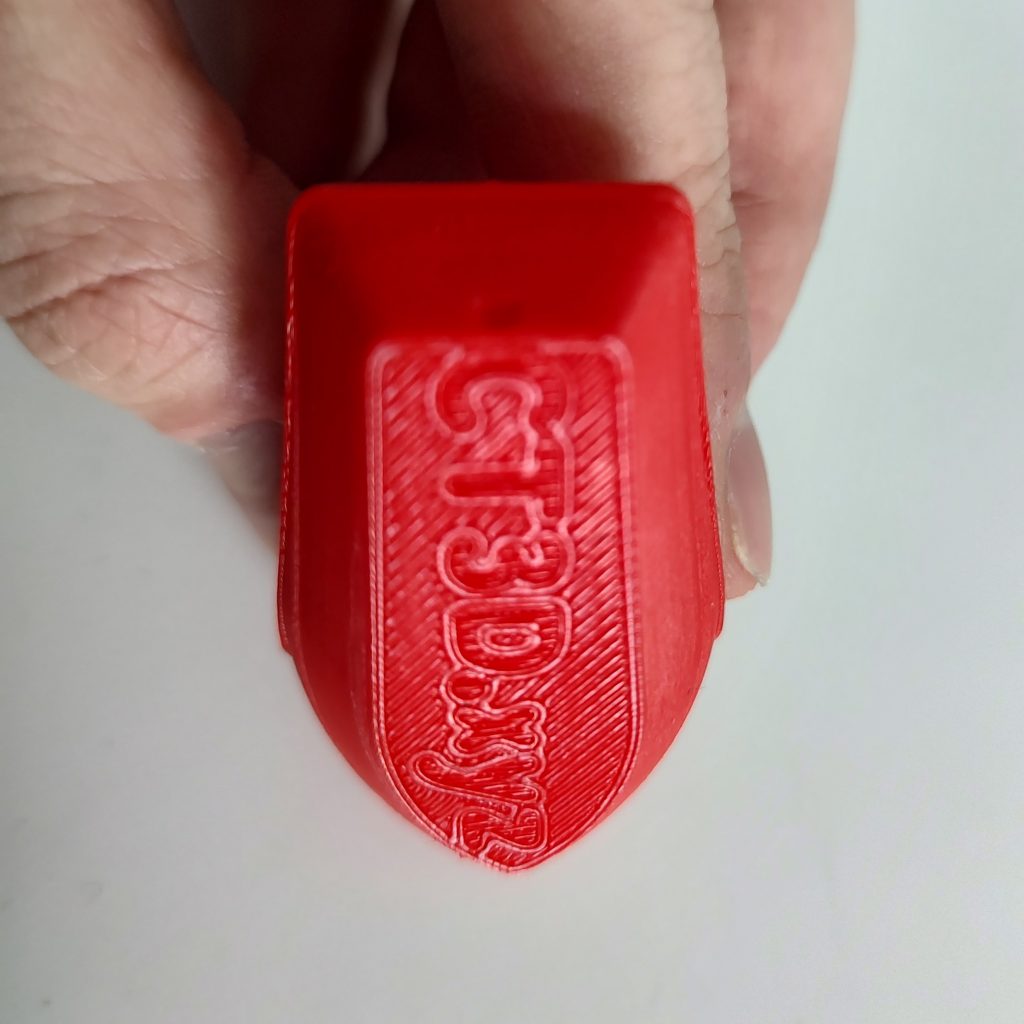
Dual-color keyring
This part was already on the USB key that came with the Pro3 Plus. It is a medium-sized part, measuring about 5cm in diameter. As an original dual-color 3D print with debossed details, it’s an interesting test for our Raise Pro3 Plus review.
It was our first print after calibrating the 3D printer. We simply sliced the file with the “standard quality” profile, with 200-micron layers and a print speed of 80 mm/s for infill.

We obtained a very good-looking result, with strictly no oozing between the two materials. The separation between the stator and rotor is clean. Even for a PLA print, it was quite impressive.
T-rex skull (200% scale)
This is a very classic print, one of our favorites to test a new 3D printer. We’ve printed this part countless times in the past, in various sizes and resolutions.
We took advantage of the Pro3 Plus’ large build volume to treat ourselves with an XL-sized T-Rex skull. After scaling the upper and bottom jaw to 200%, we printed them one by one in the default “high speed” mode, with 250-micron slices and a print speed of 100 mm/s.
The upper jaw took about 50 hours to 3D print. It was a bit of a leap of faith because, at that point, the only print we’d launched on the machine was the simple keyring. We simply transferred the GCode through RaiseCloud, turned the camera on, and launched the print before going home for the weekend.
When we came back, the part was complete, protected by the default “shell”. It only took us a few seconds to remove the shell and part from the build plate to discover the 450-gram PLA skull in all its glory. The teeth are very impressive; they came out flawless despite the big overhangs.
-
Top half of the T-rex skull with its shell. Source: Aniwaa -
Top half of the T-rex skull without the shell. Source: Aniwaa

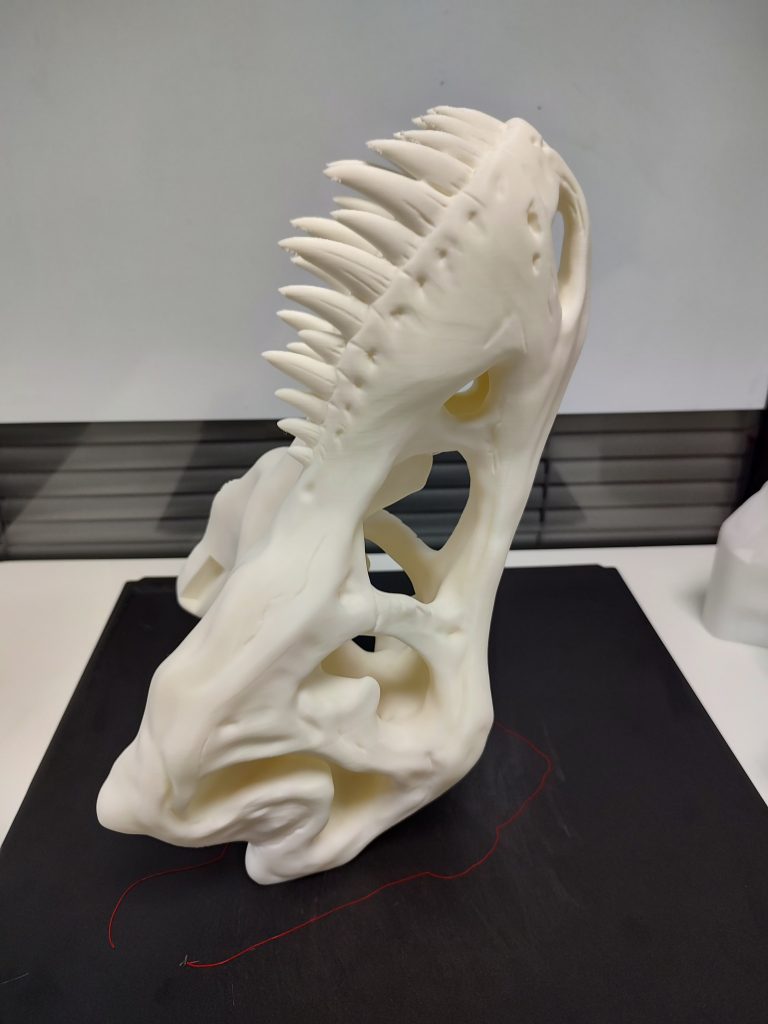
The lower jaw was quicker to print, taking 22 hours, and ate up less than 250g of PLA. Its most challenging feature is its huge overhang, and once again the Raise3D Pro3 Plus gave amazingly good results. Once again, the large overhangs came out almost perfectly.
Here is the finished, assembled result without any post-processing (aside from removing the shell):

The full T-rex skull. Source: Aniwaa -
Closeup of the bottom half of the skull. Source: Aniwaa


Dual-color benchy
The famous Benchy torture test is another classic we wanted to print. After downloading the part directly from Thingiverse, we went for the “standard quality” setting. It took about 2 hours to print.
-
Dual-color Benchy result (1). Source: Aniwaa -
Dual-color Benchy result (2). Source: Aniwaa


Don’t be fooled by the low resolution of the result; with a 250-micron layer thickness, it was something to be expected. Once again, the purging shell did its job perfectly, and there’s almost no oozing between the two colors. The overhangs are also clean and detailed, and for such a complex and small part, it’s a really good result.
Monochrome benchy
To crank up the difficulty, we went for another benchy, but in “high quality” mode and with a single color this time. This mode offers a 100-micron layer thickness and an infill print speed of 60 mm/s.

Single-color Benchy result. Source: Aniwaa -
Perfect first layer. Source: Aniwaa

We got a very good-looking result after only 2 hours of 3D printing. The overhangs are detailed and clean with no oozing and the helm is perfectly rendered.
Dual-color Tintin rocket (50% scale)
This is an interesting 3D print that also leverages the dual-color 3D printing capabilities of the Pro3 Plus. We went for the “high speed” mode again. The purging shells did their job and the different parts came out perfectly.
We did notice a few imperfections, namely on the fins which came out a bit damaged. This is linked to a mix of factors: fast print speed, heavy overhangs, and thin walls.
After a bit of hot-gluing, the rocket looked beautiful in the original red and white Raise3D PLA material!

Raise3D rocket
This test file is perfect to see how the 3D printer does with small and delicate objects. We used the “standard quality” for the pedestal/cloud and the “high-speed quality” mode for the rocket. The flames were printed separately in blue ABS and all three parts were then assembled together. They fit and stay perfectly in place without any glue.
-
The smoke/vapor cloud pedestal. Source: Aniwaa -
The assembled Raise3D rocket. Source: Aniwaa


Small gear
We used this part to assess the printer’s capacity to produce small parts of high quality. We were not disappointed. After less than 1 hour of ABS 3D printing, the part was completed in “high-speed quality” mode. The helicoidal gear teeth are strong and detailed.

Manifold
This gorgeous demo manifold was sent to us by the Raise3D team. They gave us some advice to ensure a good result at 100% size. Eager to put the Pro3 Plus to the test, we ended up scaling it all the way up to 400%, and ideaMaker gave us a 60-hour total print time. We sliced the file in “standard quality” mode.
We did not use any support or adhesion features (e.g., brim, skirt, raft, …). As soon as we were sure the first layer was going on properly, we left for the weekend.
What we didn’t notice until later was that the underside of the manifold’s top, conical area was literally hanging out in mid-air! We quickly determined via ideaMaker that the printing of this very risky layer was bound to happen sometime during that Saturday night.

We checked the video feed every 20 minutes on our smartphones thanks to the RaiseCloud app, and were only relieved once we saw the layer and those immediately above came out OK. To be honest, we don’t know how the Pro3 Plus managed to get the print right in this area. When the manifold was finally finished, it was the first thing we checked. Of course, some areas in the layers were not properly fused together, but the result is impressive nonetheless.
The final result is a gorgeous 3D part, robust and well-finished. There is strictly no warping (usually a challenge when 3D printing large ABS parts) and the 200-micron layers are barely visible. The magnetic, flexible bed made it very easy to remove the print from the print chamber and then from the print bed itself.


Conclusion: Our verdict
The Pro3 Plus offers an excellent, intuitive workflow and consistent print quality. In over 180 hours of printing, we didn’t encounter a single failed print, even on particularly complex models like the manifold and its extreme overhangs. Large, small, dual-color, lengthy, the Pro3 Plus is a workhorse and prints it all.
Raise3D’s EVE smart assistant is helpful with step-by-step instructions for each process (from unboxing to calibration and error detection). Aside from the filament detection issue, which allowed us to try Raise3D’s reactive and friendly customer service, everything went very smoothly. The magnetic and flexible bed, automatic calibration, and safety features are also all most welcome and well-thought.
Software-wise, ideaMaker has nothing to be shy of compared to classics like Cura, and is among the best free slicers we’ve tried. It’s efficient and intuitive, and it’s nice to have boolean features directly on hand.
All in all, the Raise3D Pro3 series is a reliable choice for professionals requiring FFF technology for rapid prototyping or end-use parts at a very interesting price tag.
Gallery
Here are a few additional photos from our testing sessions.